Best Homemade Sourdough Bread Recipe
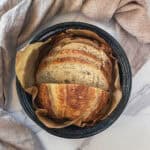
Discover the best homemade sourdough bread recipe with easy, step-by-step instructions and photos. Learn how to bake your perfect loaf of sourdough bread with helpful tips and tricks.
- Prep Time: 20 hours, 40 minutes
- Cook Time: 40 minutes
- Total Time: 21 hours, 20 minutes
- Yield: 10 slices 1x
- Method: Baking
- Cuisine: American
Ingredients
Scale
For the levain (an active starter):
- 30 g sourdough starter
- 30 g bread flour
- 30 g water
For the bread dough:
- 400 g bread flour (I use King Arthur organic bread flour)
- 300 g water (75% hydration)
- 80 g levain (active starter at peak)
- 8 g fine sea salt (I use Redmond ancient fine sea salt)
10 g white rice flour (for dusting)
Instructions
- Make a levain (an active starter): Feed the "mother" starter in the morning at a 1:1:1 ratio (30g starter, 30g flour, and 30g water), and wait 4-6 hours for it to peak.
- Fermentolyse: In a mixing bowl, combine 285g of water (the remaining 15g is set for the next step) and 80g of levain (active starter) and mix with a Danish dough whisk. Add 400g of bread flour by hand and mix for 2-3 minutes until it forms a shaggy mass and no dry flour remains. Cover the bowl with a clean tea towel or a plastic cap and let it rest at room temperature for 30 minutes. Bulk fermentation begins once the starter is added.
- Add salt: Sprinkle the salt over the dough, then pour in 15g of water (this is the water you saved from the fermentolyse step). Use the pinch and fold mixing technique to mix the dough. It takes 3-4 minutes.
- Next, mix the dough using the Rubaud method to strengthen the dough and develop the gluten. Mix the dough using this technique for 2-3 minutes, then let it rest for another 2-3 minutes. Repeat this process a couple of times more.
- Set up the aliquot jar: Place it on the scale and tare it to zero. Take a piece of dough, place it in the container, and weigh 36 g (in my case, your amount may vary). Close the jar and set it next to the main dough. Shape the dough into a ball with your hand, cover the bowl, and let it rest at room temperature for 30 minutes.
- Stretch and fold sourdough: With wet hands, reach underneath the dough and pull it upwards, then fold it on top. Turn the bowl 90 degrees and repeat the process. Do this in all four directions (like a compass or a clock) for a total of four folds. Check the dough temperature with a probe thermometer, and record it. Cover the bowl and rest for 30 minutes. Then, wet your hand again, and repeat the stretch and fold in all four directions. After that, check the dough temperature, cover the bowl, and let it rest for an additional 30 minutes.
- Coil fold sourdough: Wet your hands and lift the dough from the middle, letting the ends fold under. Turn the bowl 180 degrees and repeat the same fold. Then, turn the bowl 90 degrees and repeat the fold. Finally, turn it another 180 degrees and fold again. You will do four folds in total. Check the dough temperature, cover the bowl, and let it rest for 30 minutes. Repeat the set of coil folds one more time, then gently transfer the dough to a large measuring cup or a straight-sided container. Check the dough temperature, cover it, and let it rest at room temperature.
- Continue bulk fermentation: Keep measuring dough temperature every 30-40 minutes. Determine the target dough percentage rise. The percentage rise depends on dough temperature. Refer to Tom Cucuzza's bulk fermentation chart for guidance.
- Finish bulk fermentation: Look for a slightly domed top, large bubbles on the surface, smaller bubbles on the sides of the container, dough that easily pulls away from the sides, and jiggles when shaken. When the dough reaches the target rise in the aliquot jar, it is time for preshaping.
- Preshape the dough into a round. Lightly flour your work surface with white rice flour. Fold the dough in half, then use both hands to gently pull it away from you, creating tension on the surface. Rotate the dough a quarter turn and gently push it back toward you, tucking the edges underneath. Cover the dough with a clean tea towel or leave it uncovered for 15 minutes.
- Shape the dough: Lightly flour your work surface with rice flour. Turn the dough out onto the table and shape it into a batard. Prepare a lined 10-inch (25cm) banneton. Generously dust it with rice flour. Place the shaped dough into the prepared banneton, seam side up.
- Proof the dough: Cover it with a towel or plastic bag and refrigerate at 39°F (4°C) overnight, or for at least 8-10 hours. The longer the cold proof, the more pronounced the sourdough flavor will be.
- Score the dough: Remove the dough from the fridge. Flip it out of the banneton onto a piece of parchment paper. Use a pastry brush to remove any excess flour. Using a sharp bread lame, make a single slash.
- Bake the bread: Place your Dutch oven into the oven and preheat to 500°F (260°C) for 30 minutes. With the oven mitts on, transfer the dough to the Dutch oven, cover with the lid, and place it on the middle rack of the oven. Lower the temperature to 450°F (232°C) and bake for 20 minutes. After 20 minutes, use the oven mitts to remove the lid and continue baking for an additional 17-20 minutes, or until the crust reaches your desired color. Check the bread's internal temperature: it should be at least 207°F (97°C).
- Cool the bread: Let the bread cool on a wire rack for at least 2 hours before slicing it.
Notes
- Decide on folding: If you mixed well with the Rubaud method, go for 2–3 coil folds. If not, start with 2 stretch and folds, then finish with 2 coil folds.
- Safety tip: Always use oven mitts or silicone gloves to handle hot pans.
- Check for doneness: Your bread is fully baked when the internal temperature reaches 205–210°F (96–99°C). I usually aim for 207°F (97°C) or higher. Use a digital probe thermometer to check.
- Storage and freezing: Store sourdough bread at room temperature for 3-5 days. Freeze for up to 3 months. Thaw at room temperature. Freeze individual slices for up to 1-2 weeks, a whole loaf for 1-2 months.
- Want to create a custom formula for your loaf? Try my sourdough calculator.
- Need help getting started? Check out my beginner's sourdough bread guide to learn sourdough basics first.
- Note: Nutritional information does not include the white rice flour used for dusting.
Nutrition
- Serving Size: 1 slice
- Calories: 160.2
- Sugar: 0.1g
- Sodium: 312mg
- Fat: 0.42g
- Saturated Fat: 0.1g
- Carbohydrates: 33.6g
- Fiber: 1.2g
- Protein: 0.4g
- Cholesterol: 0mg
Find it online: https://sourdoughtalk.com/master-sourdough-bread-recipe/