
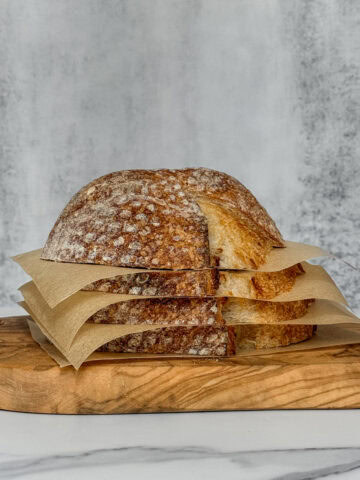
If you have ever baked sourdough bread, you know that cleaning sourdough mess is part of the experience.
I completely understand the frustration of dealing with sourdough starter or sticky dough. It clings to jars, bowls, spatulas, and even your hands. Once it dries, it becomes much harder to remove.
Over my sourdough journey, I have discovered tips and tricks that make cleaning quicker and easier, and I want to share them with you.
Here is a complete guide with 35 tips to help you keep your kitchen tidy while enjoying sourdough baking.
1. Minimise mess from the start
The best way to handle sourdough cleanup is to prevent the mess in the first place. Avoid touching jar rims when feeding your starter, as dried starter can be difficult to clean. This small habit saves time later.
2. Use a silicone jar spatula
Use a flexible silicone jar spatula to scrape the sides of the jar, keeping them clean so you can watch your starter rise. It is much easier than using your fingers.
3. Choose easy-to-clean bowls
Plastic mixing bowls are often easier to clean than glass ones, especially when dealing with sticky dough. Consider using food-grade, BPA-free plastic bowls for your starter and dough.
4. Work in a single bowl
Mix, ferment, and handle your dough in the same bowl whenever possible. Fewer bowls mean fewer surfaces to clean and less flour and dough flying everywhere.
5. Wet your hands before handling dough
Wet your hands before touching sourdough. This prevents dough from sticking and reduces the amount of dough left on your hands and work surfaces.
6. Use a dough scraper
Use a dough scraper to remove dough from bowls, counters, and other surfaces, preventing buildup and speeding up final cleanup.
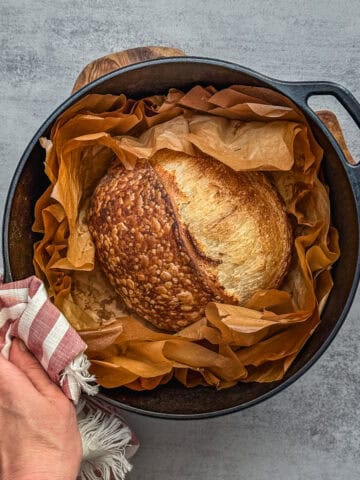
7. Line bakeware with parchment paper
Using parchment paper in Dutch ovens, roasting pans, or loaf pans simplifies cleanup. You can lift out the bread without scrubbing stuck-on dough.
8. Clean immediately after use
Don't let the starter or dough sit too long. Wash jars, bowls, spatulas, dough whisks, and scale surfaces immediately after use to prevent residue from drying.
9. Scrape off excess dough
Before washing, scrape off as much dough or starter as possible from bowls and jars. This reduces the amount of residue you need to scrub later.
10. Air dry before final scraping
For plastic bowls or Cambro containers, let them air-dry slightly before scraping, which can make stubborn dough easier to remove.
11. Quick cold rinse
A quick rinse with cold water removes most sticky dough before washing. Cold water helps dissolve flour without strengthening gluten, which would make it stickier.
12. Soak in cold water first
Soak jars, spatulas, and whisks in cold water to loosen dough before washing. Cold water prevents the gluten from forming sticky clumps.
13. Avoid warm water initially
Warm or hot water strengthens gluten, which makes dough stickier. Always start with cold water to dissolve flour residue effectively.
14. Soak large bowls for 20 minutes
Fill your mixing or stand mixer bowls with cold water for about 20 minutes before washing. This helps loosen any stuck-on dough for easier cleaning.
15. Wash and rinse thoroughly
After soaking, wash utensils in warm, soapy water and rinse with hot water. Proper rinsing guarantees no dough or soap residue remains.
16. Use a dishwasher only for safe items
Only put dishwasher-safe utensils in the dishwasher. There is no need to sterilize your starter jars.
17. Rinse glassware with baking soda
Rinse glass jars or bowls with a baking-soda solution to remove soap residue that might affect your starter's cultures, as recommended in Bread Science by Emily Buehler.
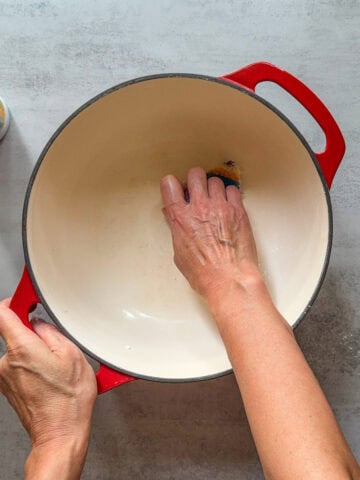
18. Protect your sink
Use a fine-mesh strainer and a sink strainer mesh bag to catch dough and starter bits. This prevents clogs and keeps your sink hygienic.
19. Use an over-the-sink colander
Line an over-the-sink colander with paper towels to trap dough residue. After cleaning, dispose of the paper towels. This is especially useful when washing multiple utensils.
20. Use an alternative washing basin
For larger batches or sticky hands, use a Rubbermaid tub or foldable washing basin to wash utensils and hands. Dispose of the water outside to prevent dough bits from going down the drain.
21. Clean commercial mixers quickly
With large commercial mixers, scrape the dough from the bowl as quickly as possible, especially if the bowl isn't removable. Then, use a plastic scraper to remove any remaining dough.
22. Wipe before soaking
After scraping, wipe tools with a paper towel before soaking. This removes surface residue and reduces the soaking time.
23. Use a vinegar solution for commercial mixers
For stubborn dough in commercial spiral mixers, use a vinegar solution (1 part Harris 30% vinegar to 60 parts water) while wearing long cleaning gloves and safety glasses. This helps dissolve tough dough without harsh scrubbing.
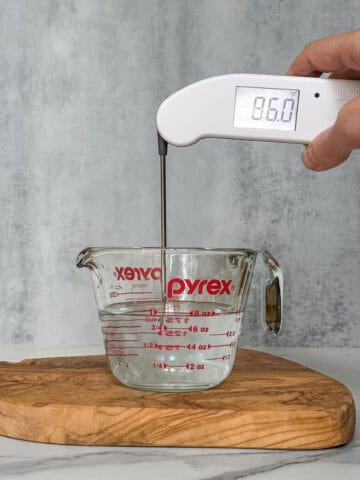
24. Wipe thermometers immediately
After measuring the dough temperature, wipe the probe with a damp paper towel. Sticky dough hardens quickly, which makes it harder to clean later.
25. Don't pour starter down the drain
Avoid dumping leftover starter or soaking water down the drain to prevent clogs in the pipes over time. Compost or trash it instead.
26. Keep your hands clean while mixing
Wet one hand to help clean the other, or use a silicone scrubber, like DOAP™, to scrub off sticky dough.
27. Give your hands a "flour bath"
Rub your hands with flour over a trash can to remove leftover dough. This prevents flour and dough from clogging your sink.
28 Wear disposable gloves
If you want to avoid the mess altogether, wear disposable food-safe gloves while mixing and shaping. Washing gloved hands in cold water makes cleanup much easier.
29 Use a bench scraper for surfaces
Use a bench scraper to remove most flour and dough from your work surface. This prevents a sticky mess from spreading around your kitchen.
30. Clean surfaces with a dish scrubber and Swedish cloth
After scraping, use a dish scrubber (the RSVP International ECO-3 Cleaning Cloth is my favorite if you can find it) and finish with a Swedish dishcloth and Seventh Generation All Purpose Cleaner for thorough cleaning.
Avoid regular kitchen sponges or dishcloths to wipe up dough or sourdough starter until you have scraped off the mess first.
31. Use a silicone mat
Cover your work area with a silicone baking mat to catch stray dough and flour, and make cleanup quicker and easier.
32. Protect your kitchen scale
Keep the scale clean by wiping it regularly. You can also cover it with plastic wrap to prevent the dough and flour from sticking.
33. Rinse the sink immediately after spills
Rinse your sink with cold water right after any spills. Use a paper towel to remove large clumps of dough before rinsing.
34. Wash towels separately
Soak tea towels, banneton liners, or other cloths in cold water, remove large clumps of dough, and wash separately from other laundry in a portable washing machine to prevent cross-contamination. If no dough is stuck, rinse and hang to dry.
Wash regular towels separately from other laundry in hot water (140-194°F or 60-90°C) every 3 to 7 days, and air-dry or use a low-heat dryer.
35. Take care of bannetons
Remove excess flour or dough by tapping the banneton over a trash can. For stubborn residue, let it dry, then brush gently with a stiff-bristle brush. Air dry completely before storing to prevent mold or mildew.
Let's talk sourdough
Do you have any cleaning tips or tricks? Share your experience in the comments below.
Ready to keep learning?
Now that your kitchen is spotless, it is time to dive into sourdough hydration. Learn the basics and see how water affects your dough.
Comments
No Comments