
If you have been scrolling through sourdough forums or chatting with other bakers, you may have come across something called cold bake sourdough. The idea sounds simple and appealing: skip preheating your oven, save energy, and still bake delicious bread.
I first discovered cold oven baking through Elaine Boddy, author of The Sourdough Whisperer. According to Elaine, this saves energy and "gets maximum oven spring."
But is it really worth it? Let's discover how the "cold oven start" method works and see what actually happens when you start your bake in a cold oven.
And if you decide to give it a try, make sure to print my sourdough baking log template to track each bake and compare your results.
What is cold bake sourdough?
Cold bake sourdough means you bake it in an oven that has started cold. You place your dough into a cold oven (no preheating), set it to the target baking temperature (typically 450°F / 230°C), start the timer, and let the oven heat up with the bread inside.
So, instead of your bread going into a very hot 500°F (260°C) oven and baking at 450°F (230°C) for about 40 minutes, you start from cold and bake at 450°F (230°C) for 50 to 60 minutes. That is it: no preheating, no waiting, no fuss. If you prefer a darker crust, you can extend the baking time by 10 minutes.
The promise: Energy savings and oven spring
The main selling point of cold bake sourdough is energy efficiency and the hope of a great oven spring.
The logic goes like this: preheating your oven to 500°F (260°C) takes extra time and electricity (or gas). By skipping that step, you save energy and reduce your carbon footprint.
It sounds great, but let's see what really happens when you bake sourdough in a cold oven.
Regular bake vs. cold bake: What's the difference?
In a regular sourdough bake, you preheat your oven to 500°F (260°C) for 30 minutes, then bake the bread at 450°F (230°C) for about 40 minutes. With preheating time included, your oven is running for roughly 70 minutes in total.
This method gives your loaf a beautiful golden crust and strong oven spring (the kind that makes your bread rise tall and proud!).
Cold baking works differently. Instead of preheating, you place your dough in a cold oven, set it to 450°F (230°C), and let the oven heat up while the bread bakes.
Because the oven warms gradually, the loaf bakes more slowly, usually taking about 50 to 60 minutes. If you want a darker crust, you might need to add another 10 minutes of baking time.
What's the result? The loaf might turn out a bit paler (but you can always bake it a few extra minutes) and may have slightly less oven spring, and that is completely normal.
Still, for some bakers, the trade-off is worth it. There is no preheat wait, less fuss, and potentially a small energy savings. But as you will see, the time and energy differences aren't as big as they first appear.
The pros of cold oven baking
- No waiting for preheat: You save time and simplify your baking routine. Just pop your dough in, turn on the oven, and go do your laundry or other chores.
- Less energy used up front: By skipping the preheat stage, you save a little electricity or gas.
- Great for small ovens: If your oven heats up quickly, cold baking is surprisingly efficient.
- Gentler on your bakeware: Cold starts help extend the life of enamel-coated pans that aren't meant to be preheated empty.
- Hands-off simplicity: You don't need to lower your dough into a hot Dutch oven, keep an eye on the timer to adjust the temperature, or remove the lid halfway through baking. Just set it, walk away, and come back to a perfectly baked loaf.
The cons of cold bake sourdough
- Less oven spring: Without that initial blast of heat, the dough doesn't expand as quickly, resulting in a less oven spring.
- Paler crust: The bread may not brown as deeply unless you extend the bake time with the lid off.
- Longer baking time: You may end up baking for 10 minutes more, offsetting any energy saved.
- Inconsistent results: Depending on your oven type, heat-up speed, and pan material, results vary widely.
Does it actually save energy?
A regular bake takes 30 minutes of preheating at 500°F (260°C) and 40 minutes of baking at 450°F (230°C), for a total of 70 minutes in the oven.
Cold-bake takes 50-60 minutes without preheating, so it is about the same total time.
So, while you skip the preheating step, the oven stays on for nearly as long, but in a different way. The energy savings are minimal, maybe about 10 minutes.
If we put that into dollars, a typical electric oven uses around 2 kW. Saving 10 minutes of oven time equals roughly 0.33 kWh, which at an average U.S. electricity rate of $0.15/kWh comes out to about 5 cents per bake.
My takeaway
Cold bake sourdough is a smart idea, and yes, it works. But in most home kitchens, the energy savings are minimal, and the bread quality varies.
If you bake often and already know your oven well, try a side-by-side test: bake one loaf from a cold oven and one from a preheated oven. The results will tell you more than any chart can.
Elaine Boddy, the author of Cold Oven Baking, states that this method works well with various bakeware, including clay pots, graniteware roasters, and even Dutch ovens.
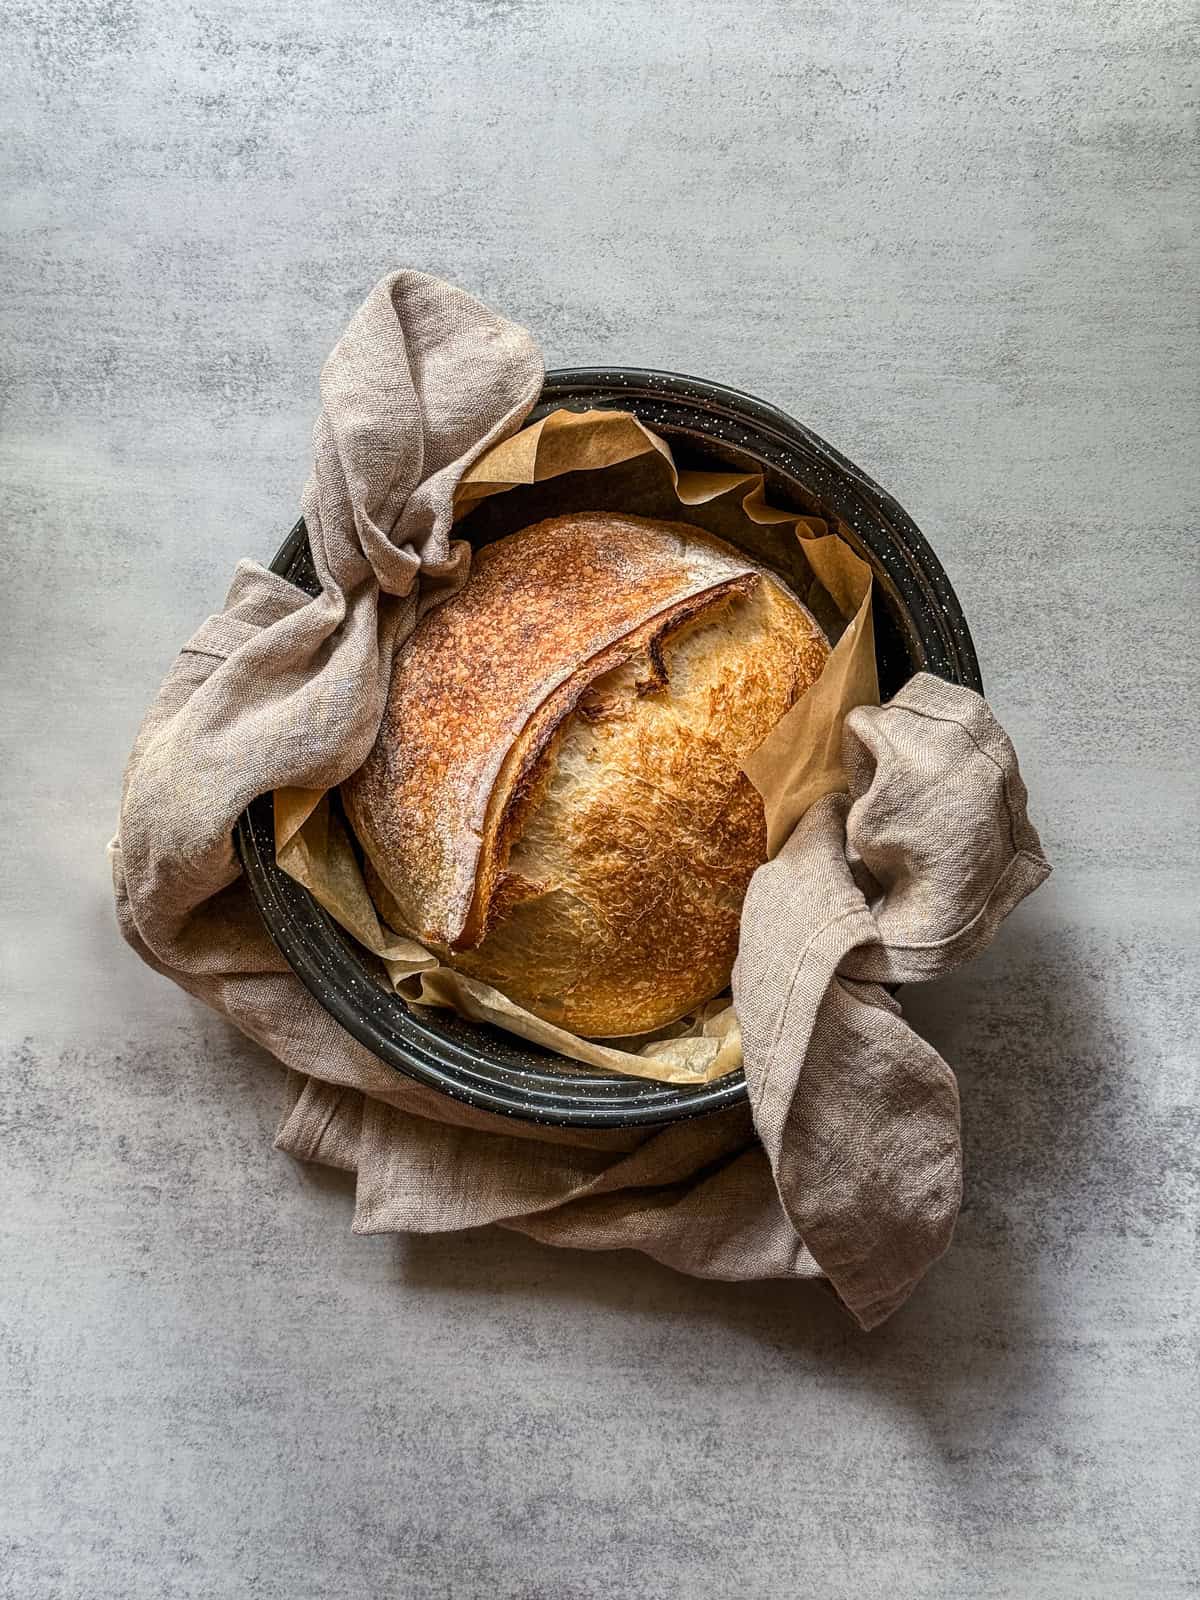
So, with a graniteware roaster and a Dutch oven on hand, I decided to try this technique. I used my foolproof Master Sourdough Bread recipe, changing only the baking method.
My results:
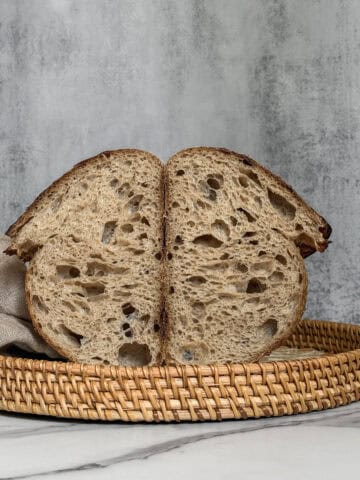
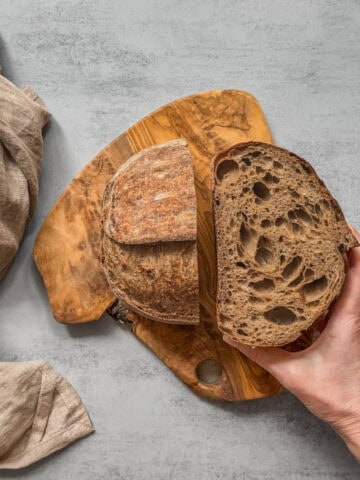
- Sourdough baked in a graniteware roaster showed excellent oven spring, similar to baking in a Dutch oven or roasting pan in a preheated oven.
- Baking in a Dutch oven from cold, however, reduced the oven spring. This happens because the thick walls of a Dutch oven absorb heat slowly, so when it starts cold, the dough doesn't experience the same rapid initial burst of heat that helps trap gases and produce oven spring.
In short, the bakeware material and heat conductivity make a big difference in cold-bake results.
So, if you are only using a graniteware roaster, there is really no need to preheat the oven. Just go for it!
Is cold-oven bread-baking still worth trying?
If you are curious and love experimenting, I would say absolutely!
Cold bake sourdough is a fun test, especially if you want to simplify your process or see how your oven behaves. You may even prefer the slightly gentler rise and softer crust, which makes your baking experience more forgiving and relaxed.
Overall, the cold-bake method is more about convenience and workflow than major energy savings, though every little bit helps.
It is a perfect option for stay-at-home moms. I can't imagine managing small children while handling a very hot Dutch oven, which can be challenging and potentially unsafe.
But if your goal is open crumb and strong oven spring, traditional preheating still wins.
How to bake sourdough in a cold oven
- Take your proofed, chilled dough from the fridge, place it on a piece of parchment paper, and score it.
- Place the dough into a baking vessel of your choice.
- Cover the pot and place it in the cold oven.
- Set the oven to 450°F (230°C) and bake for about 45-50 minutes with the lid on.
- Remove the lid and bake for an additional 5-10 minutes for a deeper crust color (optional).
Recipe
Cold Bake Sourdough Bread

Cold bake sourdough bread is baked in a cold oven for a thicker crust, beautiful oven spring, and a more relaxed baking routine. Perfect for home bakers who want to bake artisan bread with less stress and more flexibility.
- Prep Time: 20 hours, 40 minutes
- Cook Time: 50 minutes
- Total Time: 21 hours, 20 minutes
- Yield: 1 loaf 1x
- Method: Baking
- Cuisine: American
Ingredients
For the levain (an active starter):
- 35 g sourdough starter
- 35 g bread flour
- 35 g water
For the bread dough:
- 500 g bread flour (I use King Arthur organic bread flour)
- 375 g water (75% hydration)
- 100 g levain (active starter at peak)
- 10 g fine sea salt (I use Redmond ancient fine sea salt)
10 g white rice flour (for dusting)
Instructions
- Make a levain (an active starter): Feed your starter in the morning at a 1:1:1 ratio (35 g starter, 35 g flour, and 35 g water), and wait 4-6 hours for it to peak.
- Fermentolyse: In a mixing bowl, combine 355 g of water (set the remaining 20 g aside for the next step) with 100 g of levain (active starter), and mix. Add 500 g of bread flour by hand and mix for 2-3 minutes until a shaggy mass forms. Cover the bowl with a clean kitchen towel and let it rest at room temperature for 30 minutes. Bulk fermentation starts when the starter is added.
- Add salt: Sprinkle salt over the dough, then pour in 20 g of water (this water you saved from the fermentolyse step). Mix the dough for 5-10 minutes.
- Bulk fermentation: Perform two sets of stretch and folds and two sets of coil folds with 30-minute intervals. Cover the dough during these resting periods. Continue bulk fermentation until the dough reaches a slightly domed top, has large bubbles on the surface and smaller bubbles on the sides of the container, pulls easily from the sides, and jiggles when shaken.
- Preshape and shape: Preshape the dough into a round. Cover it with a clean tea towel or leave it uncovered for 15 minutes. Shape the dough as a boule or batard. Place the shaped dough into the prepared banneton, seam side up.
- Proof: Cover the dough with a towel or plastic bag and refrigerate at 39°F (4°C) overnight, or for at least 8-10 hours.
- Score: Remove the dough from the fridge. Flip it out of the banneton onto a piece of parchment paper. Using a sharp bread lame, score the dough.
- Bake the bread: Transfer the dough to a baking vessel (Granite Ware roaster or a Dutch oven), cover with the lid, and place it on the middle rack of a cold oven. Set the oven to 450°F (230°C) and bake for about 45-50 minutes with the lid on. Remove the lid and bake for an additional 5-10 minutes for a deeper crust color (optional). Using the oven mitts, remove the baking vessel from the oven. Carefully remove the bread and let it cool on a wire rack for at least 2 hours before slicing.
Notes
- Refer to my Beginner's Sourdough Bread recipe for step-by-step instructions and photos.
- Safety tip: Always use oven mitts or silicone gloves when handling a hot pan.
- Check for doneness: Use a digital probe thermometer to check the internal temperature of bread. It should reach 205-210°F (96-99°C). I usually aim for 207°F (97°C) or higher.
- Storage and freezing: Store sourdough bread at room temperature for 3-5 days. Freeze for up to 3 months. Thaw at room temperature. Freeze individual slices for up to 1-2 weeks, a whole loaf for 1-2 months.
- Want to create a custom formula for your loaf? Try my sourdough calculator.
- Need help getting started? Check out my beginner's sourdough bread guide to learn sourdough basics first.
- Note: Nutritional information doesn't include the white rice flour used for dusting.
Nutrition
- Calories: 2002
- Sugar: 1.5g
- Sodium: 3900mg
- Fat: 5.4g
- Saturated Fat: 0.9g
- Carbohydrates: 419.7g
- Fiber: 14.9g
- Protein: 56.8g
- Cholesterol: 0mg


Comments
No Comments