
Want to learn how to sell sourdough bread from home? It is a rewarding way to turn your baking passion into a small business. With good planning and a few right steps, you can start your own micro bakery.
You might want to do this to earn a little extra income, save for your college, chase a baking dream, or simply share your loaves with people in your community.
But how do you go from baking a couple of loaves for your family to taking orders for dozens of customers?
This guide walks you through starting a micro bakery, from setting things up and managing time to scaling production and baking in bulk.
Cottage food laws and local regulations
One of the most important steps is making sure you operate legally under your state government's Cottage Food laws. These regulations vary widely by region, so take time to research your local rules.
Cottage Food laws often cover:
- What types of baked goods can you sell (e.g., breads, cookies, jams)
- Where you are allowed to bake
- Whether your kitchen must pass inspection, either in person or virtually
- Where you can sell (e.g., bread stand, home pickup, farmers markets, online)
- Required licenses or permits (e.g., food handler's certification, Cottage Food permit, Business Occupation permit, etc.)
- Labeling and packaging requirements
Remember, you may not qualify for a Cottage Food permit if you live in a condo or apartment, face restrictions on porch pickups, or need a Business Occupation permit to operate.
Visit your country or state's Department of Agriculture website to learn the rules for your area. Also, check local laws to determine if you require a county or city license.
What you need before selling sourdough bread
Before selling your very first loaf, plan carefully and establish a solid foundation. Start small and consider some steps:
1. Understand your startup costs
Baking bread to sell requires more than flour and water. You will need other ingredients, baking equipment, packaging, permits, and even insurance. Be honest with yourself about what you can afford and set realistic expectations for the costs associated with getting started.
2. Think about your health
Baking is fun, but it is also hard work. Lifting heavy bags of flour, mixing bread dough, and standing for extended periods can be physically demanding. Make sure you are prepared for the physical aspects of baking.
3. Check your kitchen space
Take a good look at your baking setup. Is it clean, organized, and big enough to bake several loaves? If not, you might want to look into renting time in a certified commercial kitchen.
4. Access your baking capacity
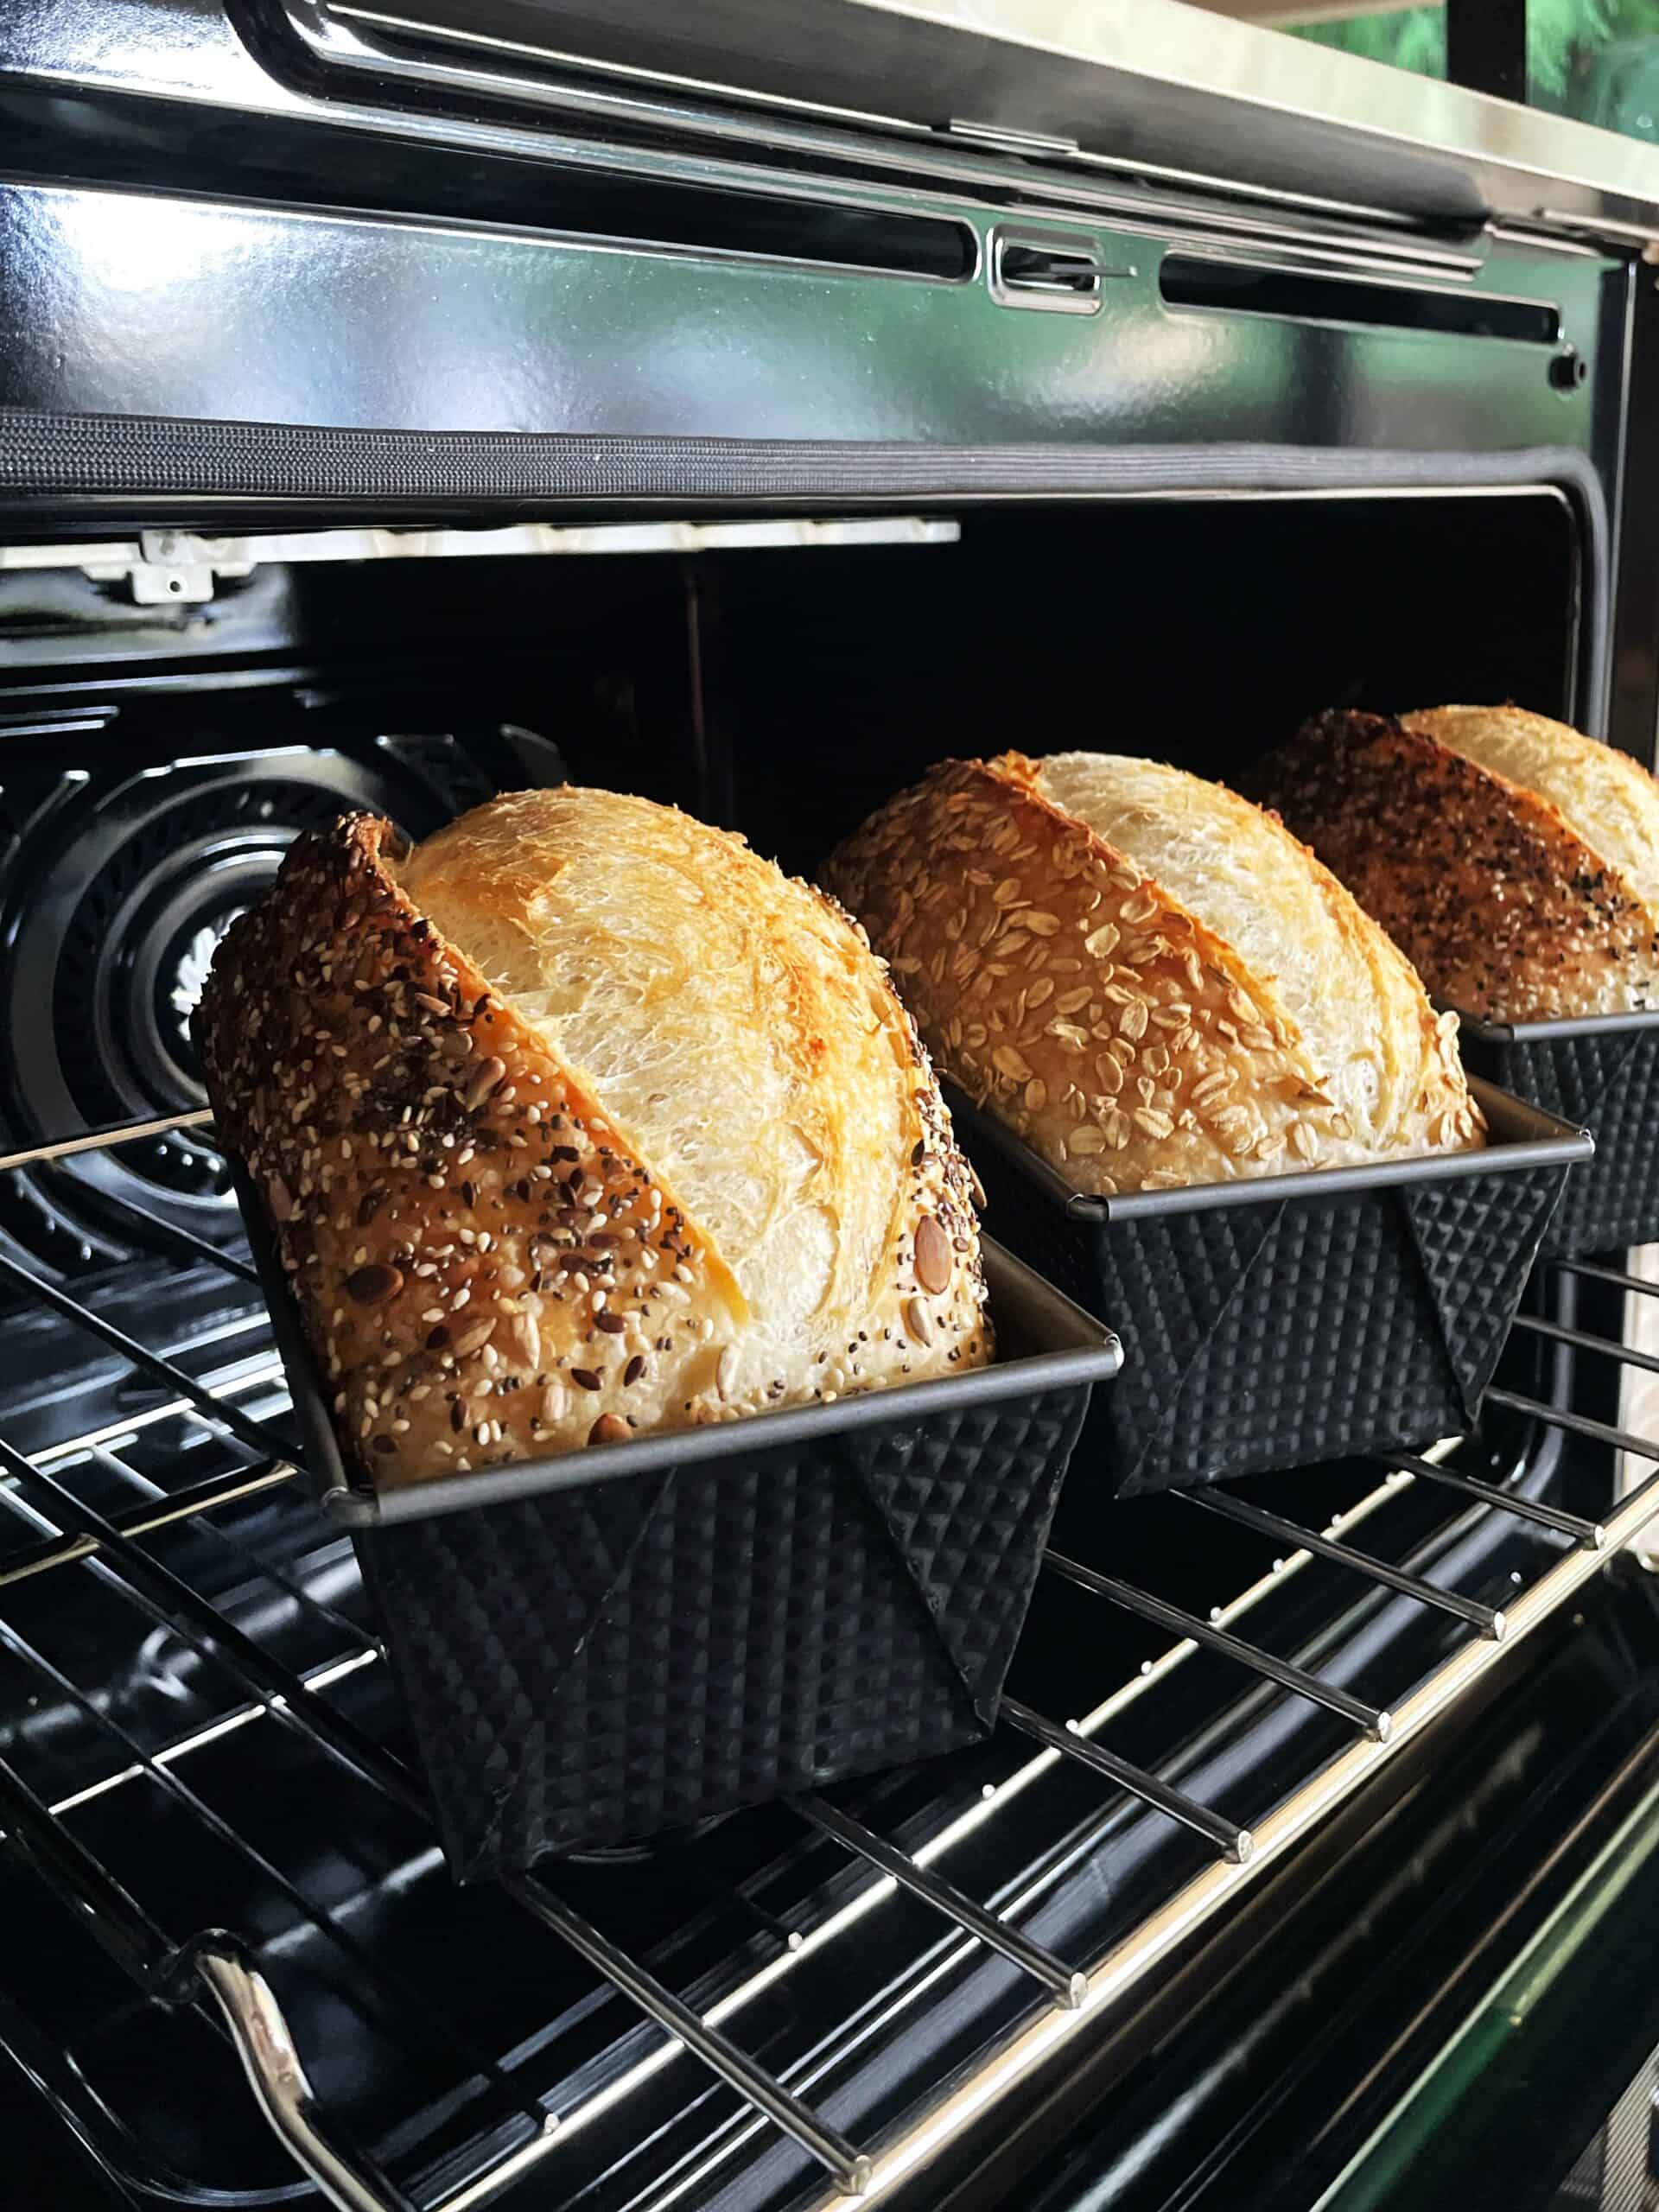
How many loaves can your oven handle at once? If your oven can only fit a few loaves at a time, you will need to plan your batches carefully or consider investing in a double oven or bread oven in the future.
5. Create your menu
Start simple. Select one or two signature loaves that you can consistently replicate. Perhaps it is a classic wheat sourdough or a whole-wheat loaf. Don't jump into creating numerous sourdough variations. Remember that you can earn decent money with just two types of bread.
6. Plan your baking schedule
Think about your life, job, family, and other commitments, and be honest about how much time you can dedicate to baking each week. Your baking schedule can be different from one week to another, too. This will help you plan production without burning out.
7. Learn to bake in bulk
Baking one or two loaves is very different from baking multiple loaves. You will need to learn how to scale up sourdough recipes, mix larger batches of dough, and use your oven more efficiently.
Keep a baking log. Record everything, such as feeding ratios and schedules, ambient temperatures and humidity, hydration percentages, dough temperatures, fermentation times, bread ingredients, and baking times.
The more you understand your dough and its behavior under various conditions, the better you will be at troubleshooting or trying to recreate your best loaves.
Initial investments for your micro bakery
Launching a micro bakery doesn't require a professional kitchen, but you must consider some basic tools and upgrades to make your workflow smoother and more efficient. Here is what's worth investing in early on:
- Extra fridge: This is a must if you are going to cold-proof your dough. A 21 Cu. Ft. convertible freezer like the Insignia™ gives you tons of space and flexibility.
- Digital food scale: Start with the best baker's scale My Weigh KD-8000. It is accurate and reliable. Later, you might want a bigger-capacity one.
- Spiral mixer: You can mix by hand (many bakers, including myself, have done it, even for large batches), but when you're ready, a 10-30 Qt. spiral mixer is a worthwhile investment. I have the Famag IM-10 and love it.
- Mixing bowls or dough tubs: Get large mixing bowls or food-safe containers that can hold 5-10 kg of dough. I find 5 to 6 kg is the sweet spot for my hand folding, but some bakers successfully handle even larger batches. I personally use a Rubbermaid food box (3.5 Gallon). Just keep in mind the box lid is sold separately.
- Proofing containers: Start with cheaper banneton alternatives, such as bowls or lined baskets. Later, upgrade to high-quality rattan or wood pulp bannetons.
- Baking pans: Depending on your baking method, you'll need multiple Dutch ovens, enamel roasting pans, or loaf pans. For "open bake," a baking steel, pizza stone, or sturdy baking sheet is great, but make sure it can withstand the heat (500°F or 260°C). Trust me, this part matters… don't ask me how I know.
- Cooling racks: Choose a collapsible cooling rack to support multiple loaves. This foldable option is great when you are just starting out.
- Worktable or counter space: A spacious kitchen counter is a big plus, but if yours is limited, add a foldable or stationary worktable to make prepping and shaping easier.
- Storage space: Plan adequate storage to keep your tools, ingredients, and baking equipment.
- Packaging supplies: Kraft paper bags, stickers, and simple labels add a professional touch to your product.
- Oven: Start with what you have. A large home oven, or even better, a double oven, is ideal. You can even begin with a compact oven and the double loaf pan method. Later, a bread-specific oven like the Rofco B40, Pico, RackMaster RM2020, My Forno, or Simply Bread Oven, can seriously boost your production.
Where to buy flour in bulk
Buying flour in bulk saves money and provides consistency to your baking. Here are some great sources for high-quality bulk flour.
Online suppliers
- WebstaurantStore - 50 lb King Arthur unbleached bread flour (12.7% protein, Special Patent Flour).
- Bakers Authority - Wide range of all-purpose and bread flours from trusted brands.
- Janie's Mill - Organic high-protein bread flour from stone-milled Hard Red Spring Wheat.
- Hayden Flour Mills - Artisan bread flour with wholesale options and low minimums.
- Central Milling - Organic Type 80 flour, perfect for sourdough and rustic loaves.
- Barton Springs Mill - Bulk heirloom wheat flours like Red Fife and Yecora Rojo.
- Sunrise Flour Mill - Heritage high-protein flours with rich flavor
- Azure Standard - Organic flours under the Azure Market Organics brand, including all-purpose, whole wheat, and ultra-unifine bread flours.
- Sam's Club - Affordable 25 lb bags of bread flour (note: some are bleached/enriched).
Local options
- US Foods CHEF'STORE - In-store bulk flour at competitive prices.
- Costco - Organic all-purpose flour (check your local warehouse).
- Walmart - Select locations offer 25 lb flour bags.
Try a few flours at a smaller scale to see what works best with your sourdough starter before committing to big bags.
Manage your time effectively
Time management becomes important when baking evolves from a hobby to a business. One of the best ways to stay on track is to create a schedule that works for your lifestyle and baking cycle. Here's a simple weekly rhythm you can try:
- Evening before: Feed your starter, weigh ingredients, and prepare your workspace.
- Morning: Mix and begin bulk fermentation.
- Midday to afternoon: Stretch and fold, divide, and shape.
- Evening: Cold-proof in the fridge overnight.
- Next morning: Bake and cool your loaves.
Use everything from timers and reminders to checklists to stay organized. And don't forget to block time for cleanup and pickups.
How to scale from two loaves to dozens
Everything starts with an established healthy sourdough starter, reliable and consistent.
You don't want to deal with a weak, acidic starter that can result in inconsistent loaves. You can't afford surprises when baking for paying customers.
Use a sourdough calculator or spreadsheet to scale a sourdough bread recipe accurately. Make sure your baking equipment can handle it. You need bigger bowls, stronger mixers, and larger oven space.
Use timers and checklists to track fermentation, shaping, proofing, and baking. Prepare everything ahead of time: scale the flour, line the baskets, and clear the fridge before your dough day.
Additionally, be ready for your energy needs to increase. Your oven will be on longer, your hands will be busier, and your fridge may need to work harder.
Master sourdough baking in bulk
Large batches behave differently. Bulk fermentation generates more internal heat than small batches.
Use a probe thermometer to monitor your dough temperature, and be careful not to let it overproof. Additionally, try using a "giant" aliquot jar method to help monitor fermentation in larger quantities.
Use food-safe tubs or large mixing bowls to hold the dough. Plan how you will handle dividing: a bench scraper, a lightly floured surface, and a clear space are important here. Weigh each dough portion for consistency.
Shaping multiple loaves takes practice and rhythm. Try to get into a flow and handle each loaf the same way. Aim for consistency in how your bread looks, bakes, and is experienced by your customers.
What if things go wrong
Even with all your planning, things won't always go perfectly, which is okay. Maybe the dough overproofs, your oven underperforms, or you realize after shaping that you forgot the salt.
Keep a baking journal and track what happened. Did the starter behave differently? Was the kitchen warmer than usual? Did you switch flour brands? Learning from mistakes helps you improve quickly.
Also, adopt the human side of your baking. Share real stories with your customers. They will love your honesty. If a batch overproofed and the loaves are flatter than usual, offer them as discounted "rustic" bread or turn them into croutons or breadcrumbs.
Micro bakery costs and pricing your products
To run a successful micro bakery, you must know your numbers. Begin by tracking every expense:
- License (permit) and insurance costs
- Flour, salt, and other ingredients
- Equipment purchases and maintenance
- Packaging materials
- Utility costs (electricity, water, gas)
- Delivery costs (if applicable)
- Time (yes, your labor has value!)
Use tools like CakeCost to calculate the cost per loaf. Then decide on a price that covers your expenses and leaves room for profit. Many cottage bakers aim to price their loaves at three to four times the cost of the ingredients.
Also, consider what your market can support. Artisanal sourdough bread is a premium product, especially when made with high-quality, organic ingredients. Don't undervalue your work, but stay competitive and honest with your pricing.
How to package sourdough bread
When selling sourdough bread, the first thing your customers see and touch is the packaging. And it should reflect the quality of what's inside.
Choose Kraft paper bread bags for boules or battards. For sandwich loaves, go with food-safe plastic bread bags.
Keep things functional, too. If you are selling at a market or offering porch pickup, bags should be easy to carry and seal. Use paper bags with handles, twine, stickers, or bakery tape to secure bags, but avoid office staples. They can cause injury (trust me).
Labeling requirements
Proper labeling is required by law. Even as a home baker, you may be expected to label your products with the following:
- Product name (e.g., "Whole Wheat Sourdough")
- Ingredients listed by weight in descending order
- Allergen warnings (e.g., contains wheat)
- Your name and home address, or business name and address (not everywhere)
- A disclaimer such as: "Made in a home kitchen that has not been subject to standard inspection criteria" (check with your state's Cottage Food law)
Start simple with Avery labels or a thermal printer. As your business grows, invest in custom-printed packaging. Also, don't forget the power of custom stamps and baking stickers, like "Homemade with Love."
Where to sell your sourdough
There are more ways to sell sourdough today than ever before. Start small and local:
- Offer loaves to friends, family, and coworkers
- Speak to your favorite barista, hairdresser, nail tech, etc.
- Organize home or parking lot pickups (if allowed under your Cottage Food law)
- Share your baking journey on Instagram or Facebook
- List weekly bake days on social media or email
- Join neighborhood groups or apps like Nextdoor
- Design and hang simple door-handle flyers
- Sell at farmers markets (if allowed under your Cottage Food law)
- Partner with local cafés, grocers, or co-ops
Start with home pickups or porch drops. Once demand grows, consider adding a simple website or online order form.
Baked goods ordering platforms
First and foremost, start with pre-orders. You only bake what's already been paid for, which means no wasted ingredients, no guessing, and way less stress.
Pre-orders give you a steady rhythm. They lower your risk, bring in predictable income, and make the whole process easier for your customers.
To manage pre-orders, use an online platform that works for you. Hotplate, Bakesy, Symply Bread, Castiron, Cococart, and UpMenu are all great options built for home bakers. They let customers browse, order, and pay without the need for a physical storefront.
Pick the one that fits your needs and budget. You can also explore Shopify or Square if you want more customization. And if you love a good project, go ahead and build your own simple baking website.
Protect your micro bakery with insurance
Although baking bread at home may seem safe, it is a good idea to obtain business insurance to protect yourself as your bakery grows.
Some states don't require insurance under Cottage Food laws, but some farmers' markets or events require it. I always recommend having it when you sell baked goods to other people.
Start with general liability coverage. It protects you if someone steps off the stairs while porch picking or something gets damaged. This includes opening a cookie box or bread bag.
Product liability insurance adds another layer in case a customer complains about your bread, reacts badly to an ingredient, or says your bread caused a problem.
Check providers like FLIP, Erie, Allstate, Hartford, State Farm, and Thimble. Most plans are affordable (around $25-30/month) and are a smart investment in your business.
Your micro bakery path
Starting a micro bakery is more than just bread. It's about discovering what you love, connecting with people, and building something real.
Start with a basic country loaf, then add one or two rotating flavors each week. Listen to your customers, and let your menu grow with you. You will gradually expand it with sourdough focaccia, cookies, or other creative baked goods.
Some bakers feel great baking 20 loaves a week, while others make 100+ and need days to recover. Do what feels right for you. Only you and your rhythm matter.
Build up your capacity over time. Be gentle. Your customer base will grow, and so will your business.
Good luck!


Comments
No Comments