
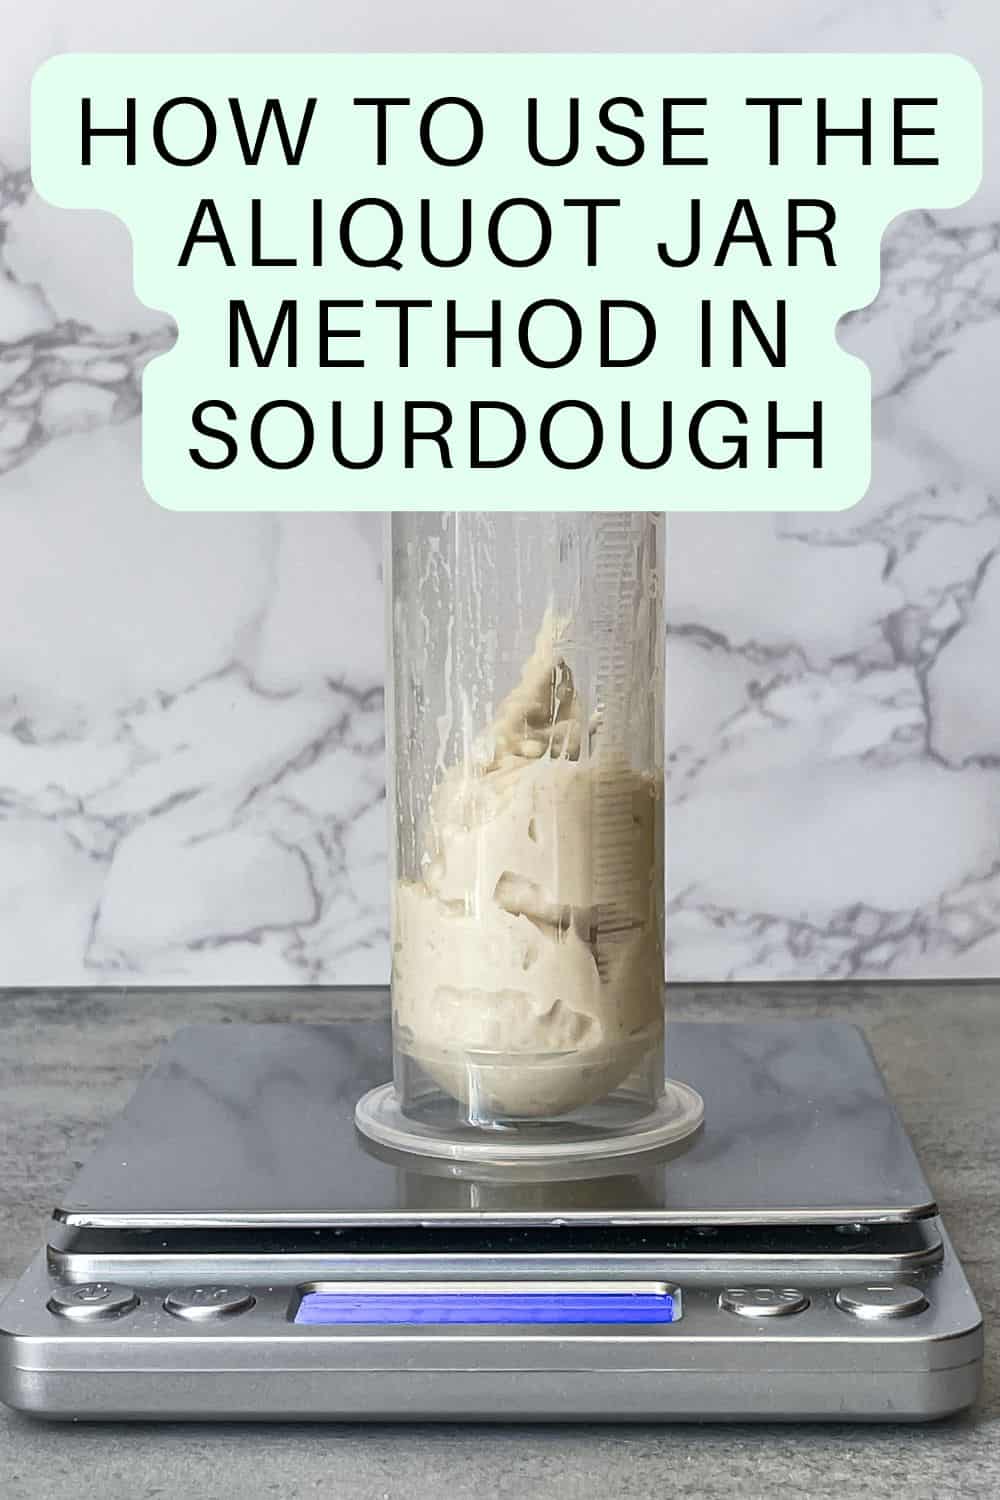
Quick Summary: The aliquot jar method is a way to track sourdough bulk fermentation by fermenting a small sample of your dough in a narrow, straight-sided jar. "Aliquot" is a science term for a representative portion of a whole, here, a small piece of dough that rises at the same rate as your main batch.
When the sample hits your target percentage rise (set by dough temperature), bulk fermentation is done, and the dough is ready to pre-shape. It removes the guesswork behind under- and over-proofed loaves.
Before using the aliquot jar, it helps to understand bulk fermentation and how to track dough temperature and percentage rise.
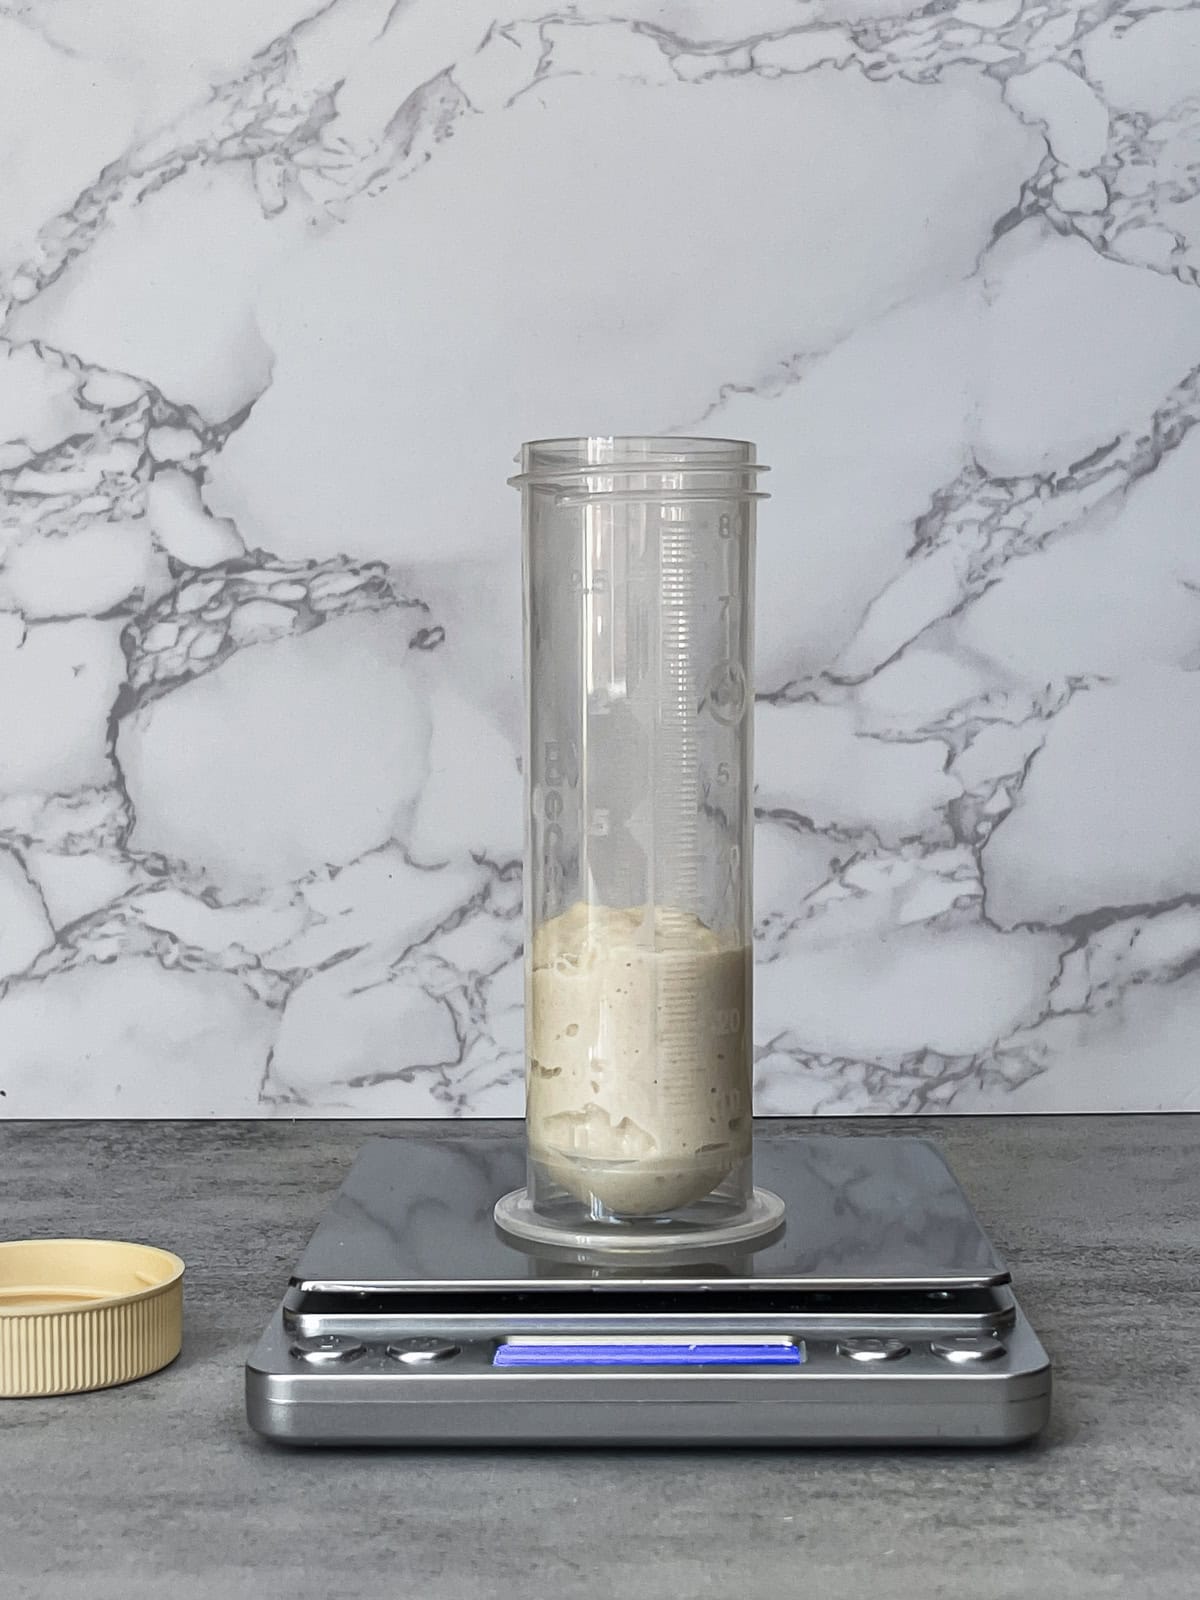
Note: I use a 2.7-oz plastic container as my aliquot jar and explain how the aliquot method works using this bottle as an example. You can use a different bottle, mark your measurements on a jar, and adjust the calculations as needed.

What is the aliquot jar method?
The aliquot jar method is a way of fermenting a small piece of dough in a small glass jar to monitor and control bulk fermentation.
Observing how the dough sample rises in the jar can indicate when the bulk fermentation is done. This method helps achieve the best results in making the perfect sourdough loaf.
The word "aliquot" comes from Latin and means "a portion or share of the whole." In this case, it refers to the small piece of dough you use as a sample. This method, borrowed from science labs, has found a home in sourdough baking.
How to choose the right aliquot jar
An ideal aliquot jar should be food-safe, BPA-free if plastic, and have straight sides with clear standard or metric markings to help accurately read dough rise.
I first heard about Audrey's aliquot jar idea from @artisansourdoughbaker on TikTok. She uses 2 oz. disposable jello shot cups with lids, filled them with 40 g of dough, and aiming for a 30% rise at 80°F (27°C).
However, since the cups don't have straight sides and measurement markings, and the dough must be at a specific temperature, I began searching for a better container.
I wanted a straight-sided tube or small shot glass with measurement markings and a screw-on lid. While you can cover a jar with plastic wrap and use tape to mark measurements, I didn't like that method.
Then, I found 2.7-oz plastic containers with clear, easy-to-read measurements in standard and metric units.
These bottles are BPA-free, phthalate-free, latex-free, and lead-free, which makes them safe for use. The best part is that the measurements are permanently marked, so they won't fade. Each line represents 1 mL.
Another option I tried was a 1.5-oz. container for storing colostrum and milk, but its minor 0.5 mL marks are tricky to read.
If you don't have a dedicated sourdough aliquot jar, you can try alternatives such as a specimen container, prescription bottle, or a short, straight-sided glass. You can also use a ruler washi tape to keep track of the dough rise during bulk fermentation.
How to set up an aliquot jar
The key to using an aliquot jar is making it simple and easy to follow, so anyone can start using this technique for sourdough. Here is how to set it up to track the bulk fermentation.
To get started, locate a mark to serve as the "start line" on the jar. You can place a rubber band around that mark for easy reference.
Next, determine the target percentage rise that corresponds to a single measuring mark using Mr. Cucuzza's bulk fermentation chart.
You can use a second rubber band (preferably in a different color) to mark the point at which the dough should rise, based on the dough temperature.
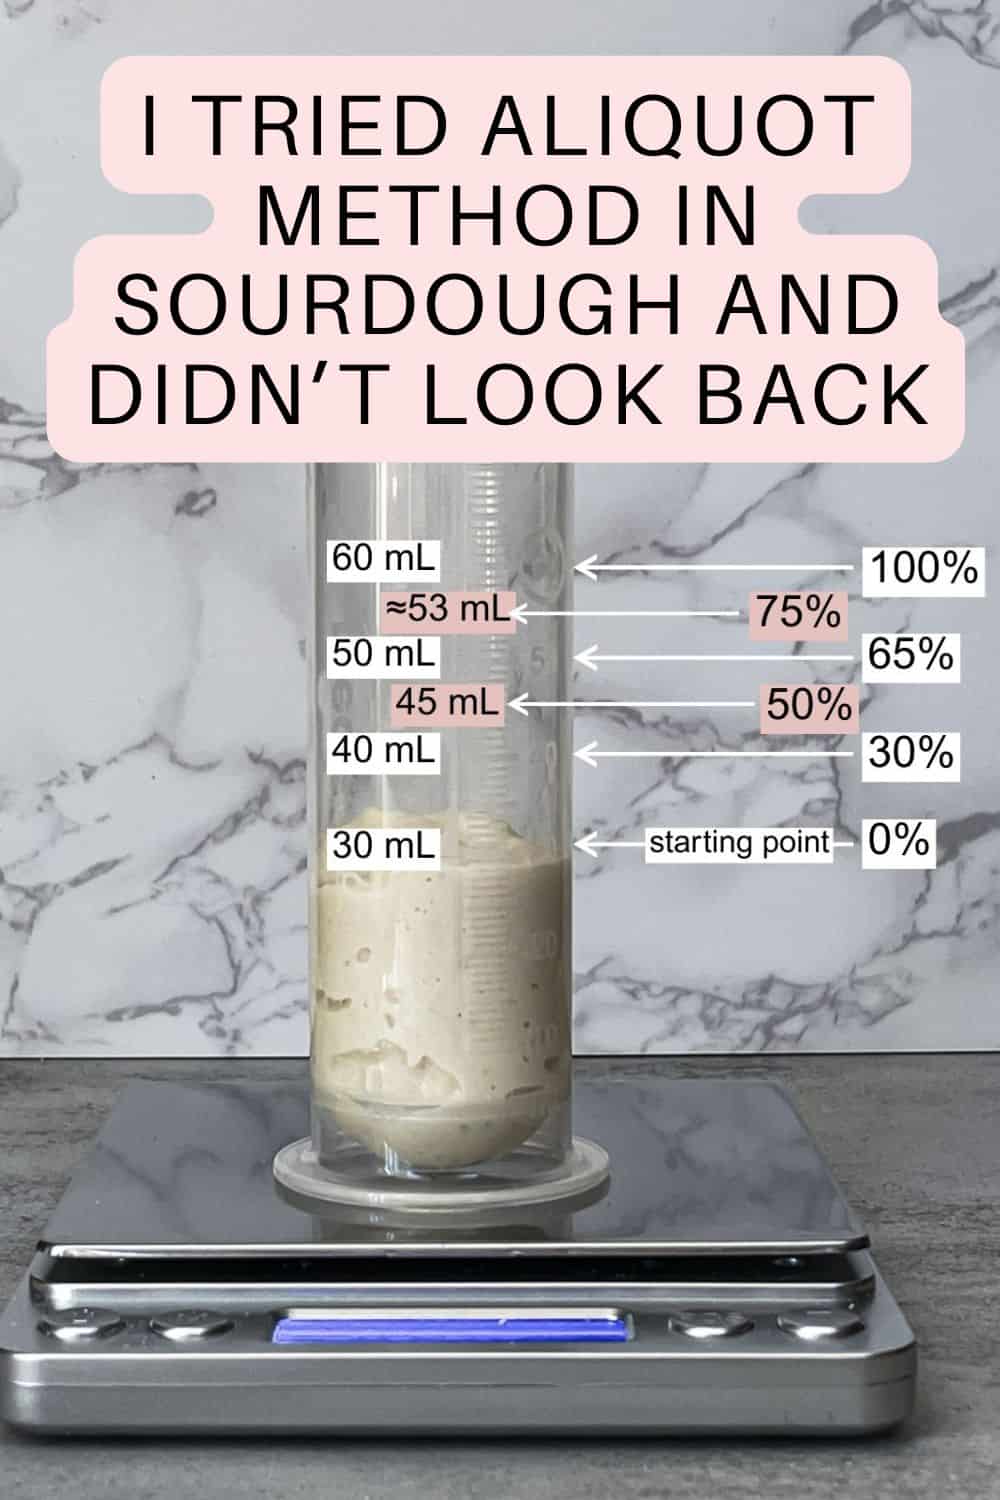
For example, in my 2.7-oz. plastic bottle, a 1-oz. (30 ml) mark is my starting point when the fermentation begins.
The 2 oz. (60 mL) mark represents a 100% rise in dough, while the 1.5 oz. (45 mL) mark indicates a 50% rise.
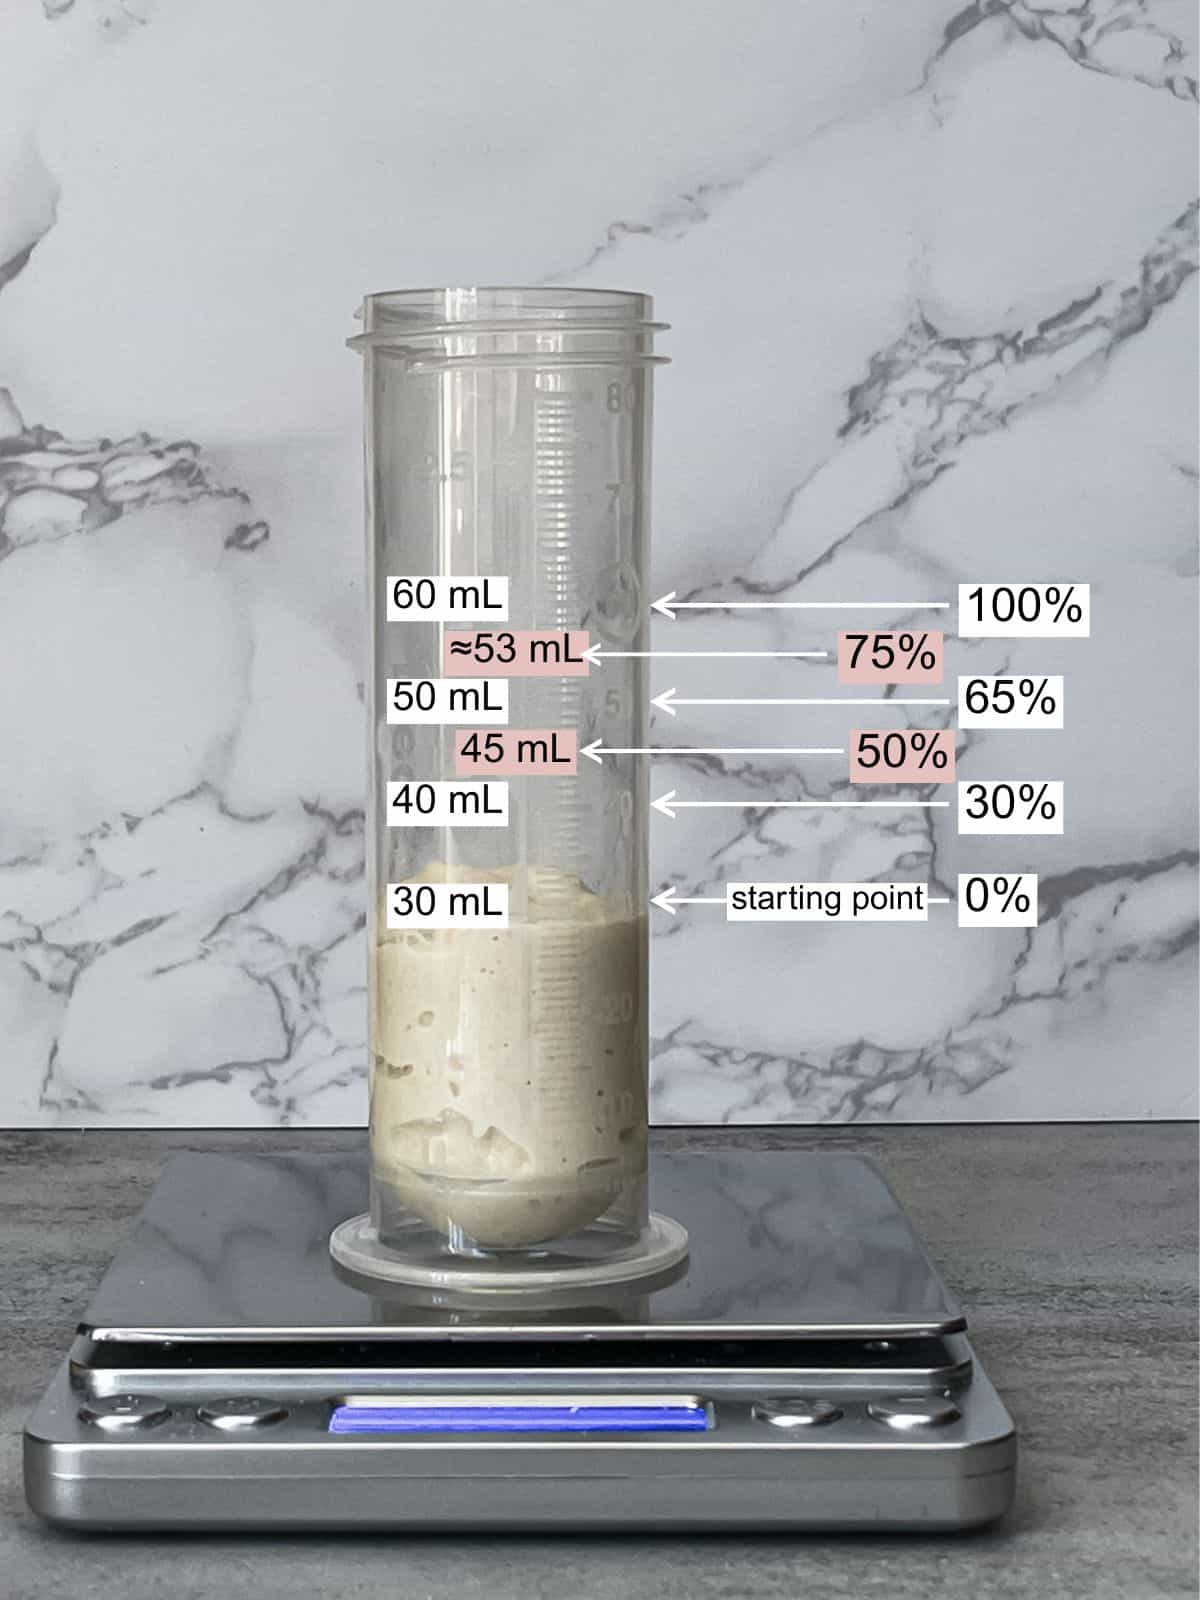
Between the 30 mL and 60 mL marks, there are 30 small divisions. Each of those 30 marks represents a 3.3% dough rise (100 ÷ 30 = 3.33).
Here is a table showing how each mark relates to the dough rise:
| Measuring Mark | Dough Rise |
| 30 mL (1 oz.) | 0% |
| 40 mL | 30% |
| 45 mL (1.5 oz.) | 50% |
| 50 mL | 65% |
| 55 mL | 80% |
| 60 mL (2 oz.) | 100% |
Keep in mind that these are approximate percentages. For example, the 40 mL mark lines up with a 33% dough rise, but I have rounded it down to 30% in the table.
After testing this method, I found that a 3% difference in dough rise doesn't affect the final bread.
How to use the aliquot jar method
I created my Master Sourdough Bread recipe, which uses a 2.7-oz plastic container as the aliquot jar. I also keep a sourdough baking log to track the dough temperature during the bulk fermentation.
- Combine the levain or active sourdough starter at peak with 95% of the water and all the flour in a large mixing bowl. Let the dough sit for 30 minutes.
- Add salt and the remaining 5% of water and mix. Write down the time when bulk fermentation begins: it starts right now.
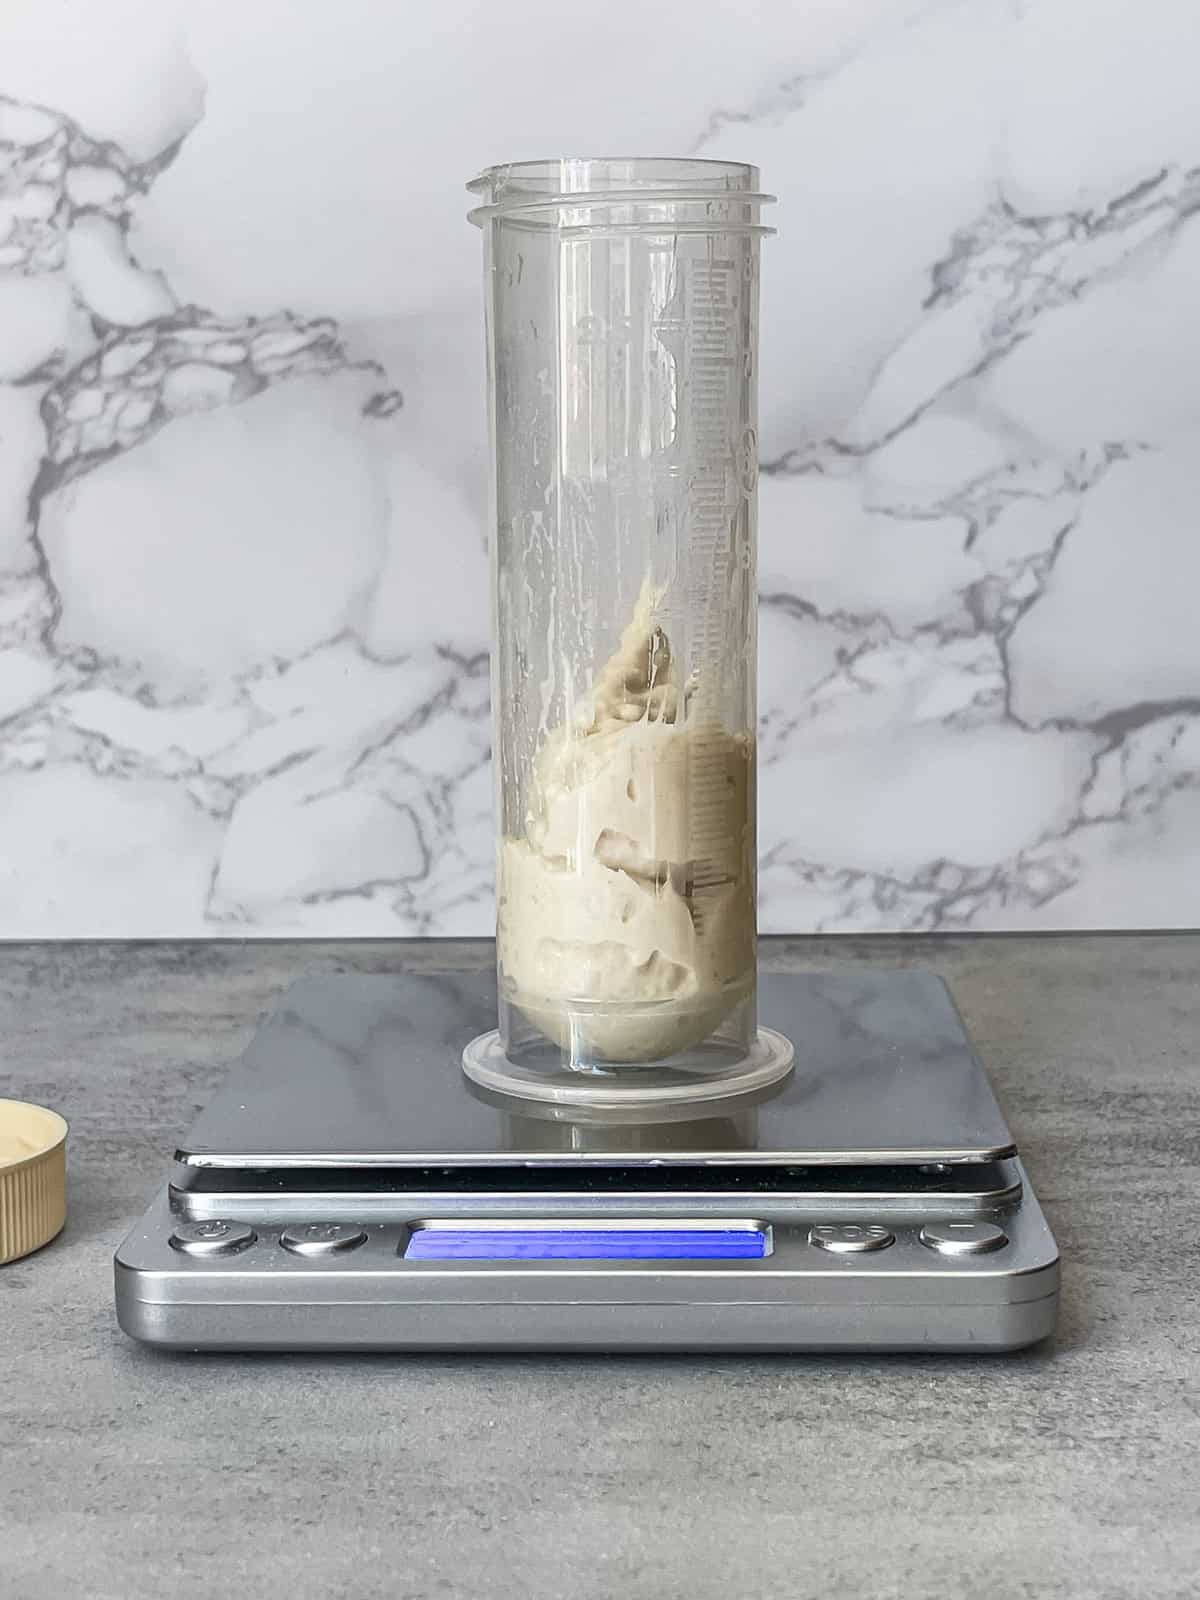
- Take a piece of dough and place it into your aliquot jar. Use a wooden chopstick, a butter knife dipped in water, or a wet finger to gently push the dough to the bottom of the container.
- Then, use your wet finger to level the dough to 1 oz. (30 mL) mark. Optionally, place a rubber band around the bottle at that level and then put the lid on.
- Check the temperature of the main dough with a probe thermometer and record the result.
- Cover the bowl with the dough to ferment, and keep the bottle next to the bowl to make sure both stay at the same temperature.
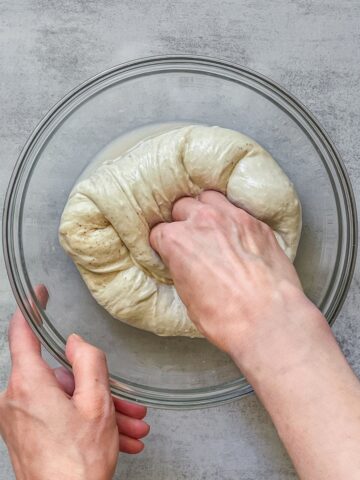
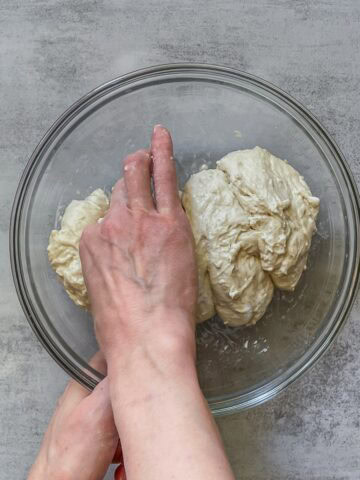
- Follow the recipe's stretch and folds or coil fold instructions, and measure the dough temperature after each fold. Using Tom Cucuzza's bulk fermentation chart, determine the percentage of dough rise you should aim for.
- Put a rubber band of a different color around the mark that shows the target dough rise. Remember, the target rise can change due to temperature changes in the dough. Always refer to the bulk fermentation chart for guidance.
- Monitor the dough rise in the jar to determine when to stop bulk fermentation. Once the dough reaches the second rubber band, it is ready for pre-shaping.

- Optionally, you can use a butter knife or a chopstick to remove the dough sample from the aliquot jar and mix it back into the main dough while pre-shaping. Sometimes, I mix it in, and at other times, I discard it.
Top tips for using the aliquot jar method
- Pick a narrow, straight-sided jar to track how much your dough rises during bulk fermentation.
- Be gentle when placing the dough sample into the jar. Don't press or compress it. Level it gently to match the measurement mark on the outside.
- Wipe the inside of the jar with a damp paper towel, so your rise marks stay clear and easy to read.
- Keep the aliquot jar close to your main dough, so both experience the same temperature and environment.
- Check the temperature of the main dough, NOT the sample. Avoid touching the dough in the aliquot jar until the end of bulk fermentation.
How to use the aliquot jar for batch baking
When making multiple loaves, use the same aliquot jar, but avoid using any non-food-safe rubber bands and only use the jar's permanent measuring marks.
The number of aliquot jars must match the number of dough tubs. Place different dough samples from each tub in the respective aliquot jars.
Place the jar upright in the corner of each tub and wrap it with dough to keep it at the same temperature as the dough.
Another way to use the aliquot jar method when making multiple loaves in bus tubs is suggested by Tom Cucuzza. He suggests placing a loaf's worth of dough into a 4-cup glass measuring cup to use as a "giant" aliquot jar.
This method works well as long as the dough temperature is the same in both the bus tub and the giant aliquot jar.
Can you use the aliquot jar method for inclusion loaves?
Not reliably. Inclusions like cheese, jalapeños, olives, or dried fruit are folded into the main dough, but your aliquot sample is taken before you add them, so the sample and the actual dough ferment a little differently.
The add-ins also add weight and moisture and can create pockets that change how the main dough rises, so the jar won't perfectly reflect what is happening in the bowl.
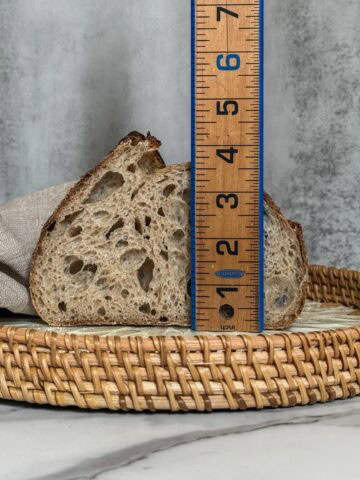
For flavored inclusion loaves, lean on visual and tactile cues instead: watch for the dough becoming puffy and jiggly, increasing in size by about 50 to 75 percent, and showing bubbles on the surface and sides.
A straight-sided, marked container for the main dough helps you judge the rise by eye. You can still keep an aliquot jar alongside as a rough guide, but treat it as a backup, not the final word, and trust the dough itself. For more on reading those signs, see my guide to when bulk fermentation is done.
Common mistakes with the aliquot jar method
- Adding the dough sample too early or too late: Make sure you add the dough to the aliquot jar right at the start of bulk fermentation, once all ingredients (including salt) are fully mixed.
- Using an inaccurate jar size: A jar that is too wide or too small makes it hard to track the dough's rise accurately. Choose a narrow, straight-sided container.
- Not marking the starting point: Always mark the dough level when you place it in the jar. Without it, you won't know how much it has risen.
- Ignoring dough temperature: The rise percentage depends on dough temperature. If the dough temperature changes, your target rise percentage should be adjusted too.
- Relying only on the jar: The aliquot jar is a helpful tool, but always use visual cues to determine when bulk fermentation is done. Look for signs like bubbles, a domed surface, and a gentle jiggle when you shake the dough.
To avoid these problems, review my bulk fermentation guide and learn how to adjust bulk fermentation to fit your kitchen conditions.
FAQ
What does "aliquot" mean? "Aliquot" is a science term for a representative portion of a larger whole. In sourdough baking, a small piece of dough is taken from your main batch and fermented in a jar, so watching the sample tells you what the whole batch is doing.
Can I use a shot glass for the aliquot method? Yes, as long as it has straight sides. Straight-sided containers make it easy to measure the dough rise accurately, while tapered or curved shot glasses can distort the reading. A small straight-sided jar or tube with mL markings is even easier to use, but you can also mark the starting and target levels with rubber bands or washi tape.
Should I take the aliquot sample before or after adding the salt? Take the sample after the dough is fully mixed, including the salt. Salt slows fermentation and strengthens gluten, so a sample taken before adding salt will ferment faster than the main dough and won't accurately reflect its progress.
What size jar works best for the aliquot method? Choose a small, narrow, straight-sided container of about 2 to 3 oz (60-90 mL). Narrow, straight sides make the rise both visible and accurate.
Does the aliquot jar need to be the same temperature as the dough? Yes. Keep the jar right next to or wrapped within your main dough so both ferment at the same temperature. Always measure the temperature of the main dough, not the sample.
Let's talk sourdough
Have you tried the aliquot method? If so, what kind of jar do you use, and how do you track the rise? Share your experience in the comments below.
Ready to keep learning?
Take your bulk fermentation tracking further by combining dough temperature, percent rise, and the aliquot method, a solid foundation for mastering the process.
Want the rest of the fermentation picture? Join the free email series for step-by-step guidance.
Kimberly says
Will it still work if I take the sample before the salt?
Irina Totterman says
Hello Kimberly, The aliquot jar sample should be taken after the dough is fully mixed, including the salt. Salt slows fermentation and strengthens gluten, so the sample needs to match the final dough. If you take it before adding salt, it will ferment faster than the main dough and give inaccurate bulk fermentation readings.
Anna says
I sealed my aliquot jar with a tight lid, and when I checked it later, it had built up so much pressure that the lid popped off. Did I do something wrong?
Irina Totterman says
Hello Anna, As the dough ferments, it naturally produces gas. If the jar is sealed tightly, that gas has nowhere to go, so pressure can build up. It's better to cover the aliquot jar loosely with a lid. That keeps the sample from drying out while allowing excess gas to escape, giving you a more reliable reading of the fermentation.
Kathrine says
I don’t have a small jar for the aliquot method. Can I use something else?
Irina Totterman says
Hello Kathrine, Yes, any small, clear container with straight sides will work. A shot glass, a small spice jar, a yogurt cup, a medicine cup, or even a clear plastic container are all good options. The important part isn't the container itself, it's being able to see the dough rise clearly. Straight sides make it much easier to judge how much the sample has expanded during bulk fermentation.