
Quick Summary: If you don't have a banneton (proofing basket), you can proof sourdough in a mixing bowl, a soup or cereal bowl, a colander, a plastic container, a wicker basket, or a greased loaf pan.
Just line it with a floured tea towel to support the dough and prevent sticking. A bowl lined with a cotton towel is the easiest and most reliable option, and you can even make a DIY proofing basket from a folded towel or parchment.
Banneton alternatives
A banneton, also called a proofing basket, helps your dough hold its shape and allows air to flow through it, which is essential during proofing. If you do have one, here is how to use a banneton properly, from flouring to turning out your dough.
However, you can achieve the same results using everyday items you likely already have at home. Just make sure to line them with a banneton liner or its alternative. Here are a few ideas:
| Alternative | Holds | How to use | Best for |
| Mixing bowl (any material) | Varies by size | Line with a floured tea towel | The easiest, most common option |
| Soup or cereal bowls | ~500g dough | Line with a towel | Small loaves |
| Colander | Varies | Line with a towel | Great airflow, banneton-like ridges |
| Deli basket or bread basket | ~900g dough | Line with a towel | Good airflow and shape |
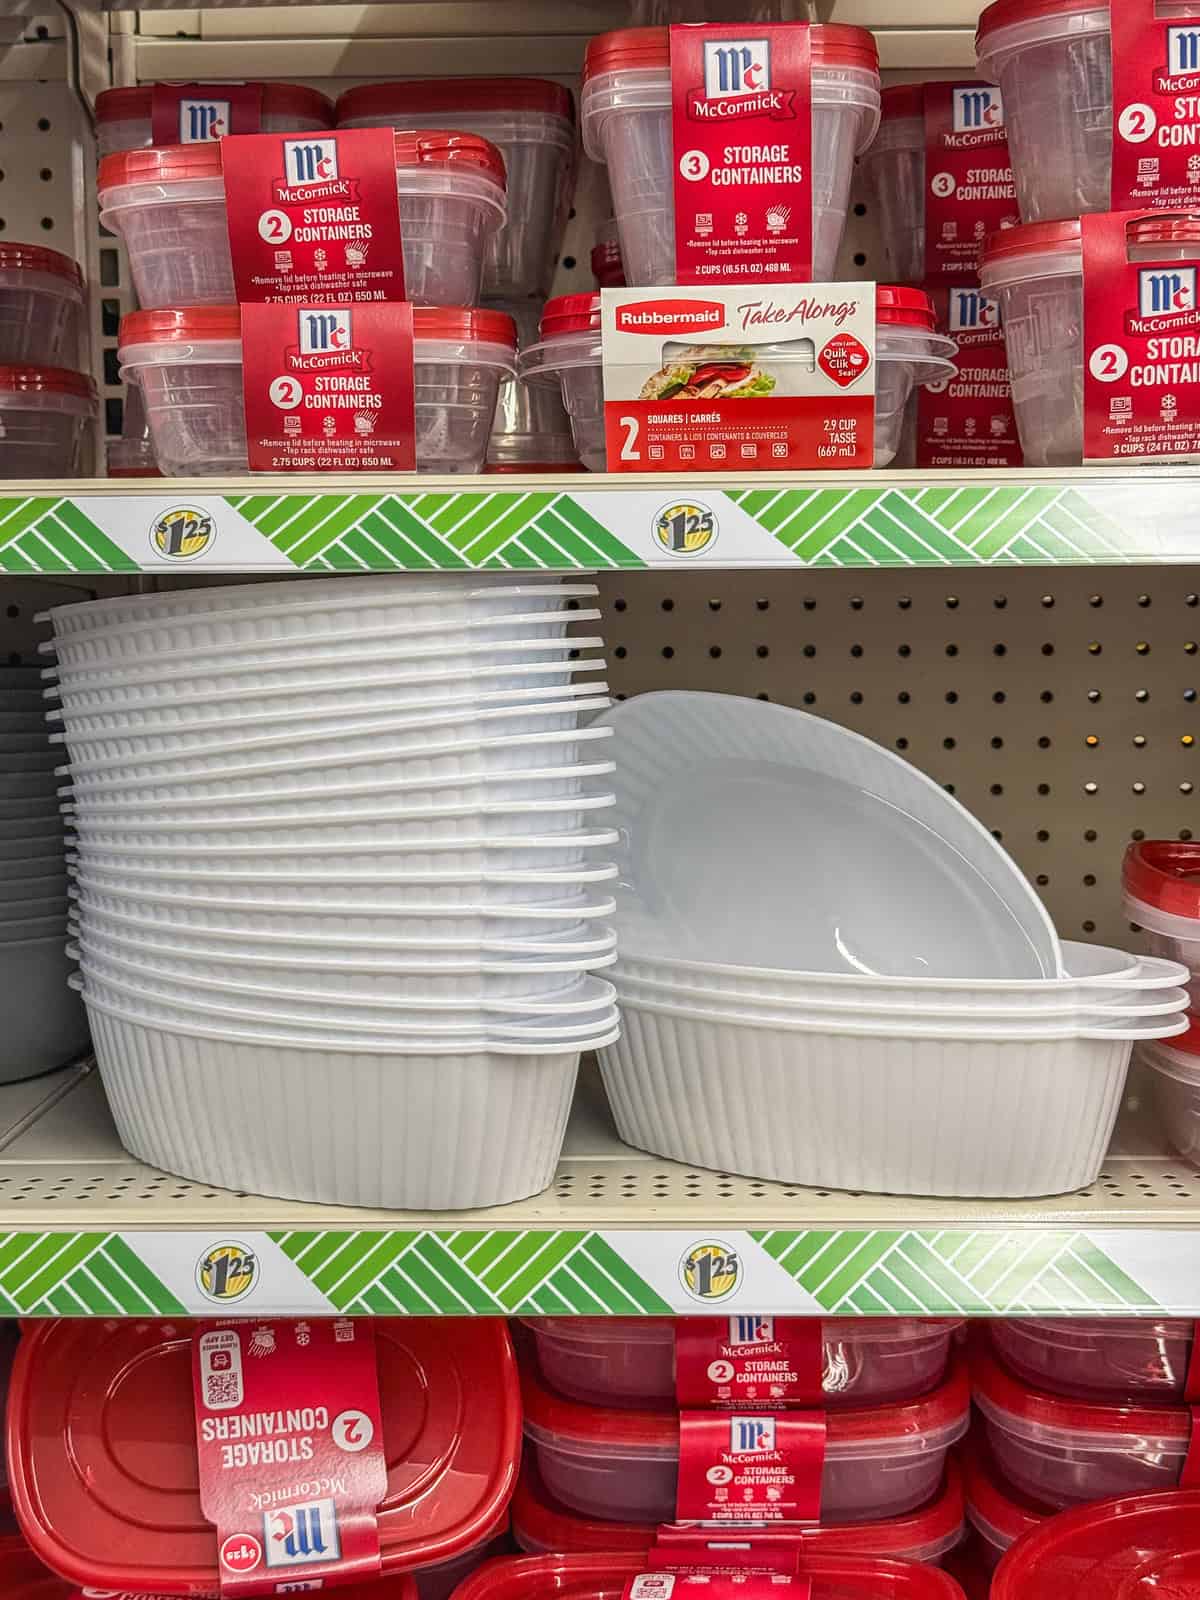
| Plastic container / Tupperware | Varies | Line with a towel | Using what you already have |
| Wicker basket | Varies | Line with a floured towel | Rustic shape and airflow |
| Greased loaf pan | One sandwich loaf | Grease or line | Pan loaves and sandwich bread |
| DIY towel or parchment nest | Adjustable | Dust or line | No special equipment at all |
Whatever you use to proof, matching it to your dough weight matters.
If you decide to use silicone bread-proofing baskets, make sure they are labeled as 100% food-grade, FDA-approved, and BPA-free.
Always read the product description carefully to check for these details. If it doesn't clearly state "100% food-grade silicone, FDA-approved, and BPA-free," I wouldn't recommend buying that basket.
Some sourdough bakers cut small slits into silicone bowls to help the dough breathe, much as a banneton does.
However, companies like Silpat warn against cutting, folding, or using sharp tools like knives, scrapers, or brushes on their silicone mats. This advice likely applies to other silicone products as well, so it is best to be cautious.
DIY banneton
You can make your own proofing basket as a fun and simple project. All you need is a sturdy tea towel or thick parchment paper. For added dough support, consider using multiple sheets of parchment.
Here is how you can do it:
- Fold the tea towel or parchment paper into an accordion shape using your hands.
- Secure both ends approximately 10-11 inches (25-28 cm) apart with a firm elastic band or string.
- Shape the cloth or paper snugly around the secured ends to form a vessel-like structure for your dough.
- Dust the towel nest with rice flour or line the parchment nest with a non-woven liner (must be food-safe) for a no-dusting alternative.
- Place the shaped dough into the nest, adjusting the position if necessary.
- Cover your DIY banneton with a towel or enclose it in a plastic bag for cold proofing.
Banneton liners and alternatives
Banneton liners absorb moisture from the dough and help prevent sticking. If you don't have a liner, use a thin 100% cotton flour sack towel, cheesecloth, or even a baby muslin swaddle blanket cut into quarters.
Avoid thick, fluffy fabrics, as they can stick to the dough even with rice flour. Also, avoid "old, worn-out bed sheets" that have been washed with regular laundry detergent. If your dough sticks no matter what you try, see my guide to common banneton problems.
For easier cleanup, try disposable non-woven liners made of "food-grade healthy PP material." They don't need to be washed, making them super convenient.
I have personally tried using a banneton without a liner, one with the original liner, a non-woven liner, and a simple tea towel. My favorite method is using a thin 100% cotton towel, which perfectly absorbs the moisture from the dough during the overnight cold proofing.
FAQ
Do you need a banneton to make sourdough? No. A banneton helps the dough hold its shape and lets air circulate, but a mixing bowl lined with a floured tea towel does the same job. Plenty of bakers never use a dedicated banneton.
Can you proof sourdough in a regular bowl? Yes, this is the most popular banneton alternative. Line any bowl with a floured cotton towel, place the shaped dough seam-side up, and proof. The towel supports the dough and prevents sticking.
What size bowl should I use instead of a banneton? Match the bowl to your dough weight: a soup or cereal bowl holds about 500g of dough, while larger loaves need a bigger bowl. See my banneton size guide for exact sizes by dough weight.
What can I use instead of a banneton liner? A thin 100% cotton flour sack towel, cheesecloth, or a quartered muslin baby blanket all work. Avoid thick, fluffy fabrics, which stick to the dough even with rice flour.
Let's talk sourdough
Do you use a traditional banneton, or have you found creative alternatives for proofing? Let me know in the comments.
Ready to keep learning?
And finally, every baker knows the mess is part of the process. Learn how to clean sourdough mess efficiently and keep your kitchen stress-free.
Comments
No Comments