
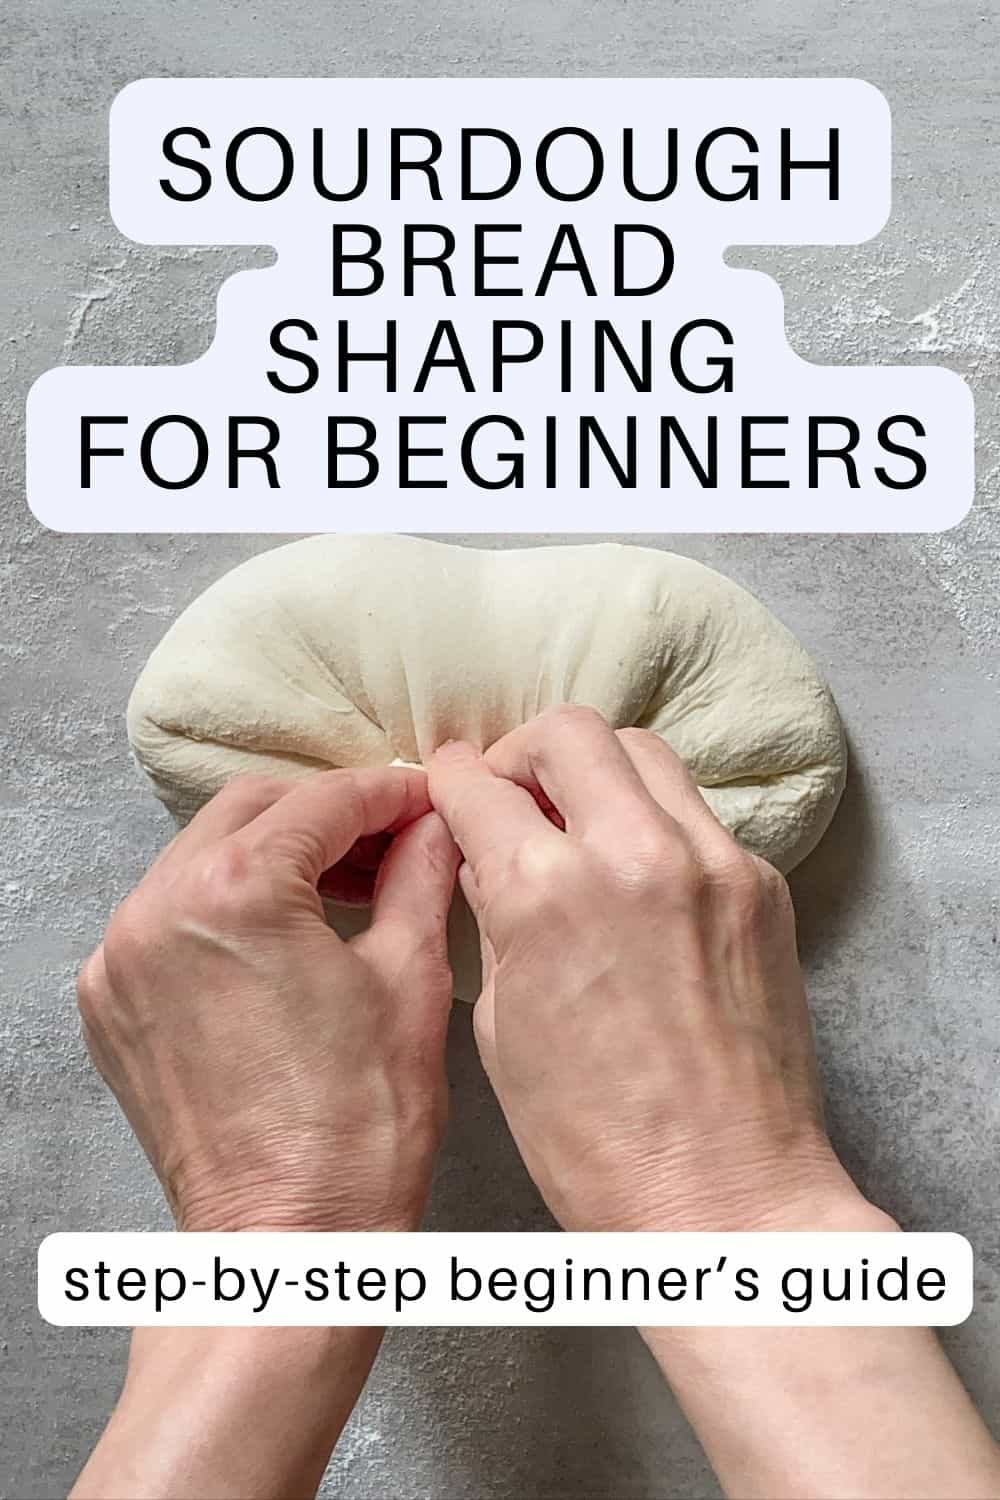
Shaping bread dough is another essential step in sourdough baking. Learn how to shape a boule (round), a bâtard (oblong), and a pan loaf. Each one has its own shaping technique.
I have also included links to shaping videos further down the page so you can watch the movements in action.
Why shape bread dough?
After the bench rest, it is time to shape the bread dough into its final form. This step helps build height, structure, and surface tension, like a smooth "skin" on the outside of the dough. This tension allows the dough to rise upwards during baking instead of spreading out.
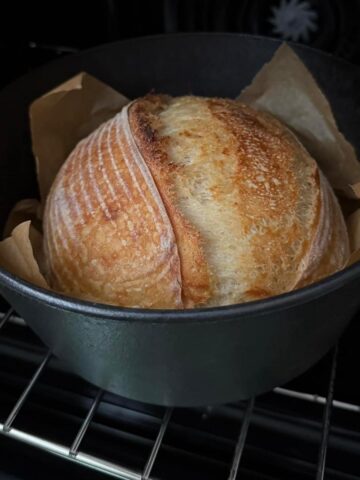
How to shape a boule (round loaf)
The word "boule" comes from French and means "ball." It is one of the easiest shapes to start with. There are two main techniques you can use:
- Folding technique: This works well for a weaker dough.
- Gathering technique: It is great for stronger, more elastic dough.
Folding technique for shaping a boule
- Sprinkle a little flour on the dough and your work surface to prevent sticking. You can use bread flour, all-purpose flour, or white rice flour.
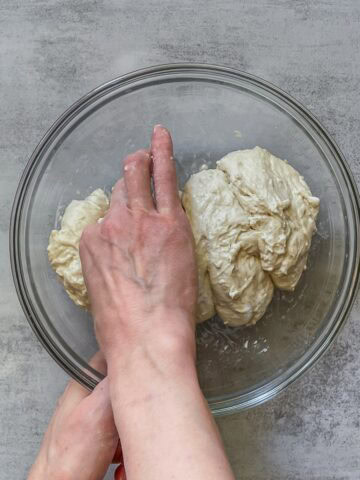
- Carefully flip the dough onto your work surface with the sticky side up and stretch it gently into a rough rectangle shape.
- Take the left side of the dough, fold it toward the center, and press it lightly so it sticks.
- Do the same with the right side, folding it over the left side and pressing gently to keep it in place.
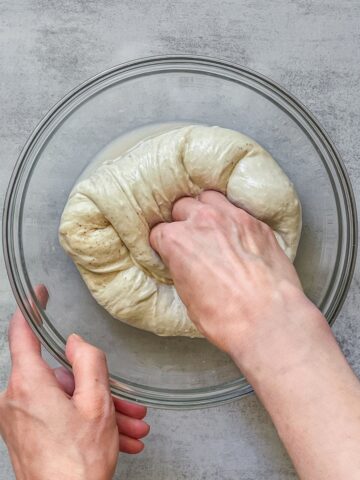
- Using both hands, roll the dough from the top edge down to the bottom to form a loose ball. Let it rest for a few seconds to allow it to relax.
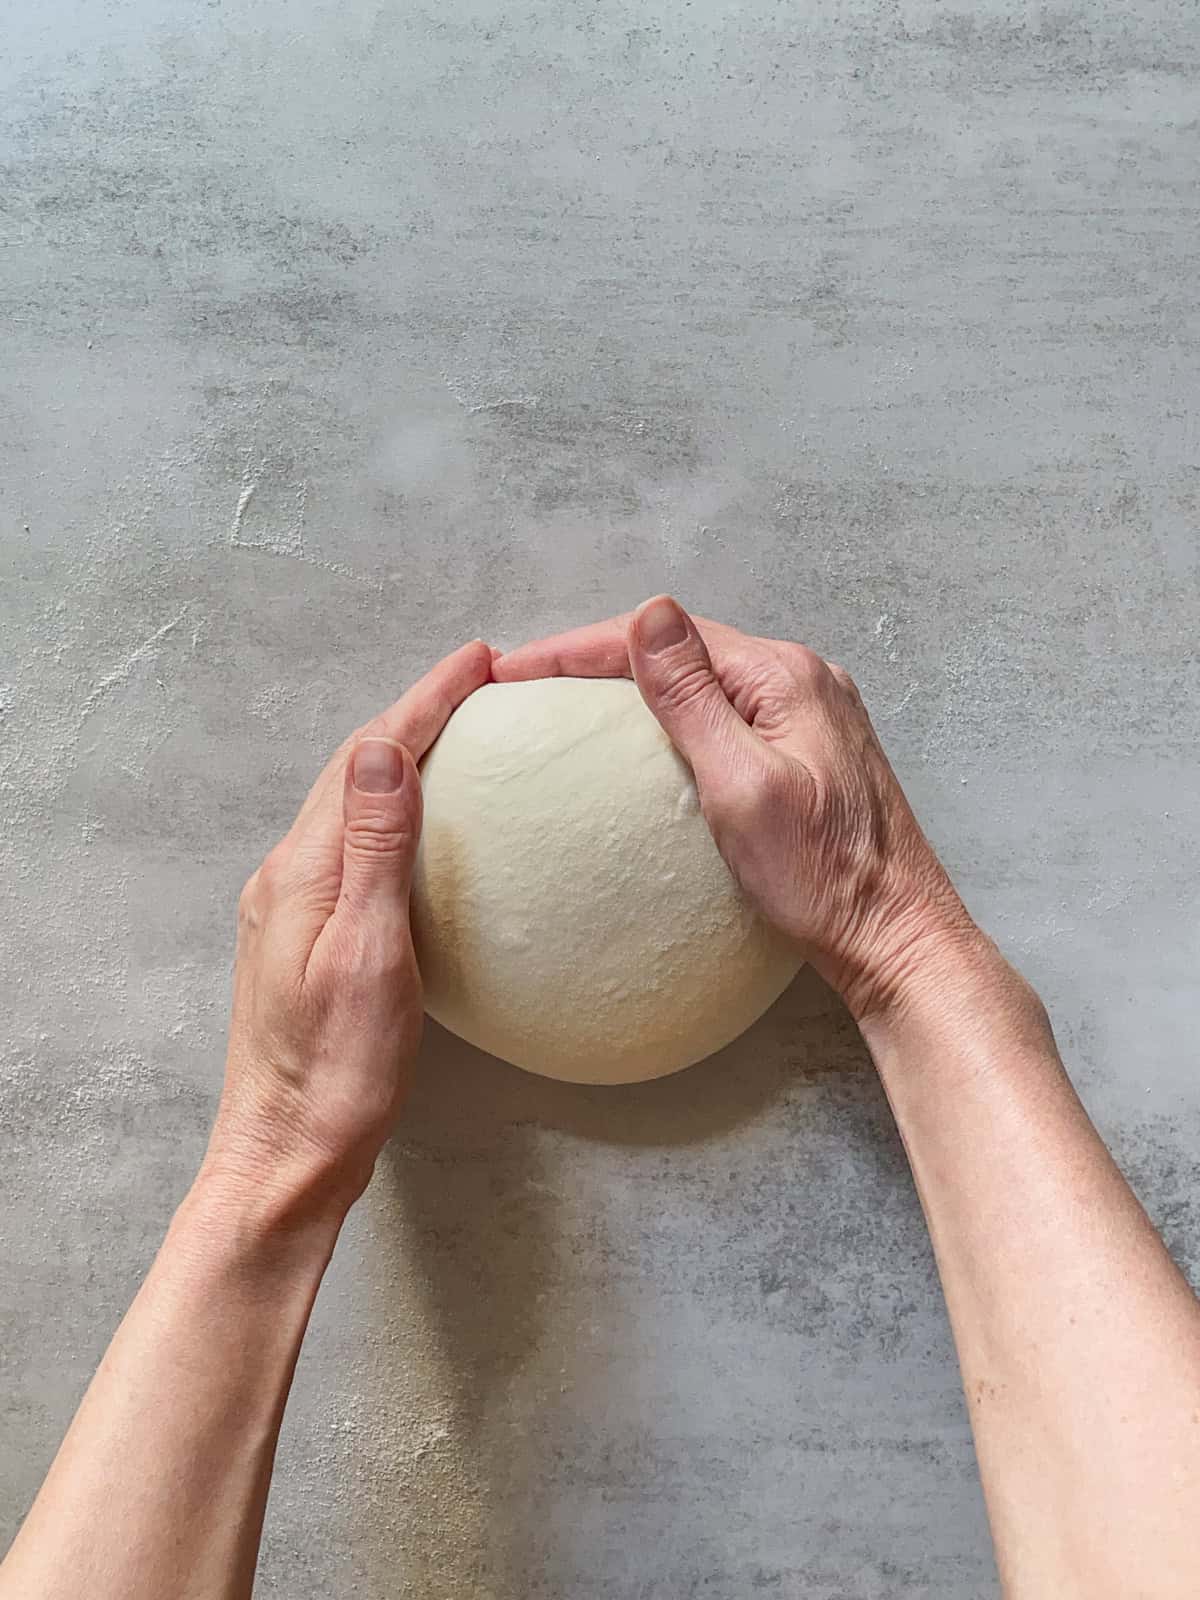
- Cup your hands like a bowl to gently pull the dough ball toward you. This will tighten the surface of the dough while its bottom sticks to the table.
- Rotate the dough about a quarter turn (90 degrees) so a new side faces you. Do not flip it over; keep the same side facing up the whole time. Repeat the pulling motion toward you. Each pull tightens the surface more.
- Continue rotating a quarter turn and pulling until you've gone around the dough 3-4 times. The dough should look smooth, round, and hold its shape on the counter.
- Use a bench scraper to flip the dough, seam side up, into the prepared round banneton or a similar container (banneton alternative).
Gathering technique for shaping a boule
Step 1: Lightly sprinkle a little flour (white rice flour, bread, or all-purpose flour) on top of the dough and your work surface to keep the dough from sticking. Gently flip the dough onto your work surface with the sticky side up and stretch it into a rough rectangle shape.
Step 2: Grab opposite sides of the dough, pull them up, and press them into the center. Hold it there for a couple of seconds so it sticks together.
Step 3: Repeat this process on two opposite sides, pulling up sections and pressing them into the center.
Step 4: Continue this process around the dough, lifting each section and folding it toward the center.
Step 5: Finish the last round, gently lifting and folding each section into the center.
Step 6: Finish shaping, and your dough will form a nice, round ball.
Step 7: Flip the dough seam side down on an unfloured surface. Using cupped hands, gently pull the dough toward you to tighten the surface as the bottom sticks slightly. Rotate the dough a quarter turn and repeat the pulling motion. Continue rotating and pulling 3-4 times until the dough is smooth, round, and holds its shape. Keep the sticky side down the whole time.
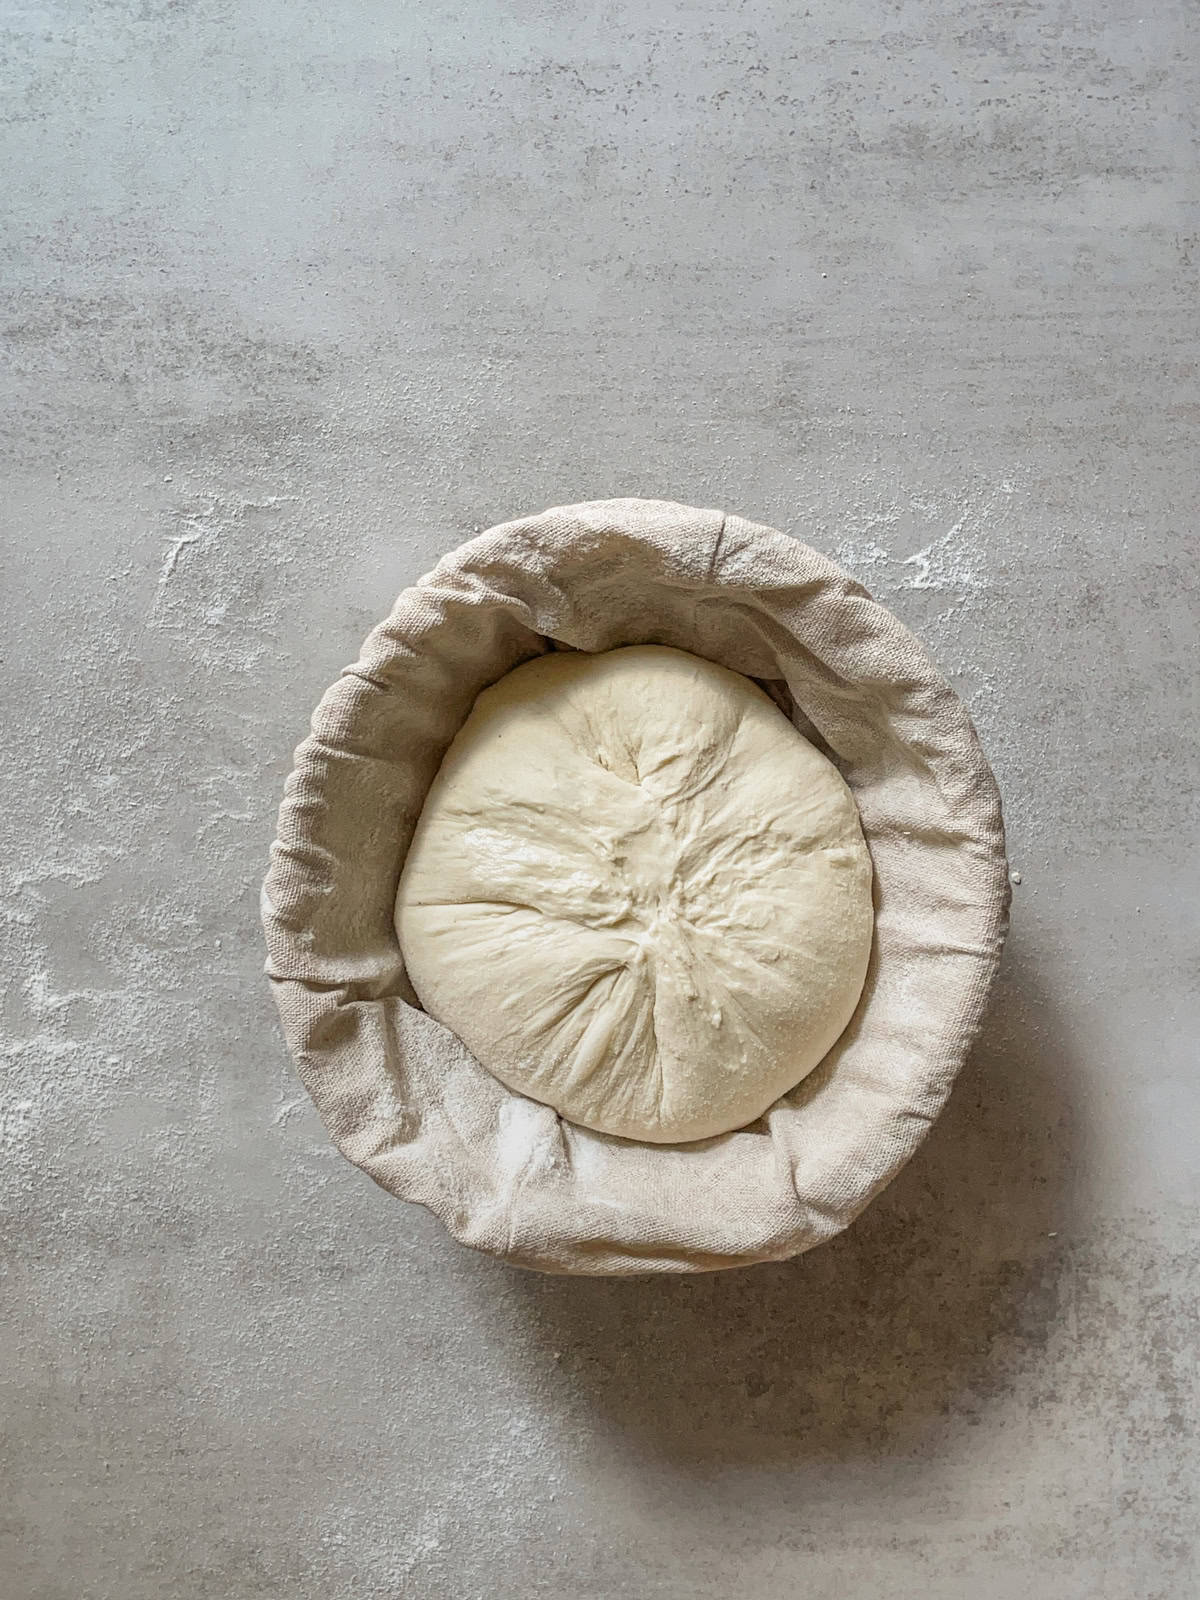
Step 8: Use a bench scraper to flip the boule and place it into the prepared round banneton or another container, with the seam side facing up. Stitch the dough (read below) and cover the banneton with a plastic cap, wrap, or use a clean plastic bag.
How to shape a bâtard (oval loaf)
A bâtard is a French term for a loaf with an oval or oblong shape. You can shape it in two common ways, and there is also a special technique created by Wayne Caddy.
- Stitching technique (sometimes called the "envelope" technique): This helps build a structure while gently pushing out extra air.
- Cinching technique: This creates surface tension on the dough without popping air bubbles.
- Caddy Clasp technique: Creates tall, symmetrical loaves.
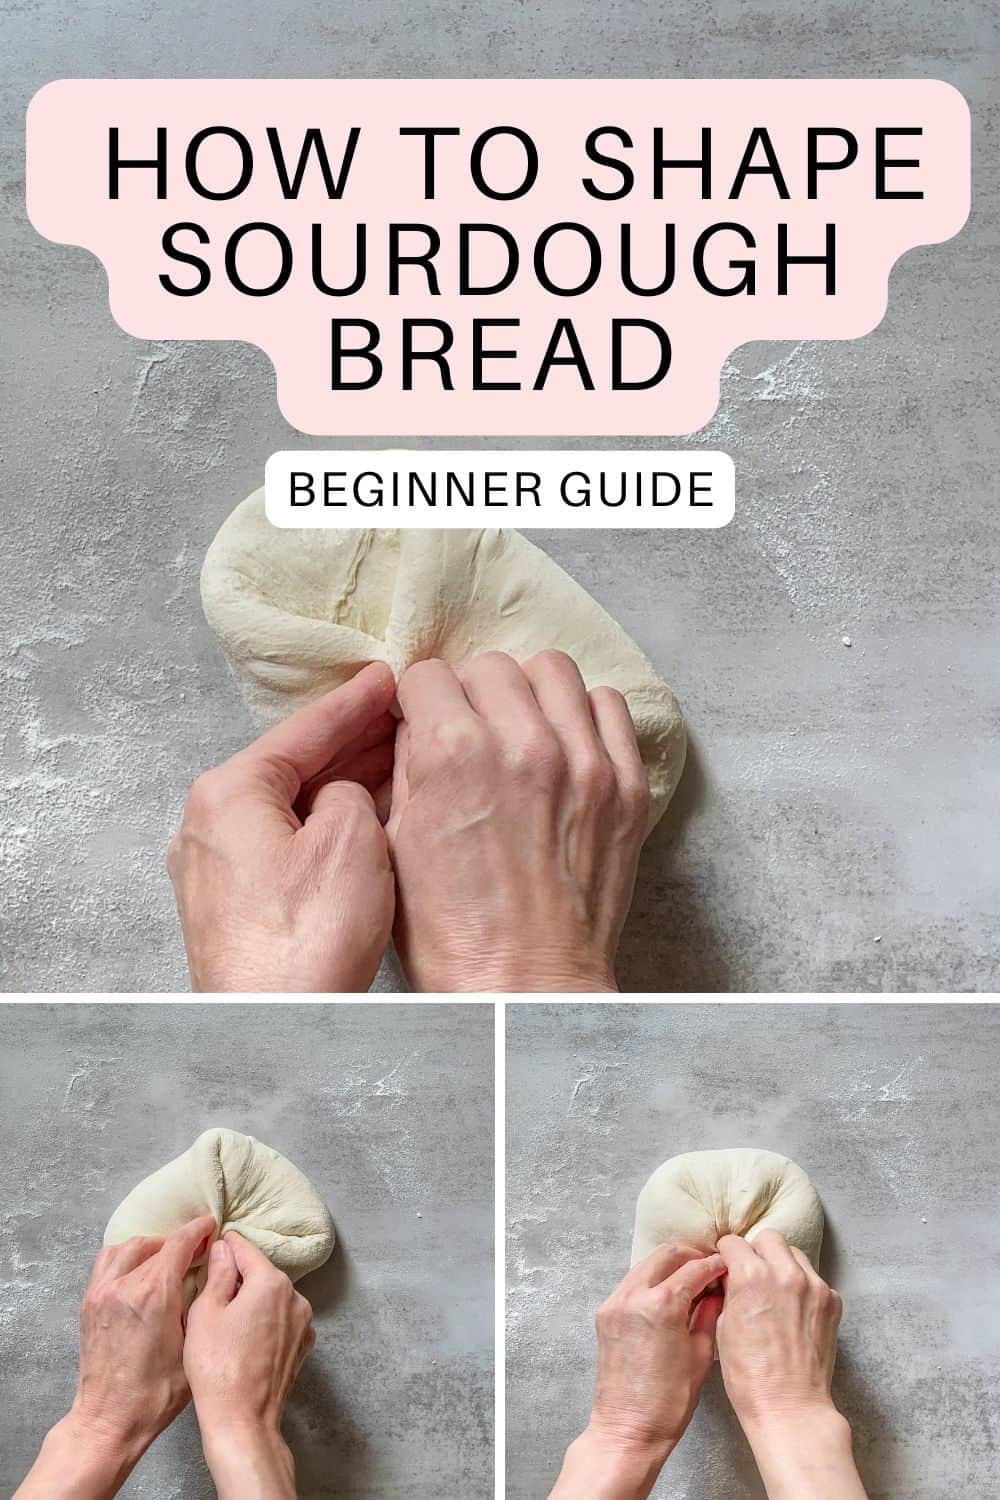
Stitching technique for shaping bâtard
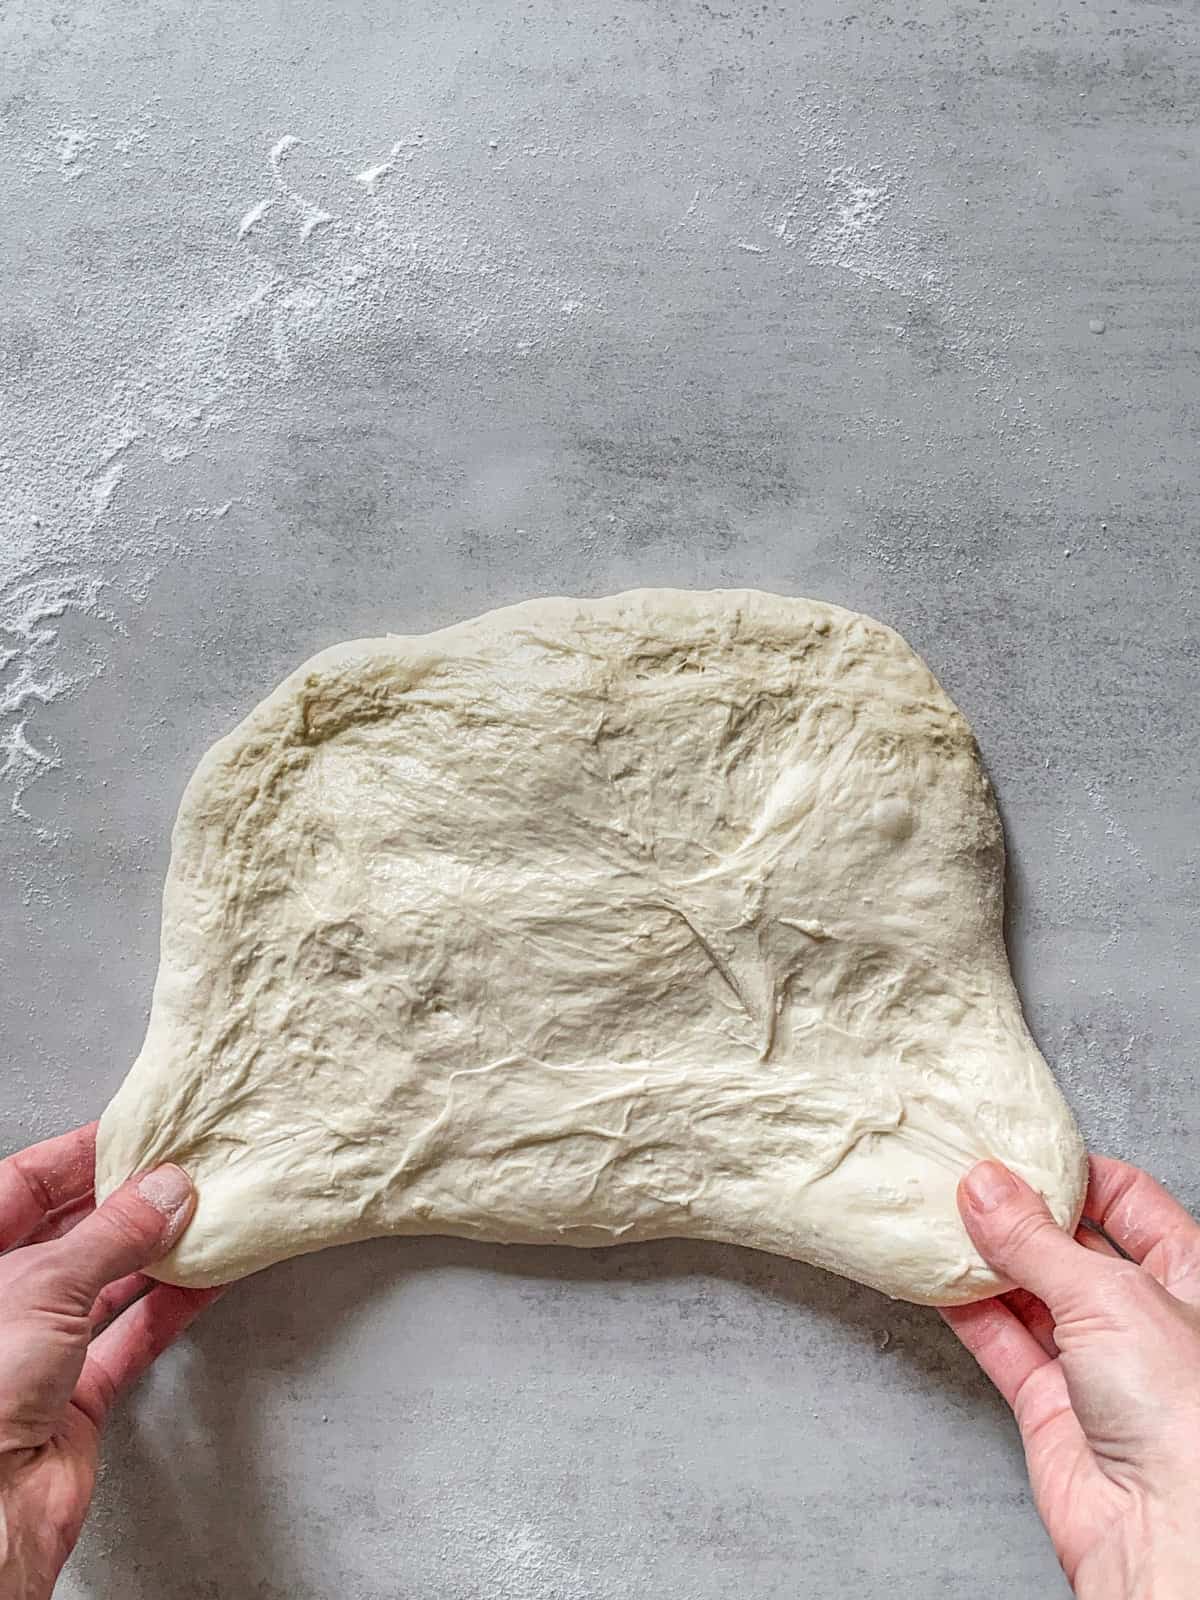
- Lightly dust the top of the dough and your work surface with a little bread flour, all-purpose flour, or white rice flour to prevent sticking.
- Flip the dough onto the floured surface and carefully stretch it into a rough rectangle shape.
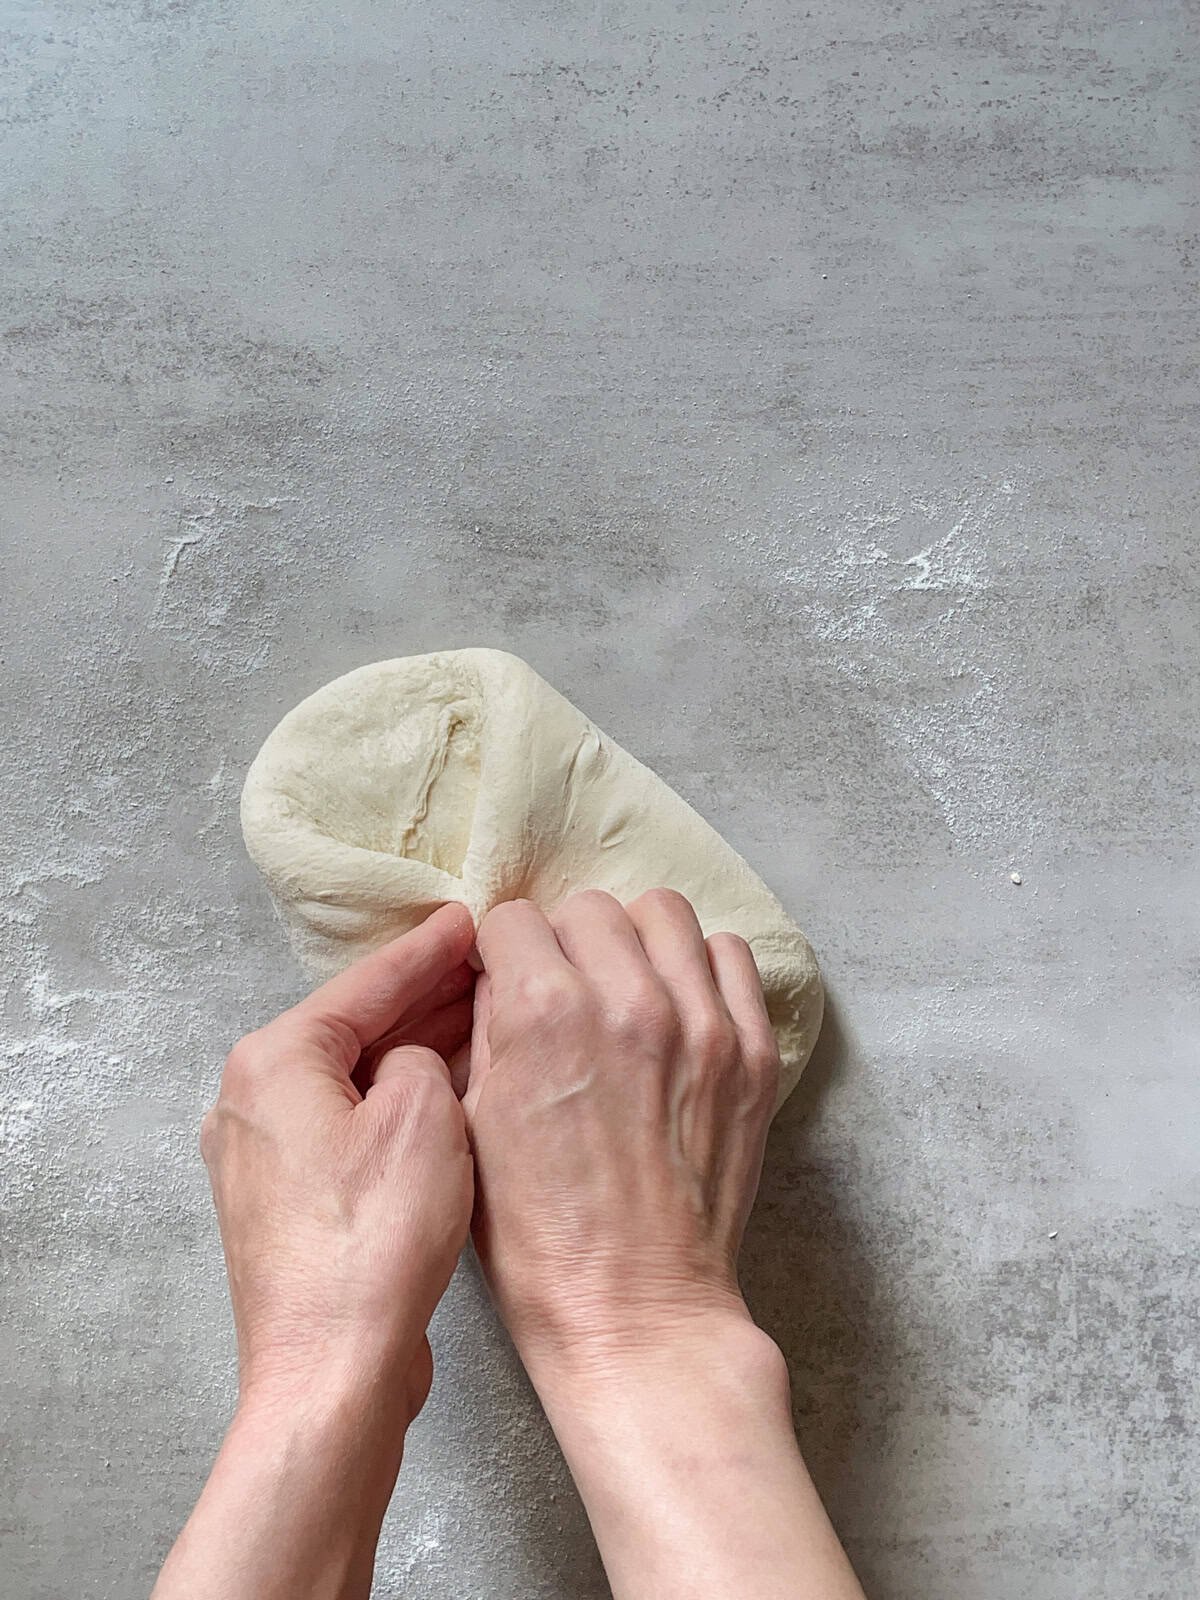
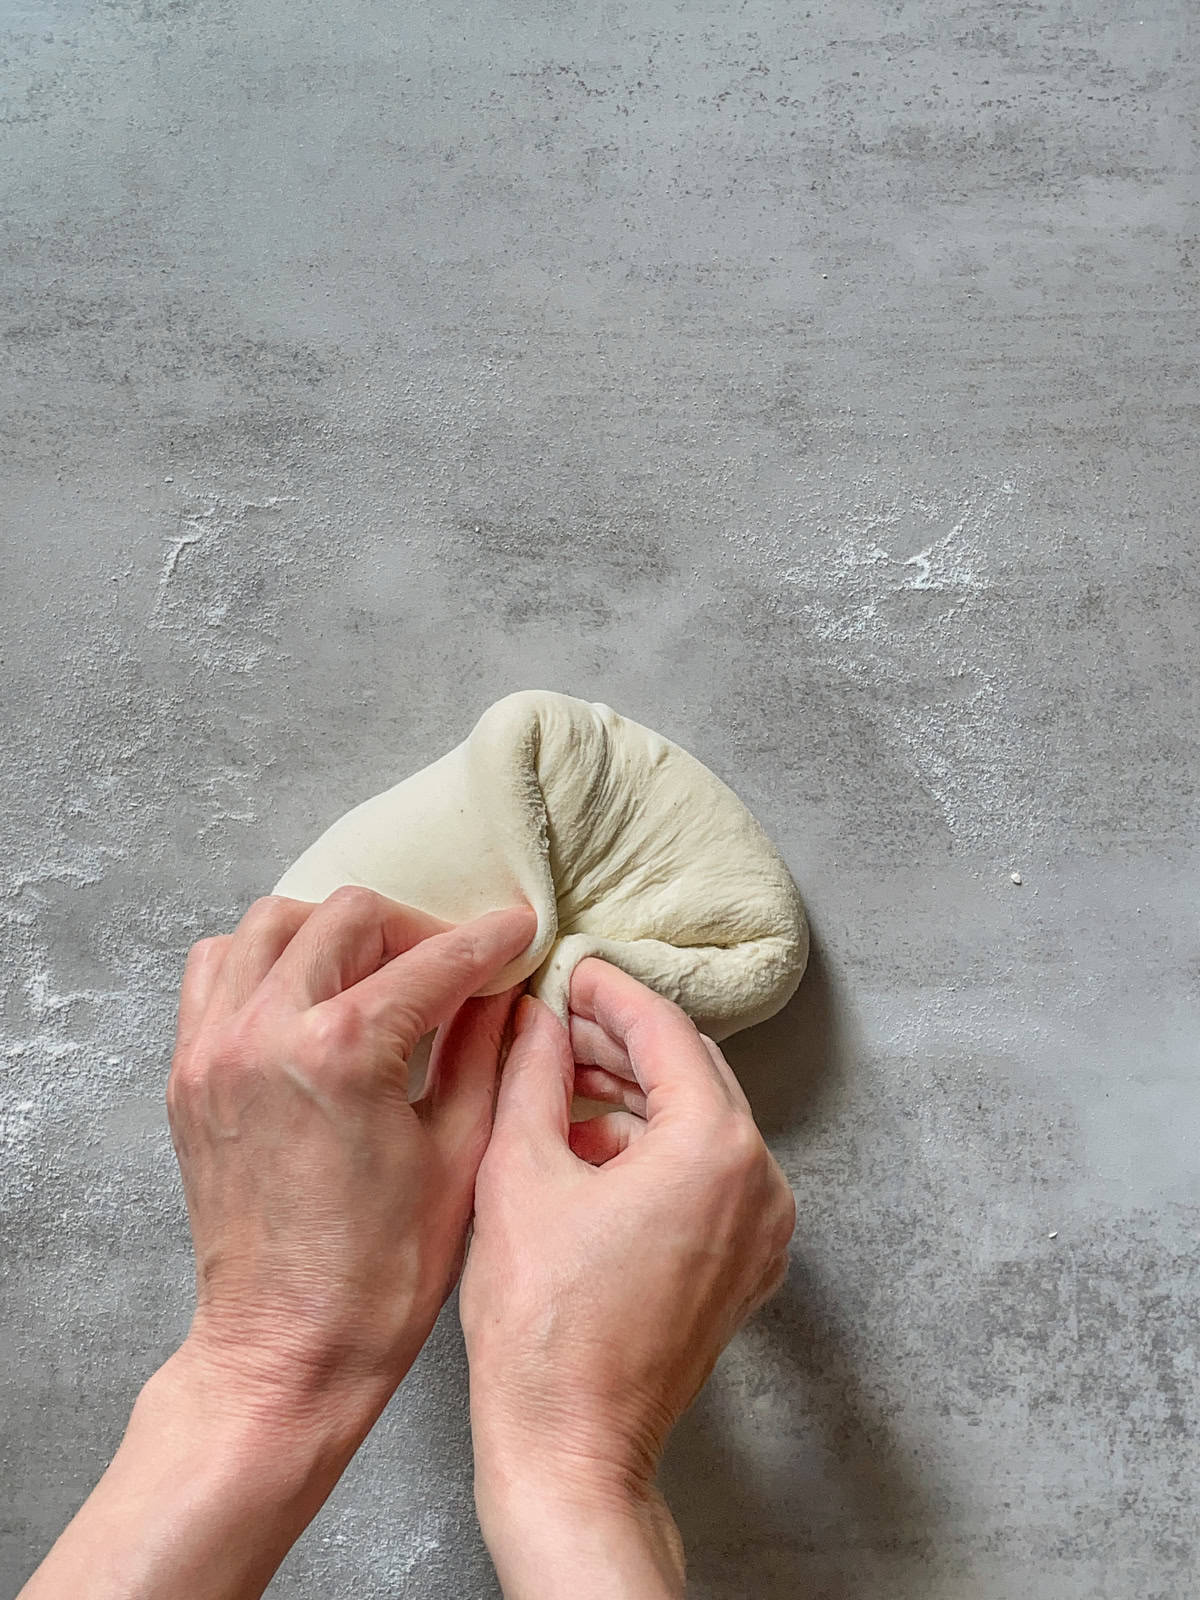
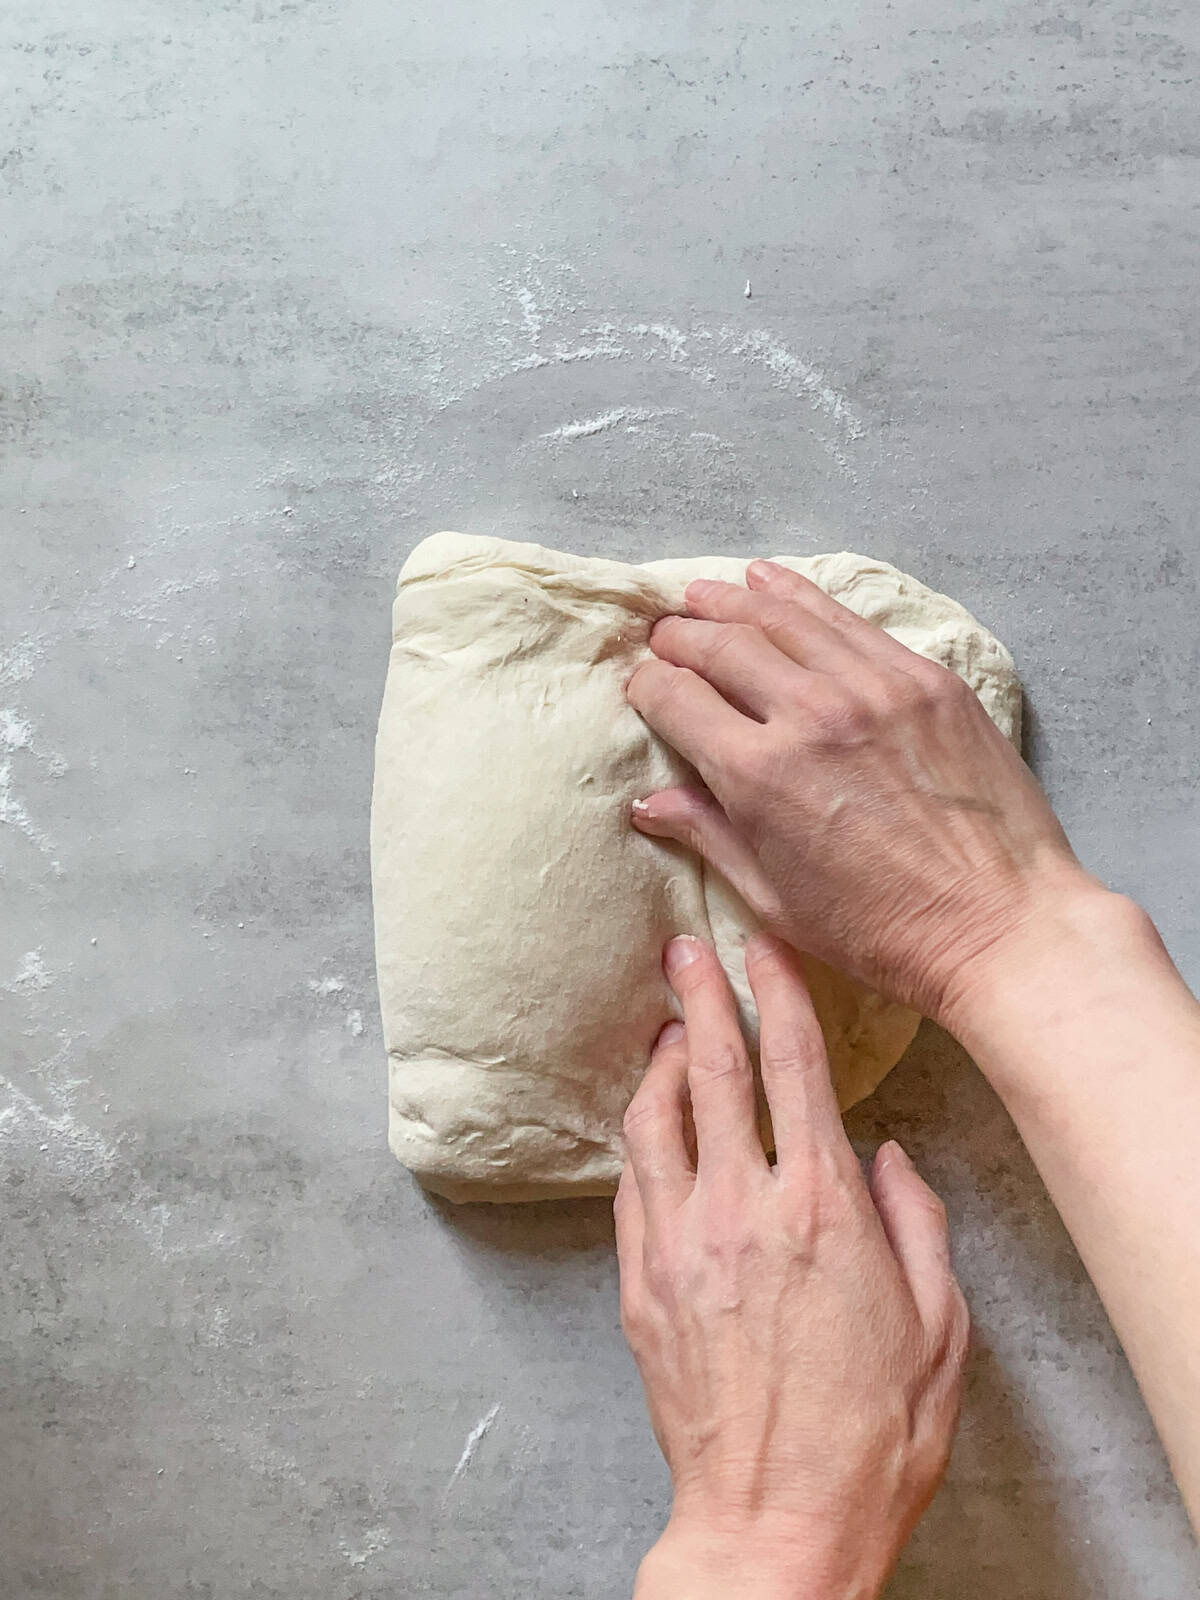
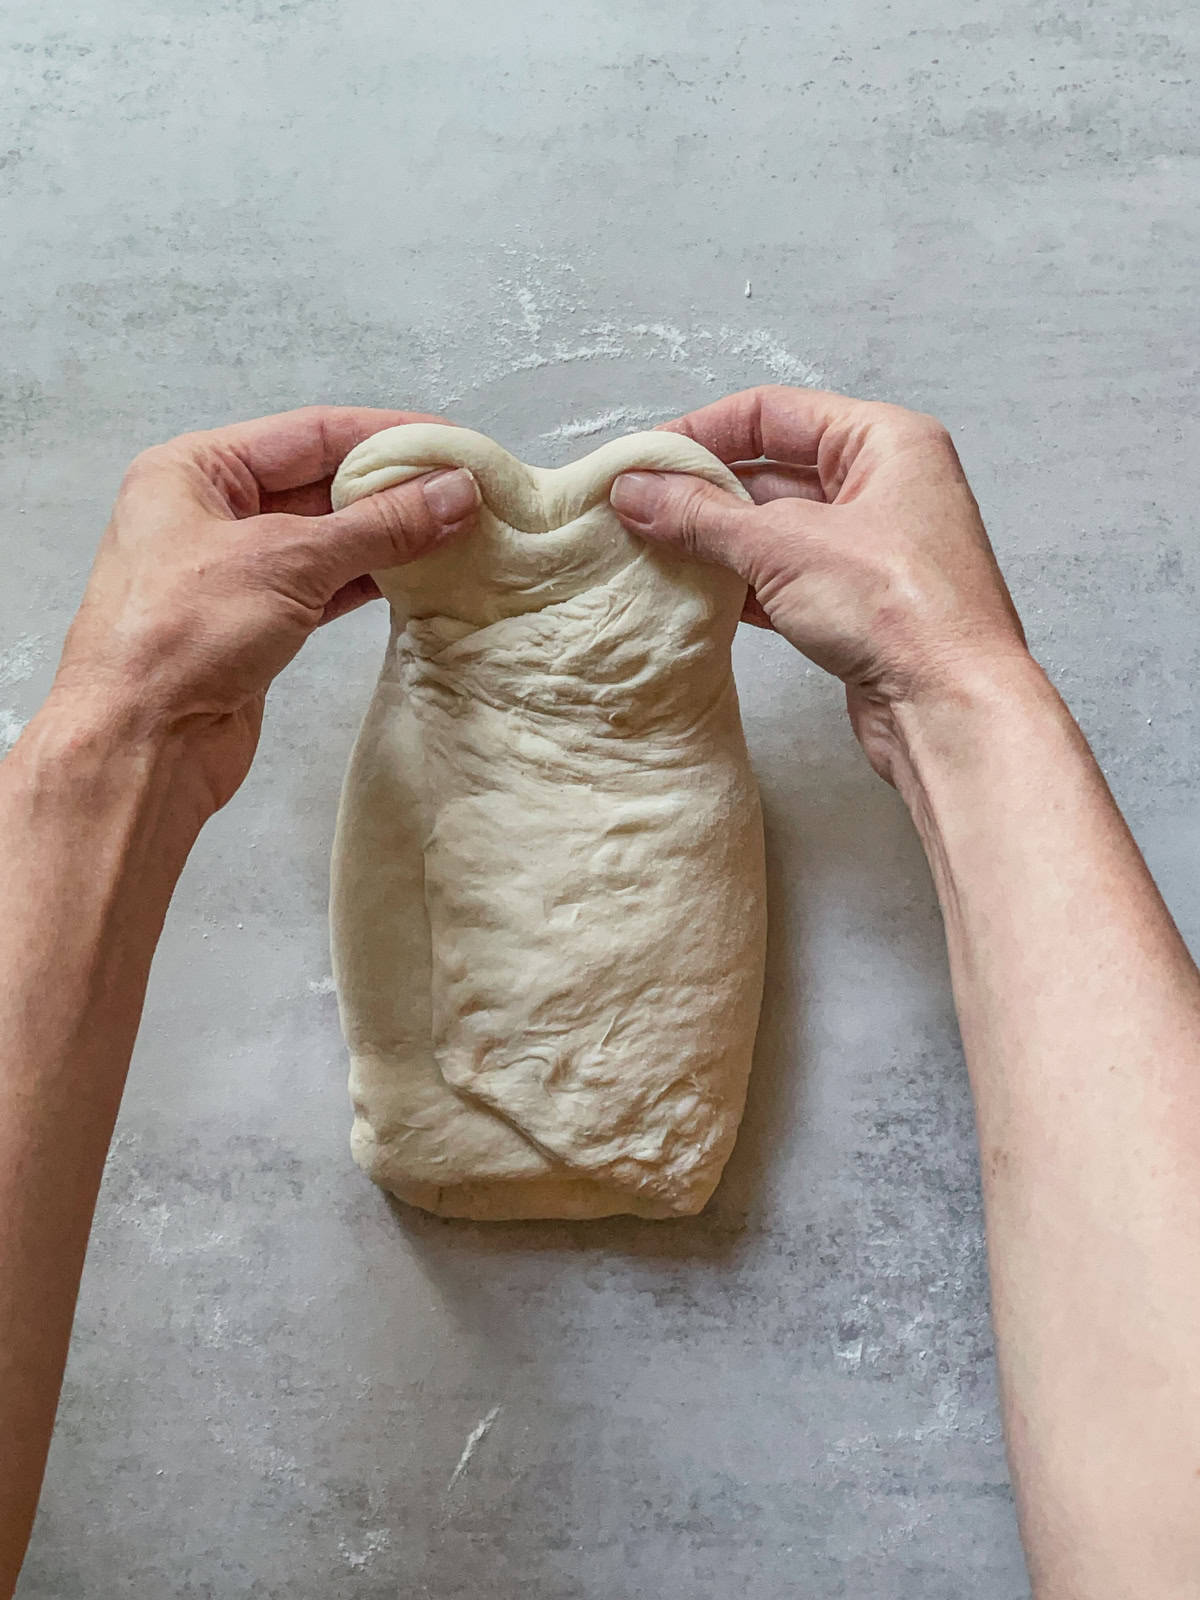
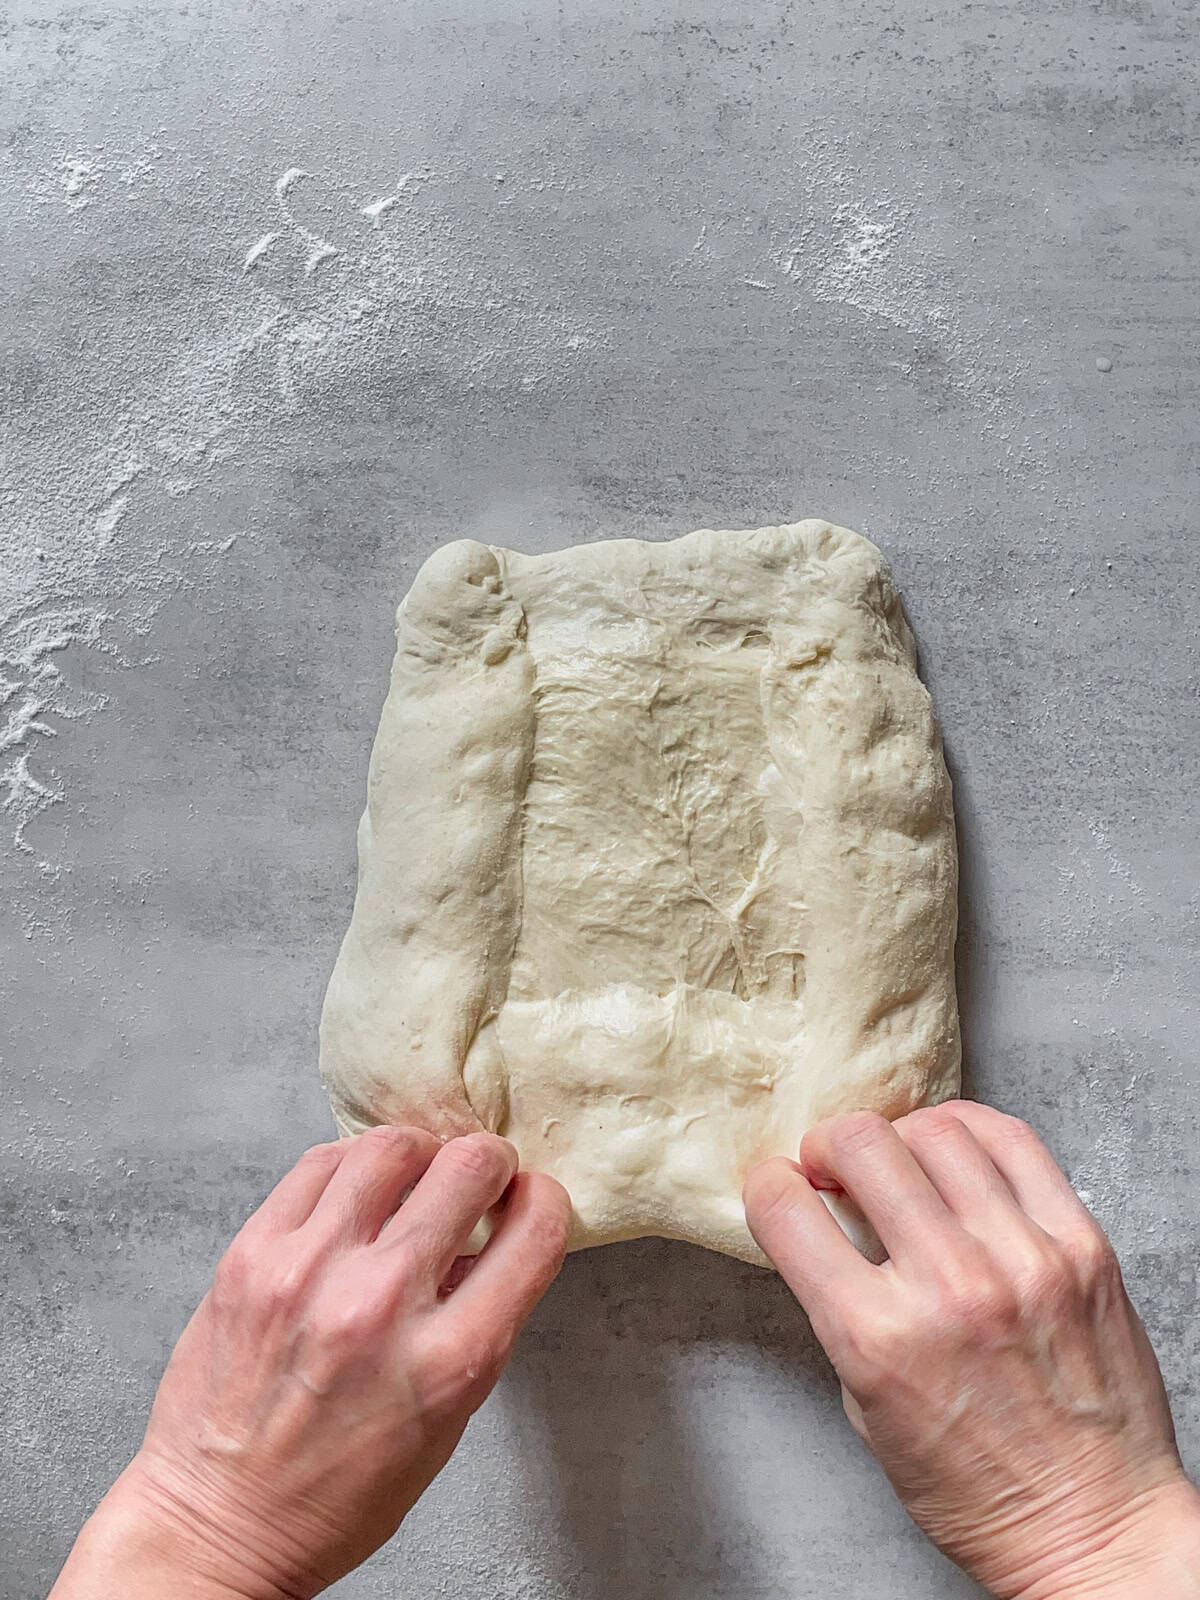
- Lift the bottom edge of the dough and fold it up toward the center, as if closing an envelope. Press gently so it sticks in place.
- With both hands, gently stretch the right and left sides of the dough outward.
- Fold the right side over the center of the dough and press lightly.
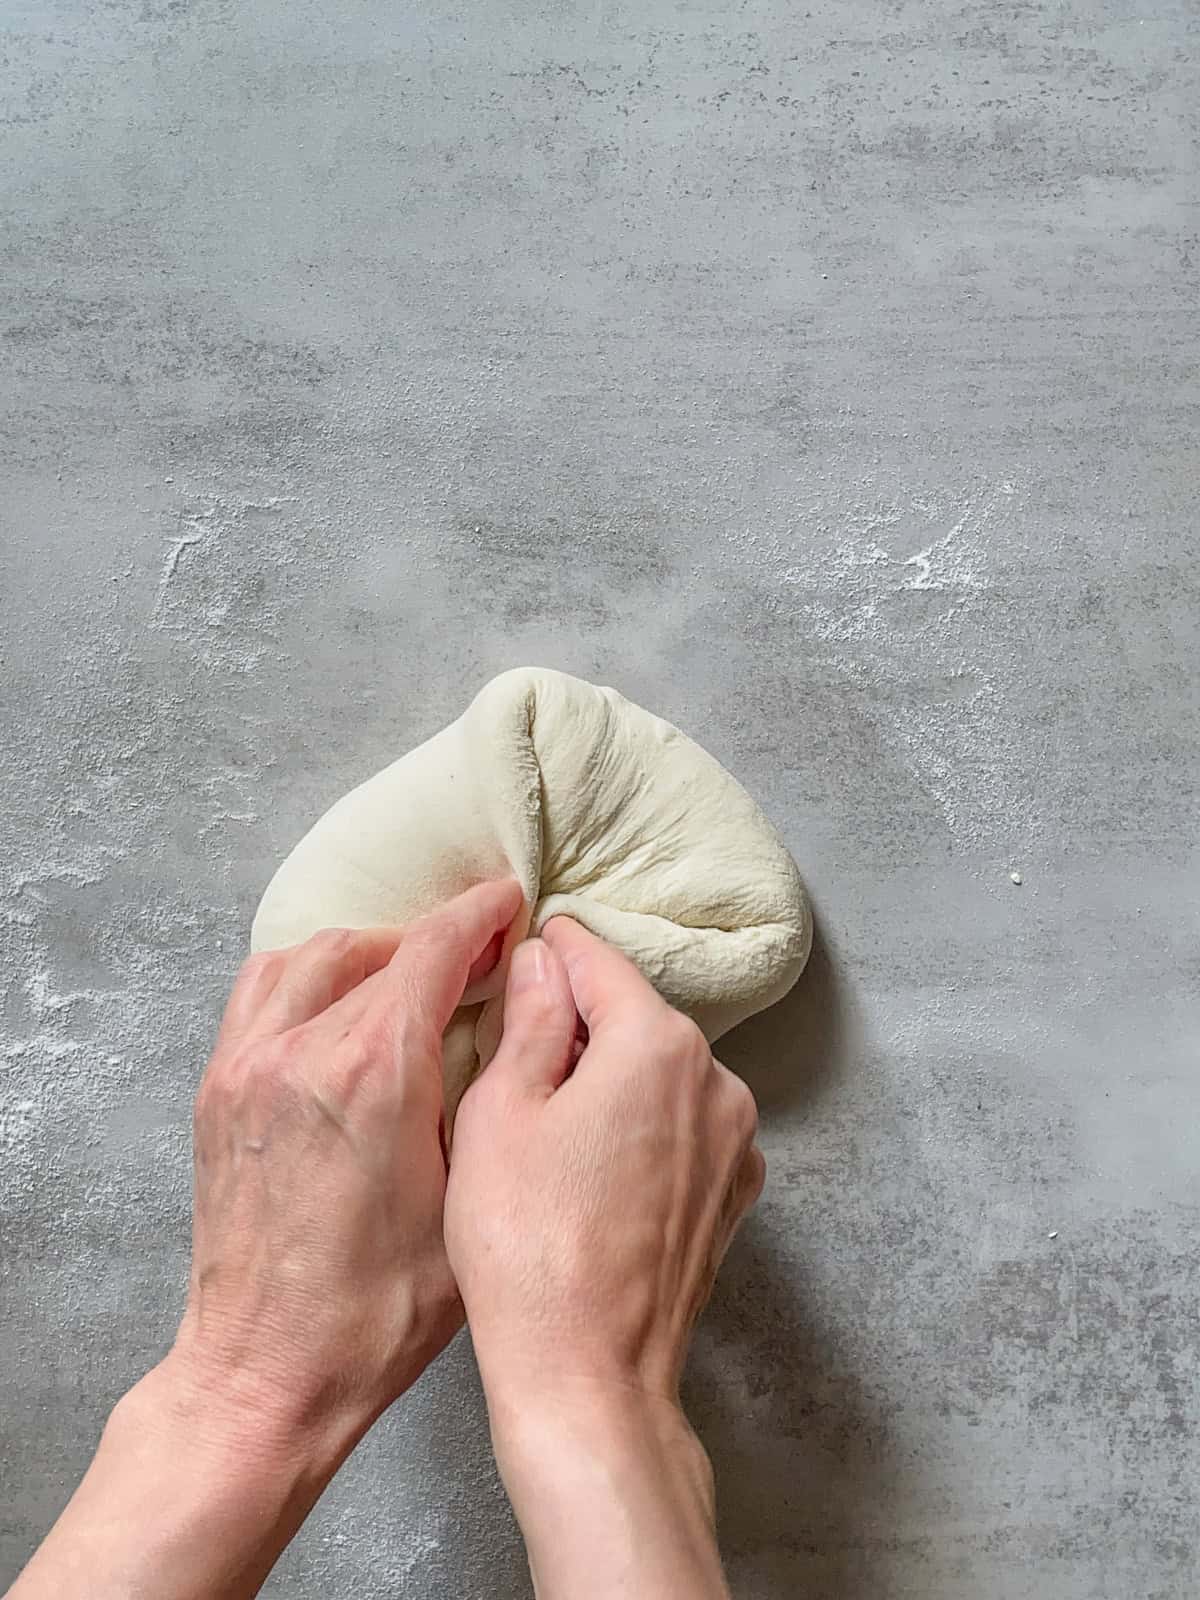
- Fold the left side over the center to overlap the right fold, then press lightly again.
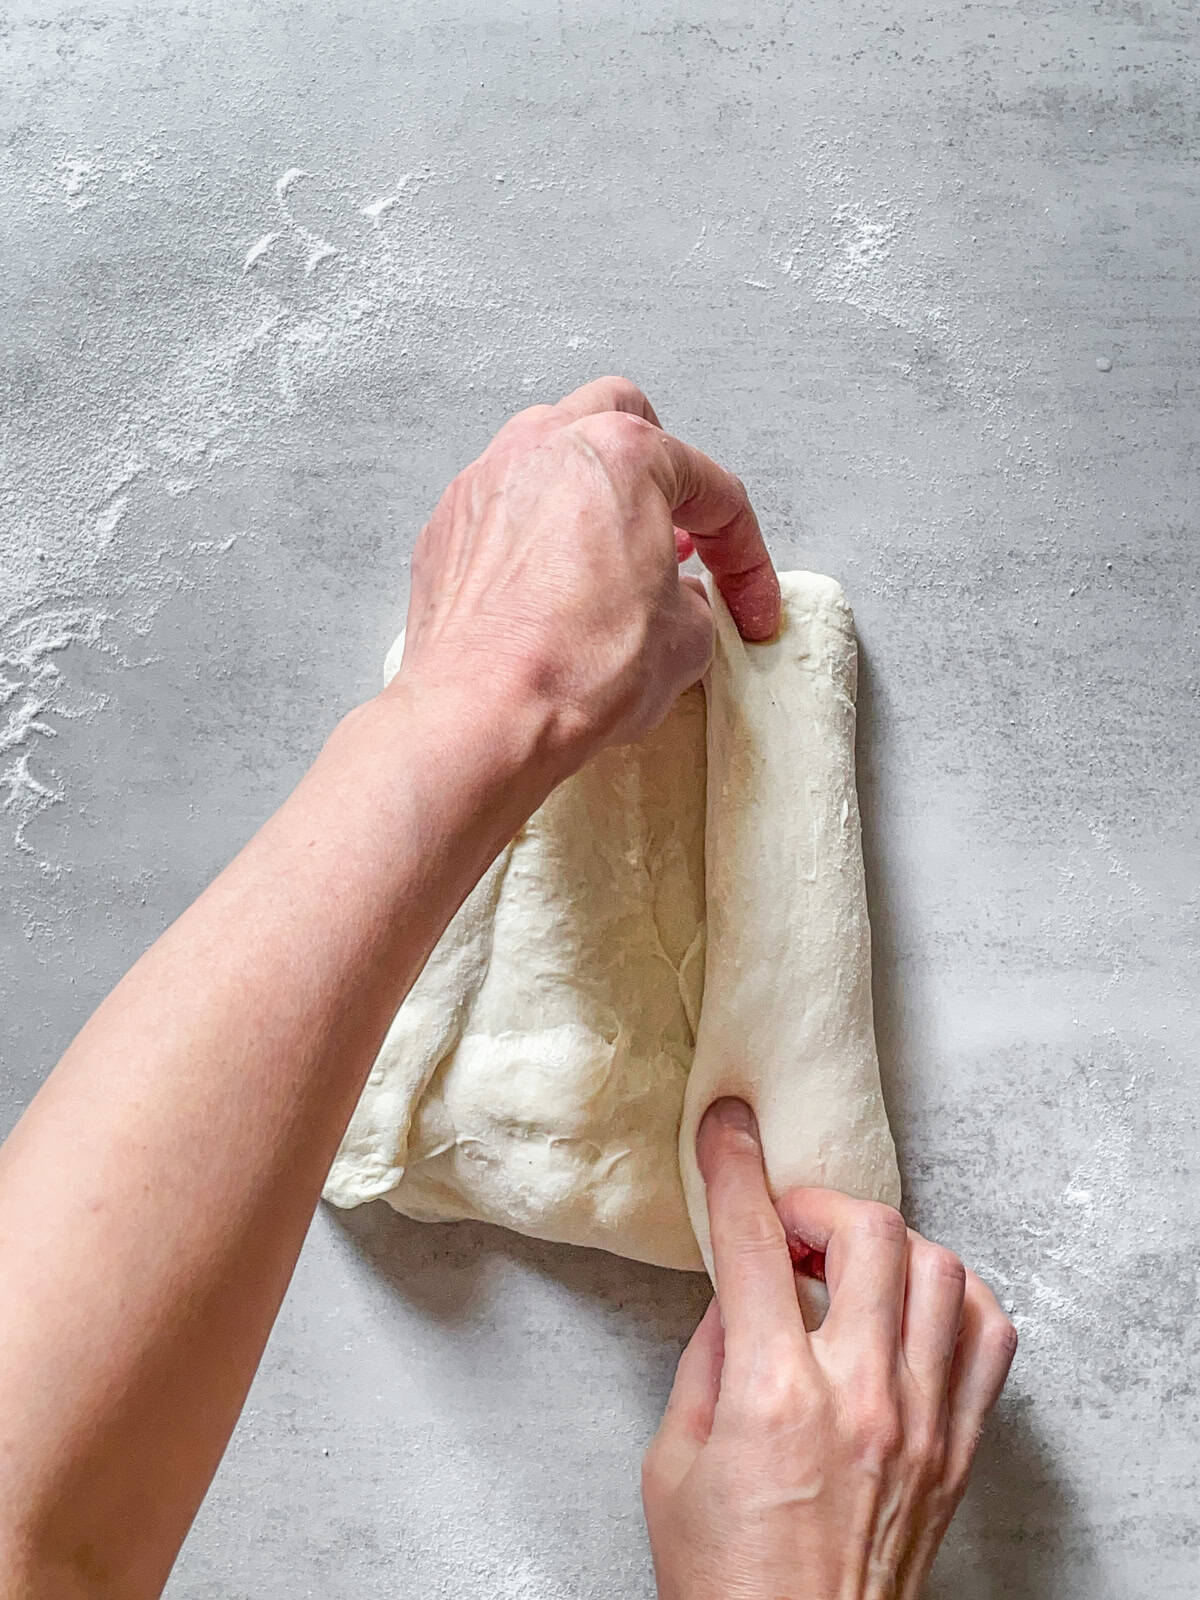
- Stretch the top edge of the dough outward slightly, then fold it down over the middle, overlapping the folds you just made.
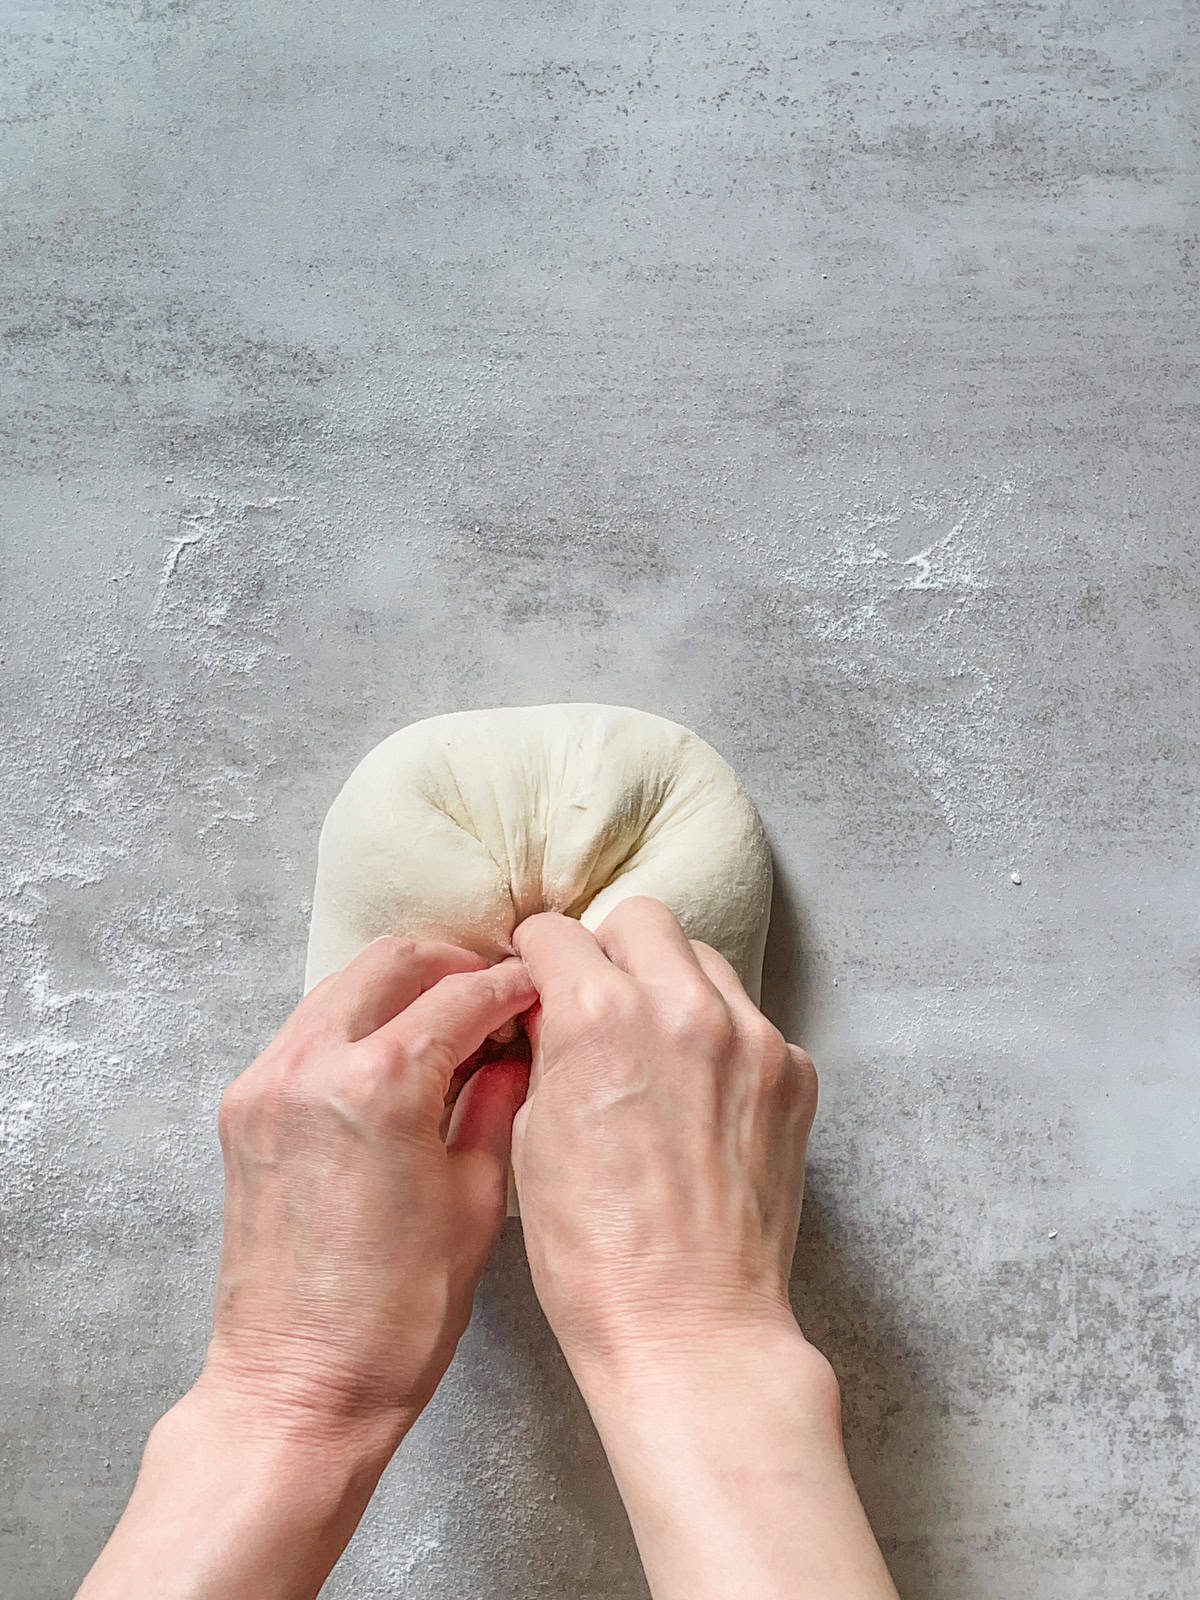
- To "stitch" the dough, use both hands to fold the right and left edges over each other, working from top to bottom. Repeat this 3 to 5 times to seal the loaf tightly.
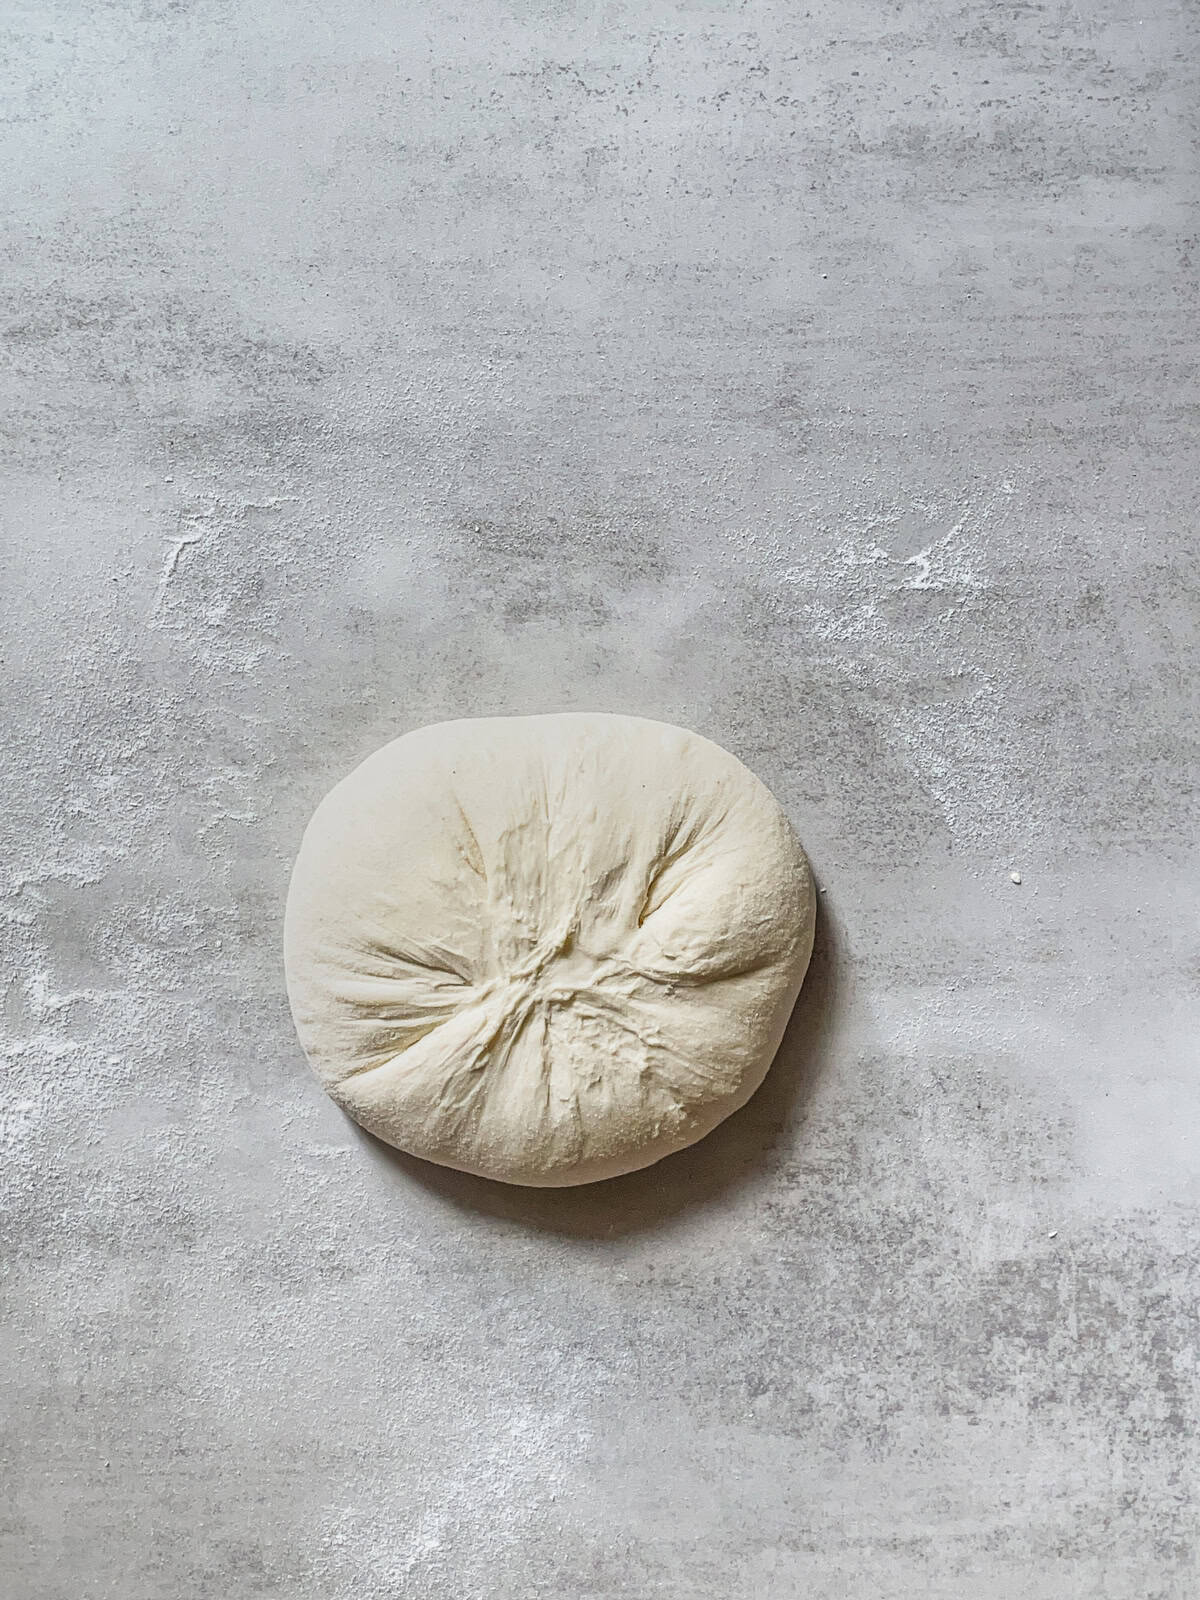
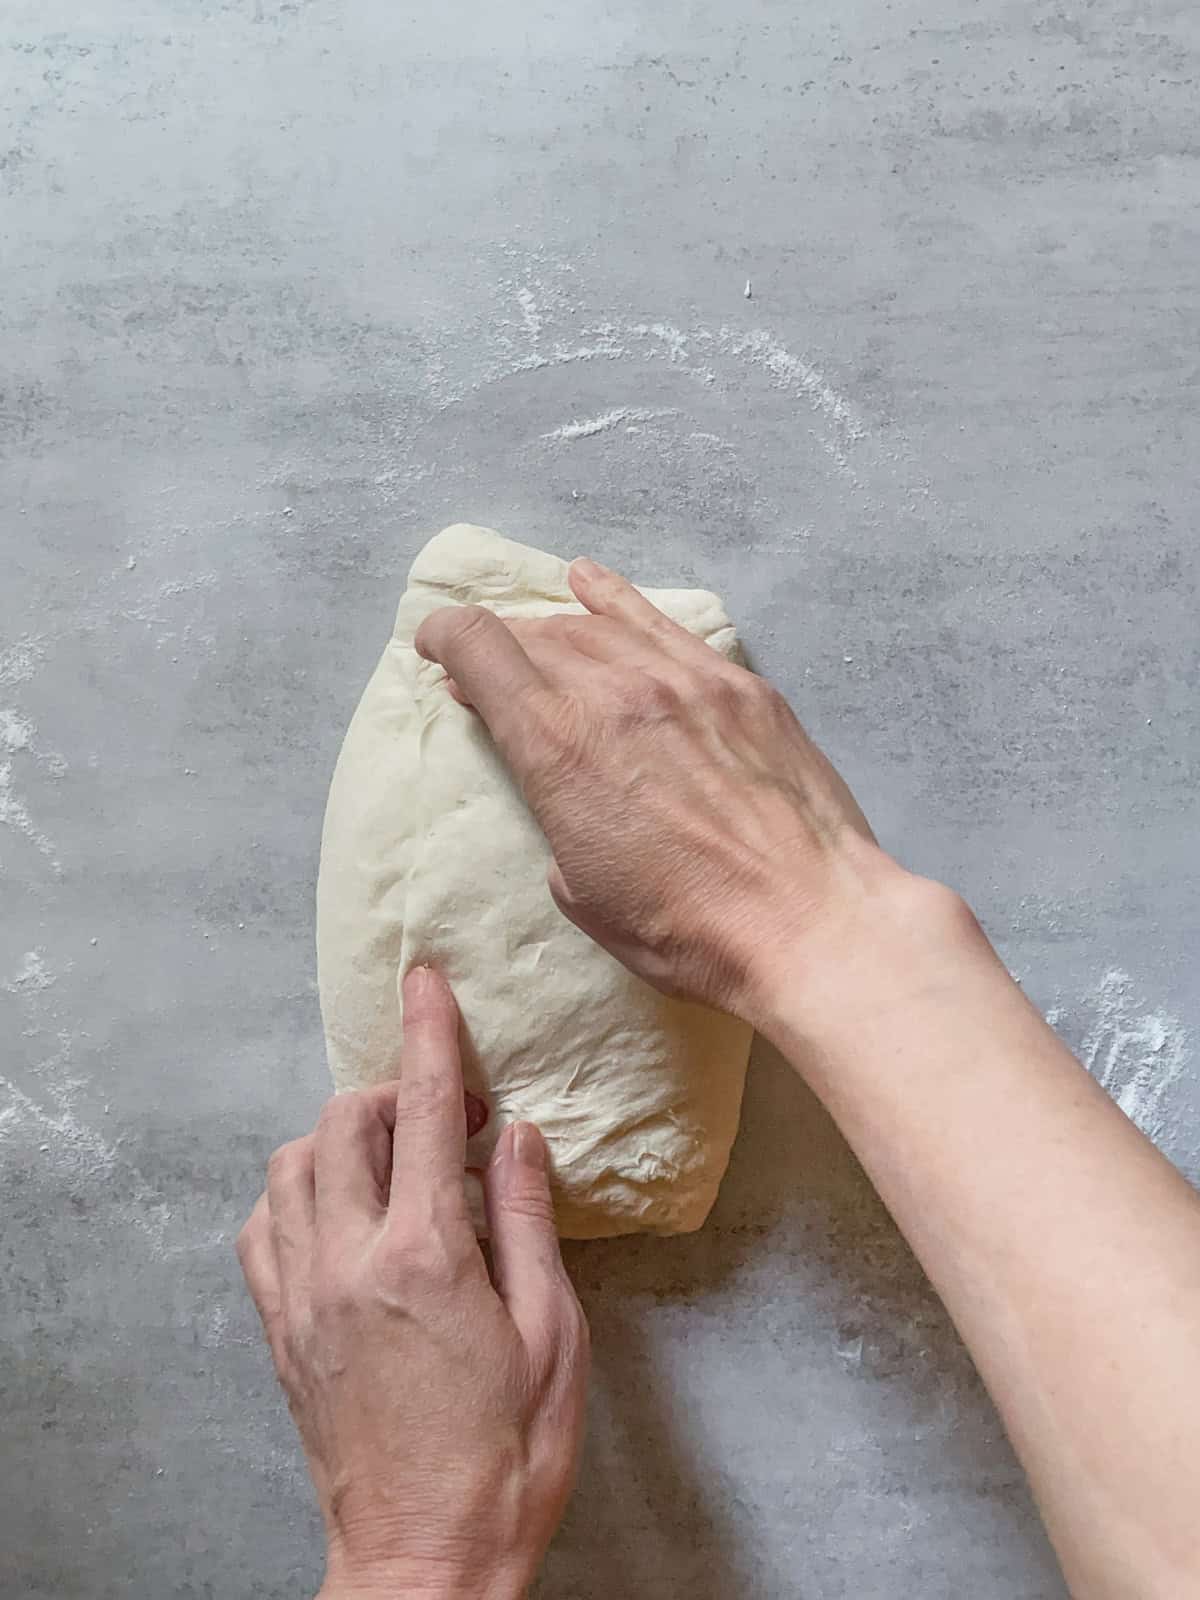
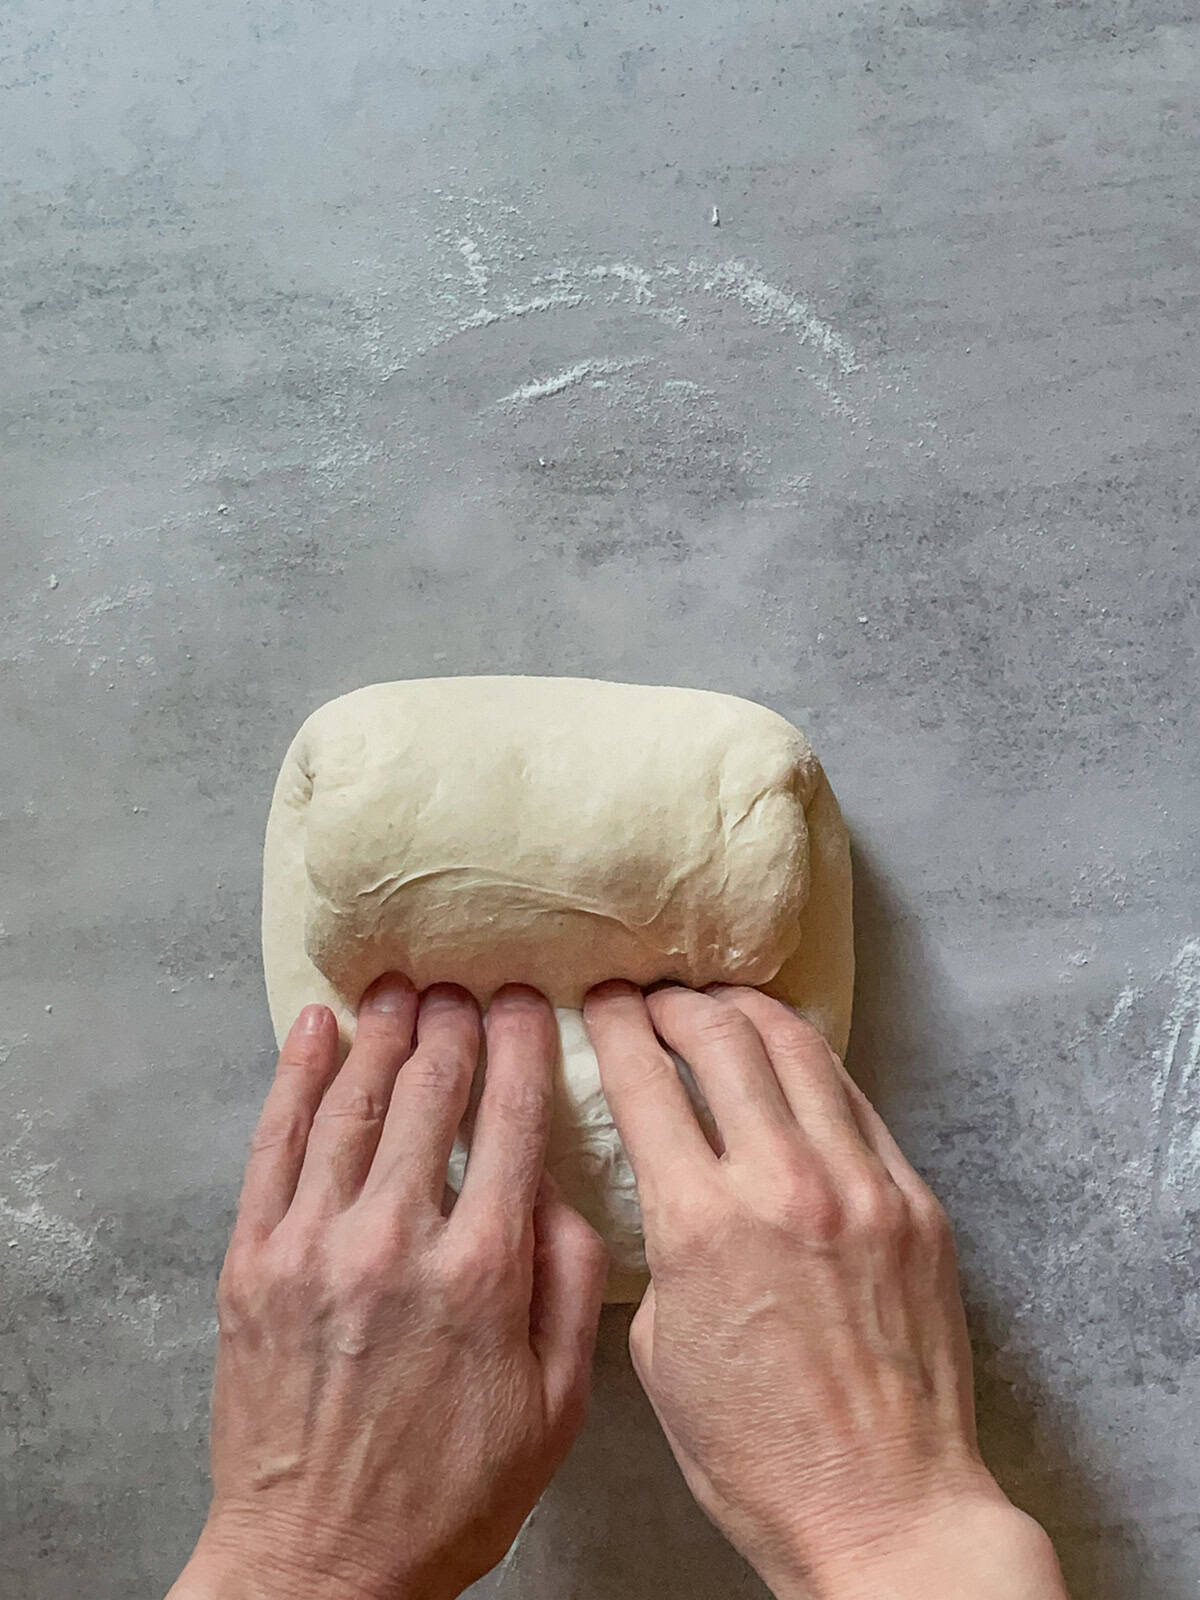
- Starting at the bottom edge, roll the dough up tightly over itself until the roll is finished.
- Use your fingers (index and thumb) to pinch and seal the ends of the loaf firmly.
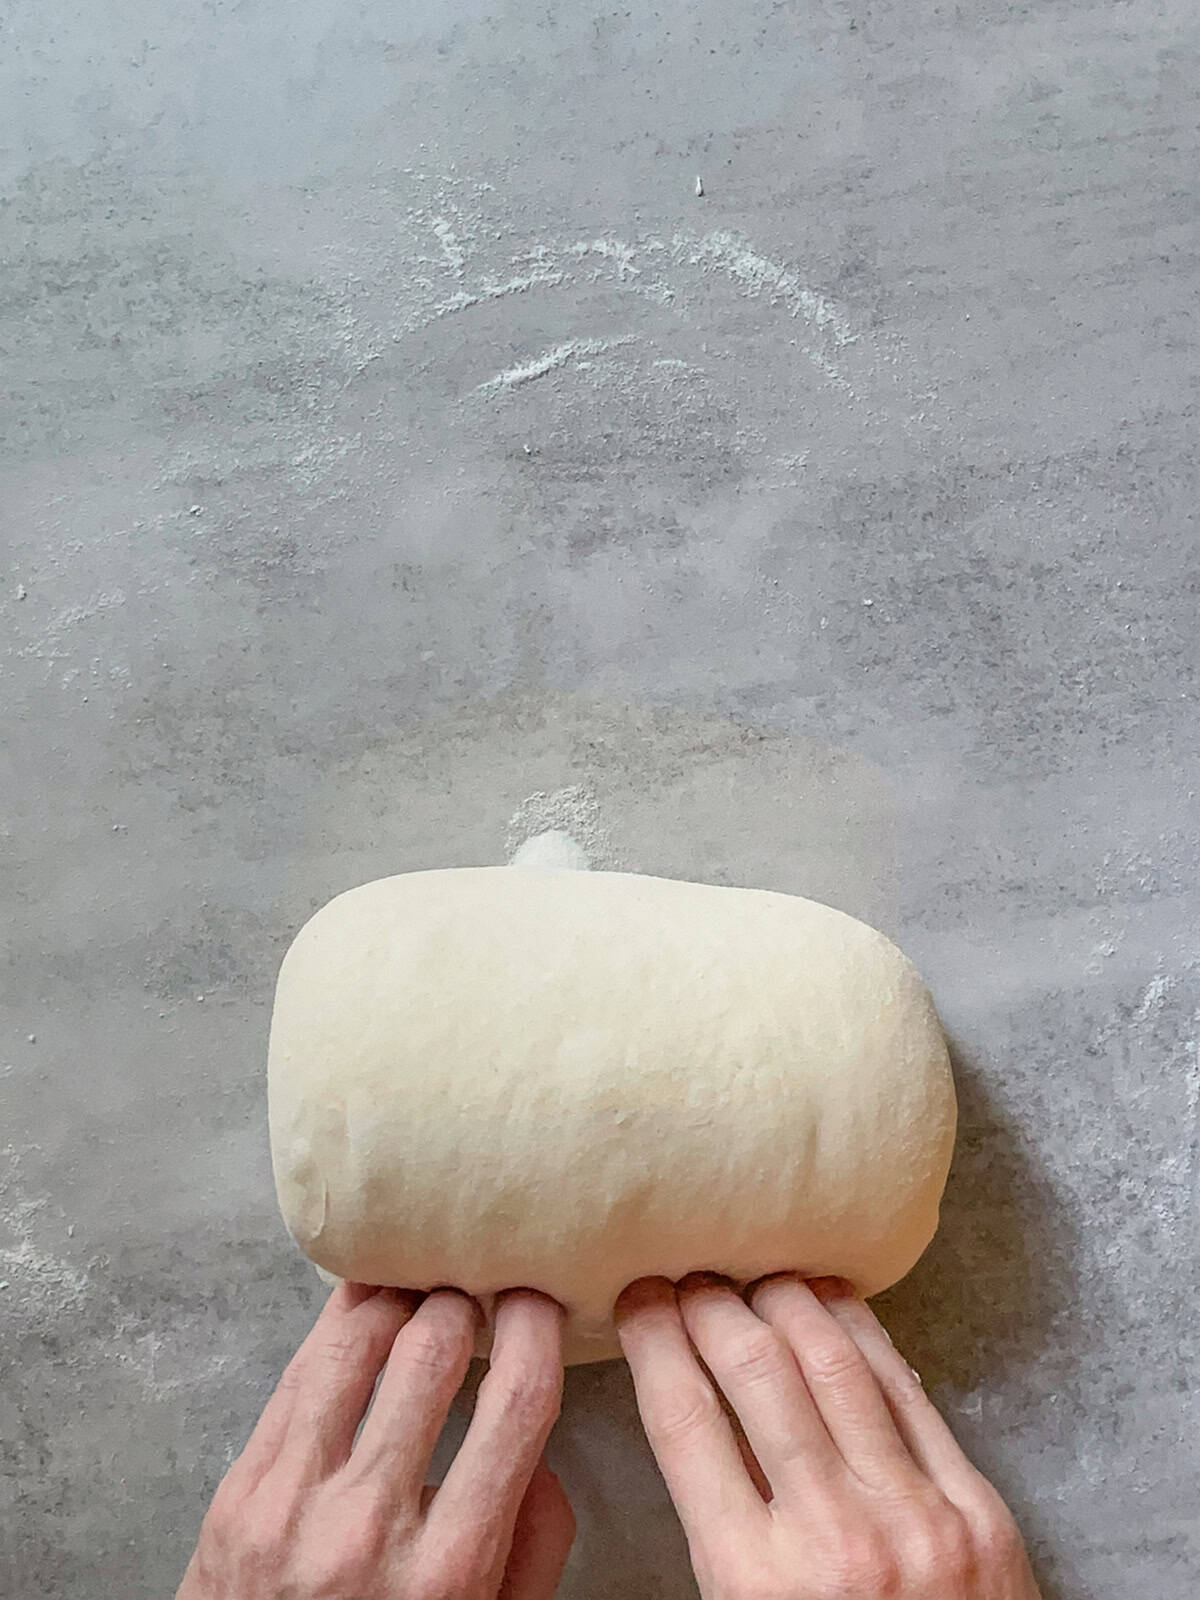
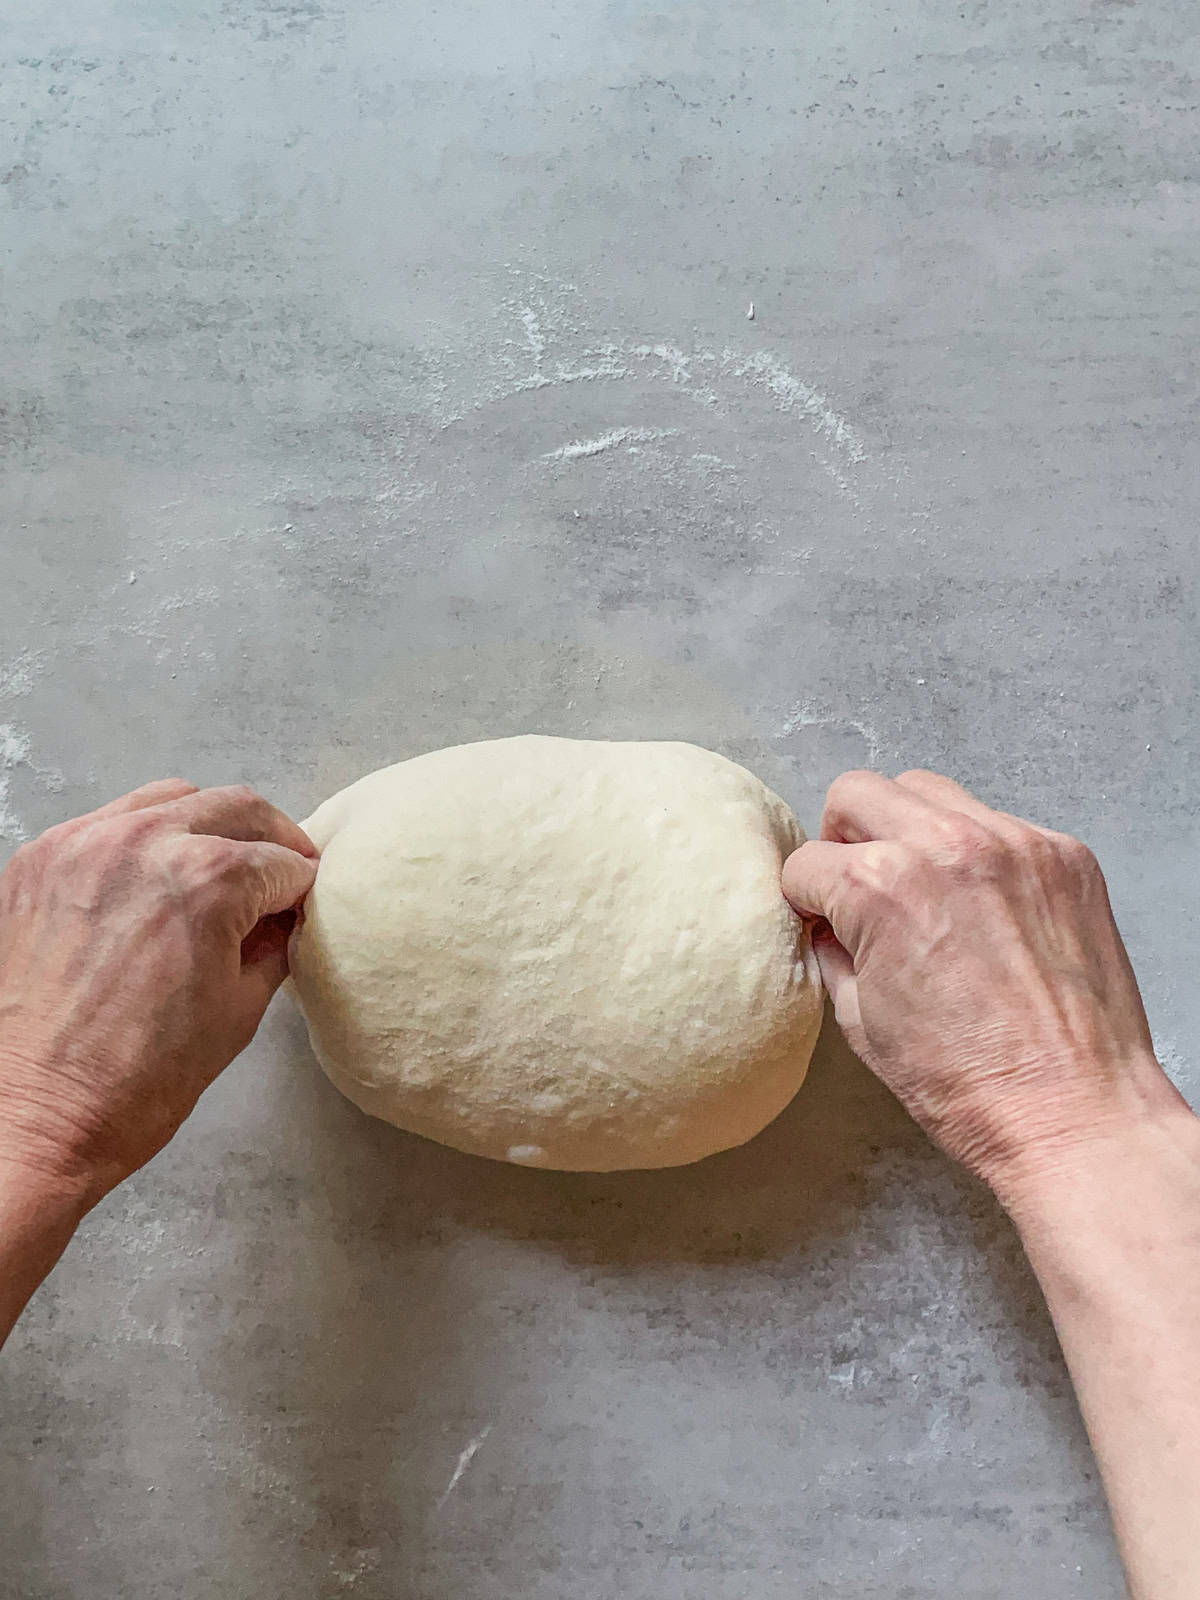
- Tighten the seam side using the bench scraper or your hands by pulling the long side of the bâtard along the working surface.
- Finally, use the bench scraper to carefully flip the bâtard into a prepared proofing basket or an alternative container, placing it seam-side up.
Cinching technique for shaping bâtard

Step 1: Lightly sprinkle a little flour (white rice flour, bread, or all-purpose flour) on top of the dough and your work surface to keep the dough from sticking. Gently flip the dough onto your work surface with the sticky side up and stretch it into a rough rectangle shape.
Step 2: Lift the left side of the dough, fold it to the center, and press it down lightly so it sticks.

Step 3: Lift the right side of the dough, fold it to the center.
Step 4: Overlap the left side, and gently press it down.
Step 5: Use both hands to gently pull the top of the dough toward you.
Step 6: Roll the dough tightly from top to bottom, pressing it lightly as you go. Use your fingers to help create a smooth, firm surface.

Step 7: Keep rolling the dough downward, maintaining gentle pressure.
Step 8: Finish rolling so the dough forms a tight, smooth cylinder.
Step 9: Pinch the ends of the dough with your thumb and index finger to seal them. To tighten the seam side, let the dough rest for 5-10 minutes or gently pull the long side toward you with your hands or a bench scraper to create surface tension.
Step 10: Use the bench scraper to carefully flip the bâtard into the prepared banneton or an alternative container with the seam side facing up. Stitch the dough (see below), then cover the banneton with a plastic cap, a wrap, or a clean plastic bag.
Caddy Clasp shaping technique
The Caddy Clasp technique, made popular by Wayne Caddy, is a simple and quick way to shape a bâtard, especially helpful when working with large batches. It helps create tall and symmetrical loaves.
This method doesn't involve folding, rolling, or stitching but focuses on squeezing the dough to create surface tension. Pre-shaping the dough is very important before using the Caddy Clasp technique.
Here are the three main variations:
Single Clasp:
- Use a bench scraper and flip the pre-shaped dough onto one hand, with the sticky side facing up.
- Squeeze the dough with both hands, pressing it together.
- Place the dough in the banneton with the seam side facing up, then clasp it to create tension.
Watch the single Caddy Clasp technique by @wayne_caddy.
Double Clasp:
- Take the pre-shaped dough with a bench scraper and flip it onto one hand, sticky side up.
- Use both hands to squeeze the dough toward the center, then place it on the work surface.
- Move to the other sides of the dough and repeat the squeezing, crimping the ends as you go.
- Place the dough into the banneton.
Watch the double Caddy Clasp technique by @wayne_caddy.
Tri-fold and clasp:
- Lightly flour your working surface to prevent the dough from sticking.
- Gently stretch your dough into a rough rectangle shape.
- Take one edge of the dough and fold it toward the center, forming a letter shape. Then, fold the opposite side over the first fold.
- With both hands, gently squeeze the dough toward the center.
- Transfer the dough to the prepared banneton with the seam side facing up and clasp it to create tension.
Final top stitching for a boule and batard
After shaping the dough with the stitching or cinching technique and placing it in the proofing basket, let it rest for about 5 minutes to relax.
Next, stitch the dough to create tension on the outside. This tension helps the dough rise rather than spread out when you score it (since the stitching stays at the bottom). If you used the Caddy Clasp technique, you can skip the final stitching since the clasp does the job.
The way you stitch the dough differs between a boule and a bâtard.
For a boule:
- Use three fingers to lift a small section of the dough and fold it toward the center. Gently press it into place.
- Repeat this around the boule 6 to 7 times, making a total of 6-7 stitches, similar to the approach demonstrated by @southworth_sourdough.
For a batard:
- Work along the middle line of the dough, using three fingers from each hand.
- Depending on the banneton's orientation, fold the edges left to right or top to bottom over one another, forming 5-7 stitches, as shown by @bakingshots.
If you want a simpler version of stitching a bâtard, check out tips from @flourhousbreadco for an easier approach.
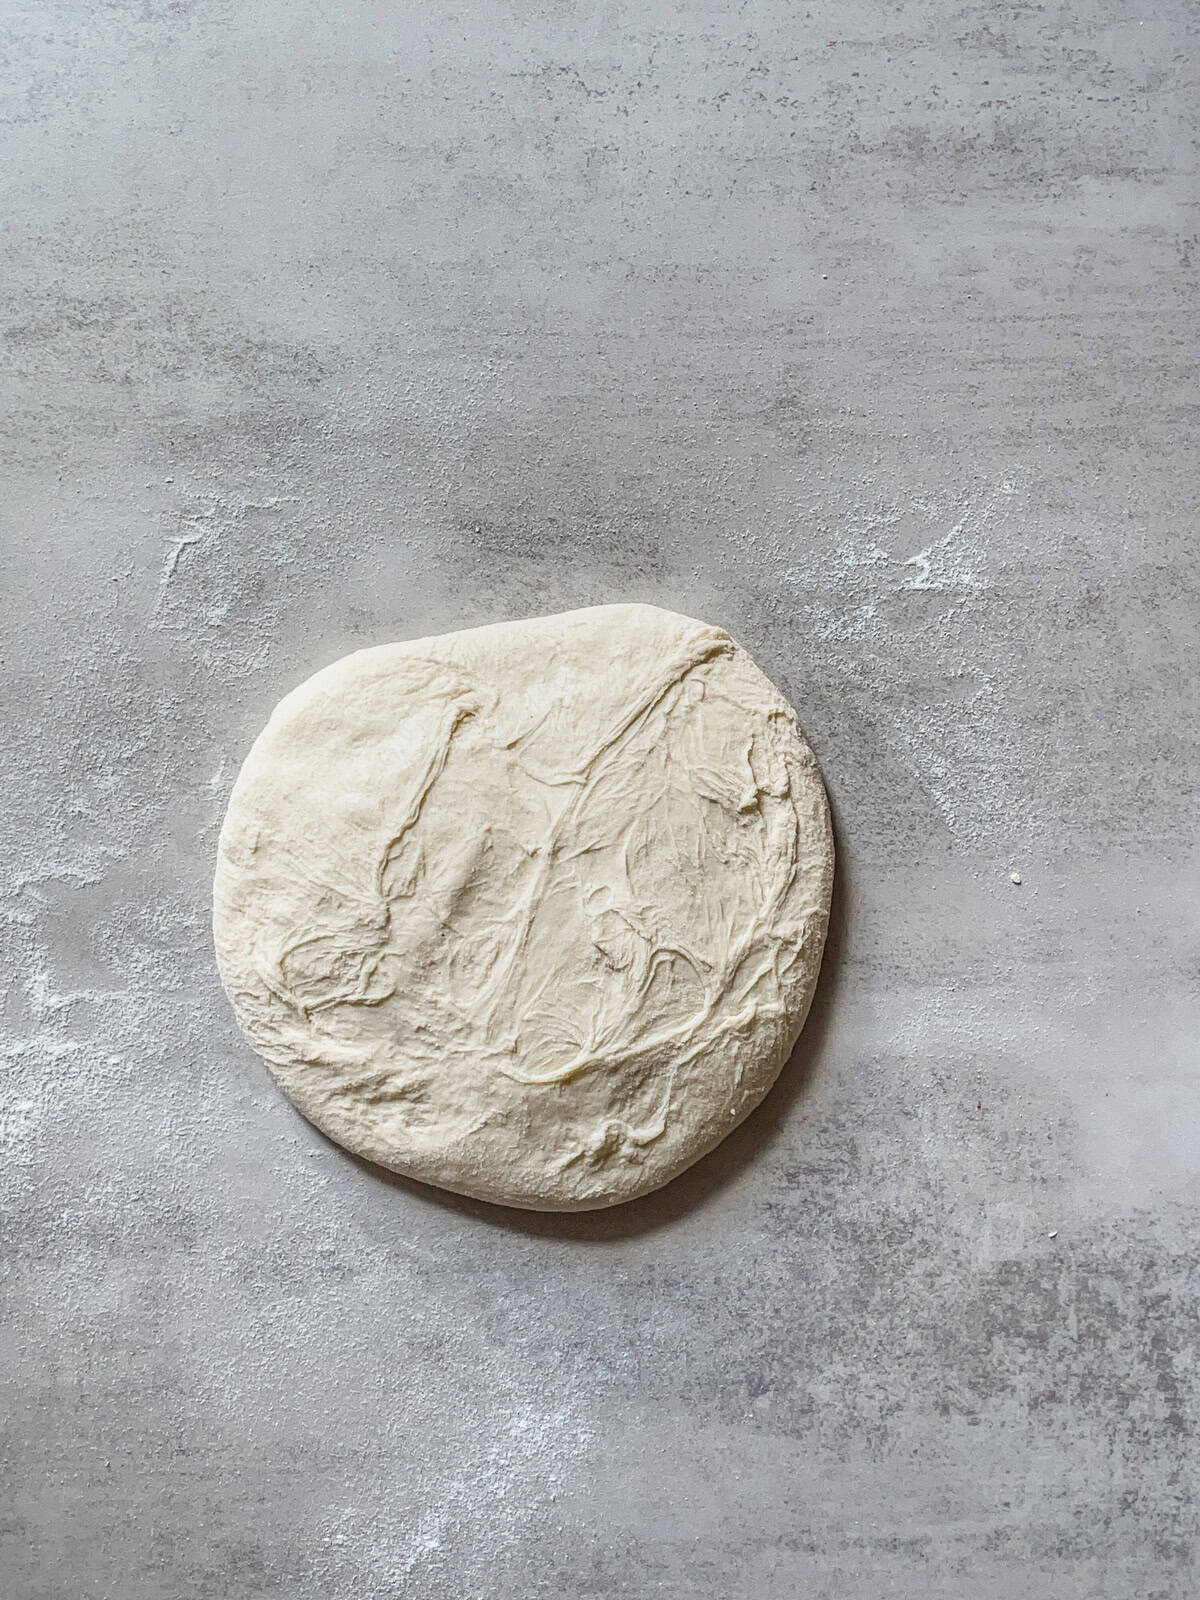
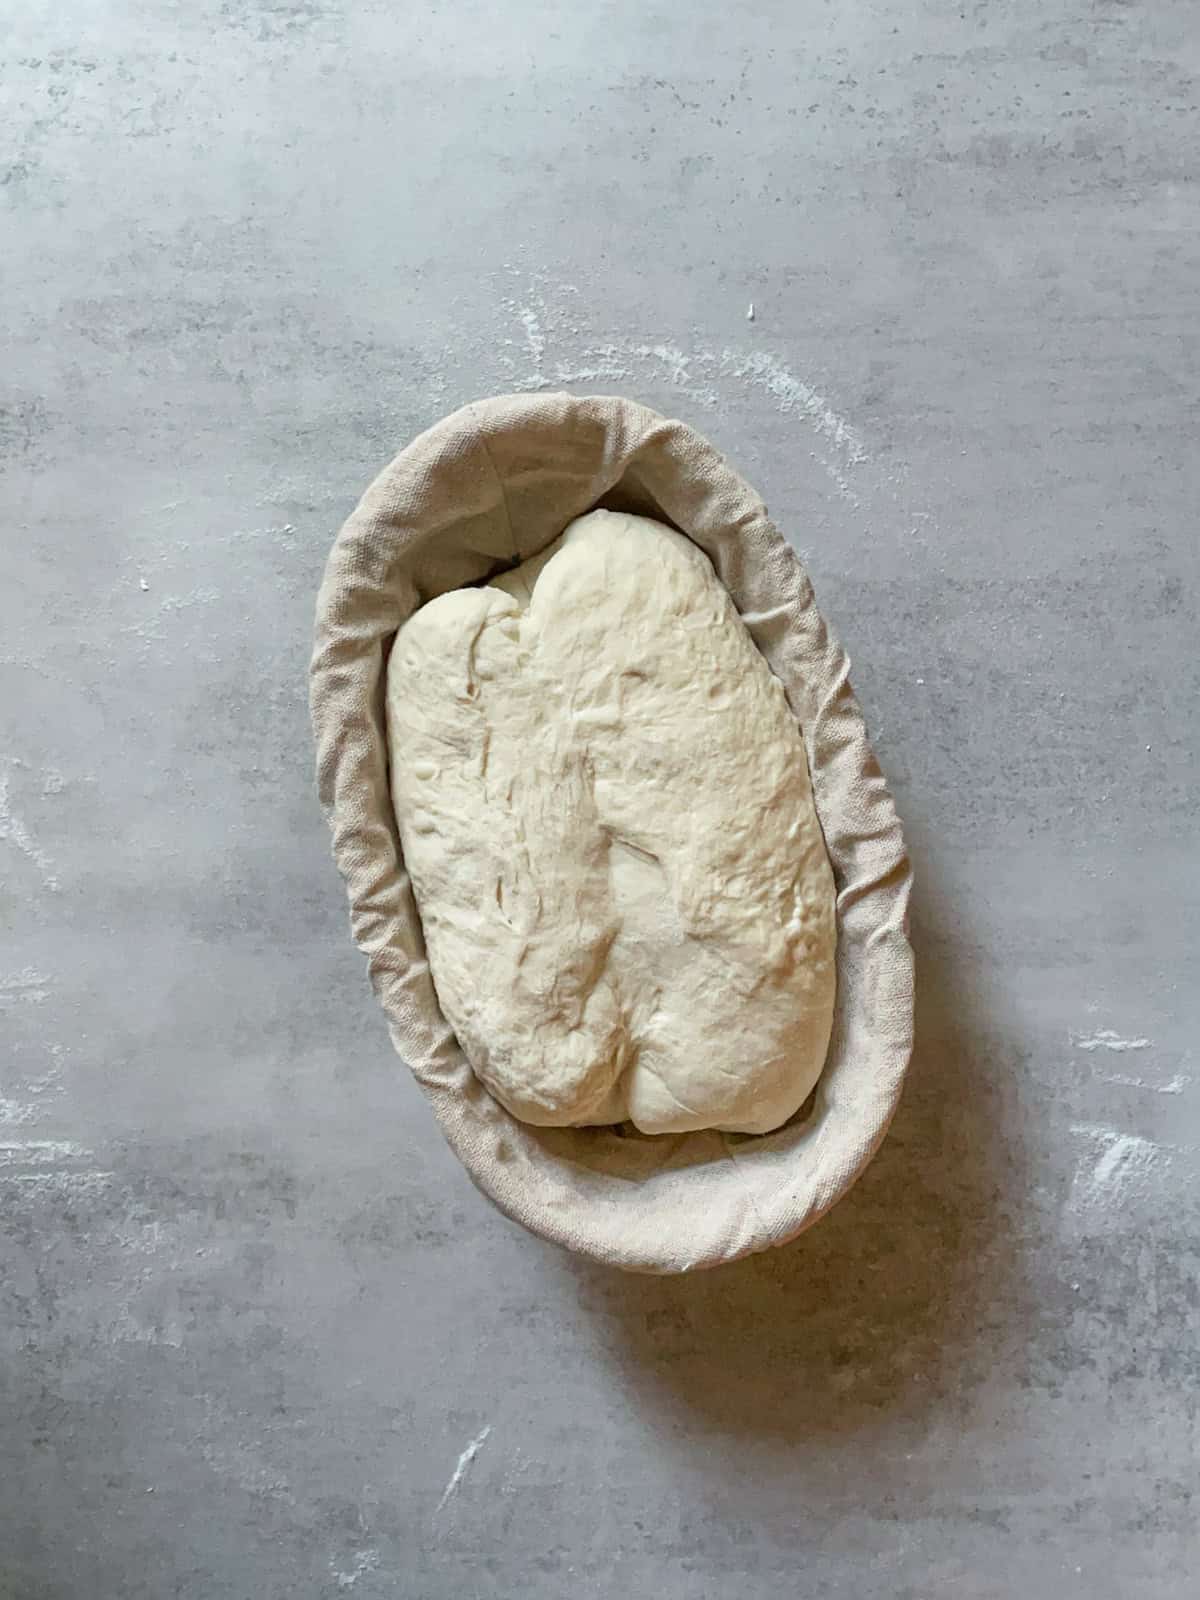
Here is how the batard looks before and after stitching.

Bread dough shaped into a bâtard before top stitching.

Bread dough shaped into a batard after top stitching.
How to shape a pan loaf
Shaping a pan loaf usually relies on the cinching technique used for bâtard shaping (see above). It works perfectly for 8-9-inch loaf pans.
However, it doesn't create an oval long enough for pans 10 inches or larger. For those, I recommend this shaping method instead.
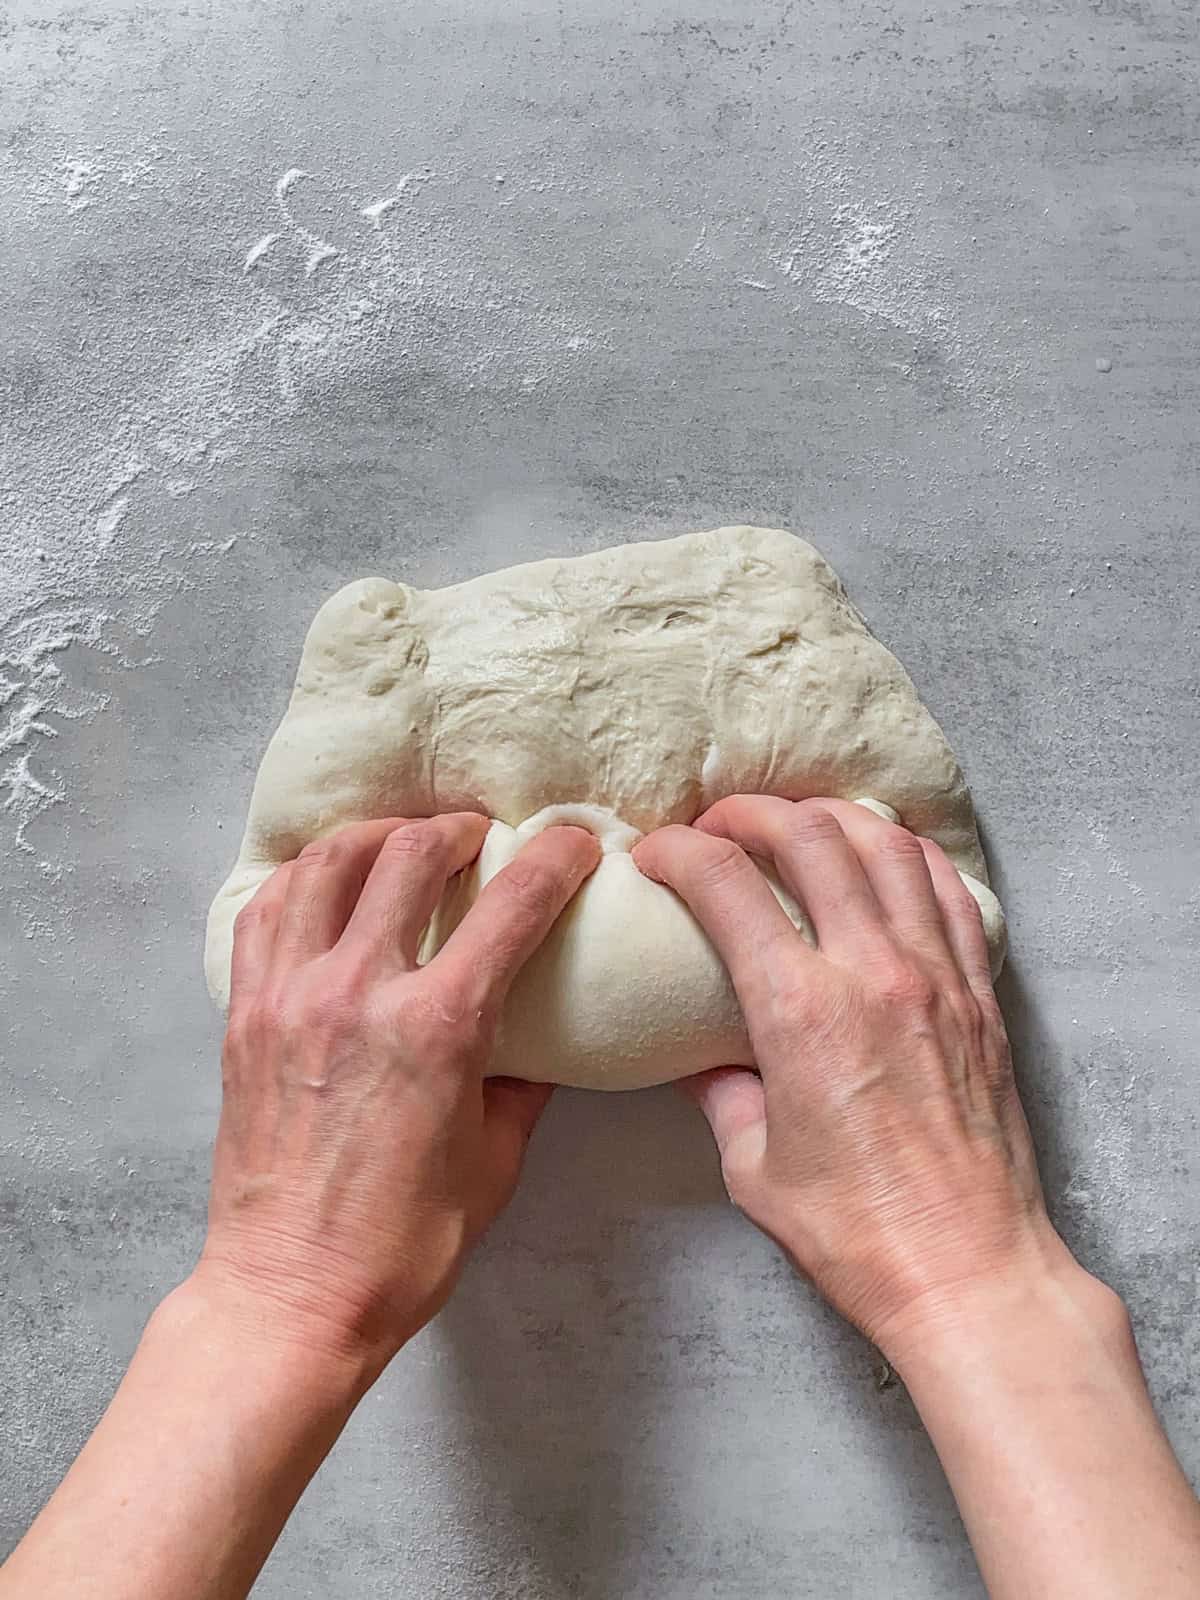
Step 1: Lightly sprinkle a little flour (white rice flour, bread, or all-purpose flour) on top of the dough and your work surface to keep the dough from sticking. Gently flip the dough onto your work surface with the sticky side up and stretch it into a rough rectangle shape.

Step 2: Press down on the dough with your fingers to lightly degas it, using motions similar to those for making focaccia.

Step 3: Lift the bottom edge of the dough and fold it upward about 2 inches (5 cm), not all the way to the center. Gently press the fold to seal it in place.

Step 4: Lift the left side of the dough and fold it in about 2-3 inches toward the middle, pressing it down slightly to stick.
Step 5: Do the same with the right side, lifting the right side of the dough about 2-3 inches and folding it toward the center. Gently press to make it stick.
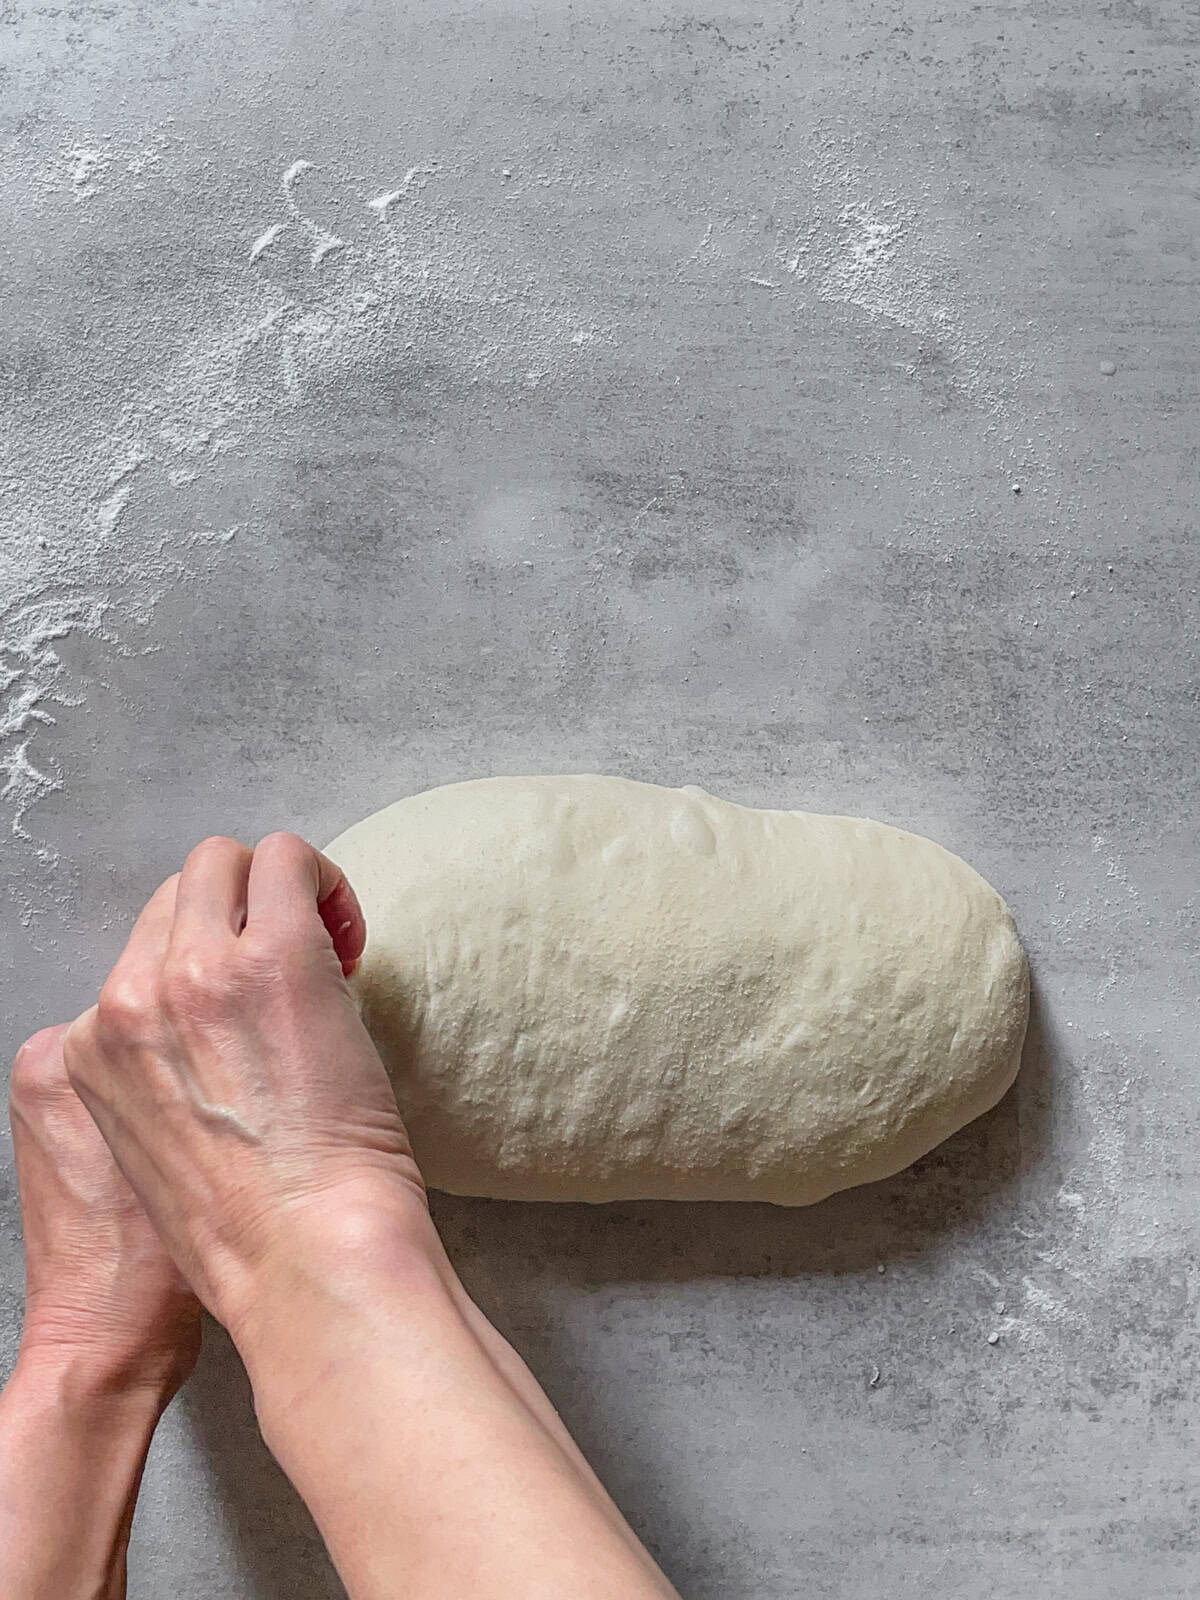
Step 6: With both hands, grab the bottom of the dough and pull it up.
Step 7: Continue rolling the dough from bottom to top so the dough forms a tight, smooth, and long cylinder.
Step 8: Use your fingers to stitch the ends to close them tightly.
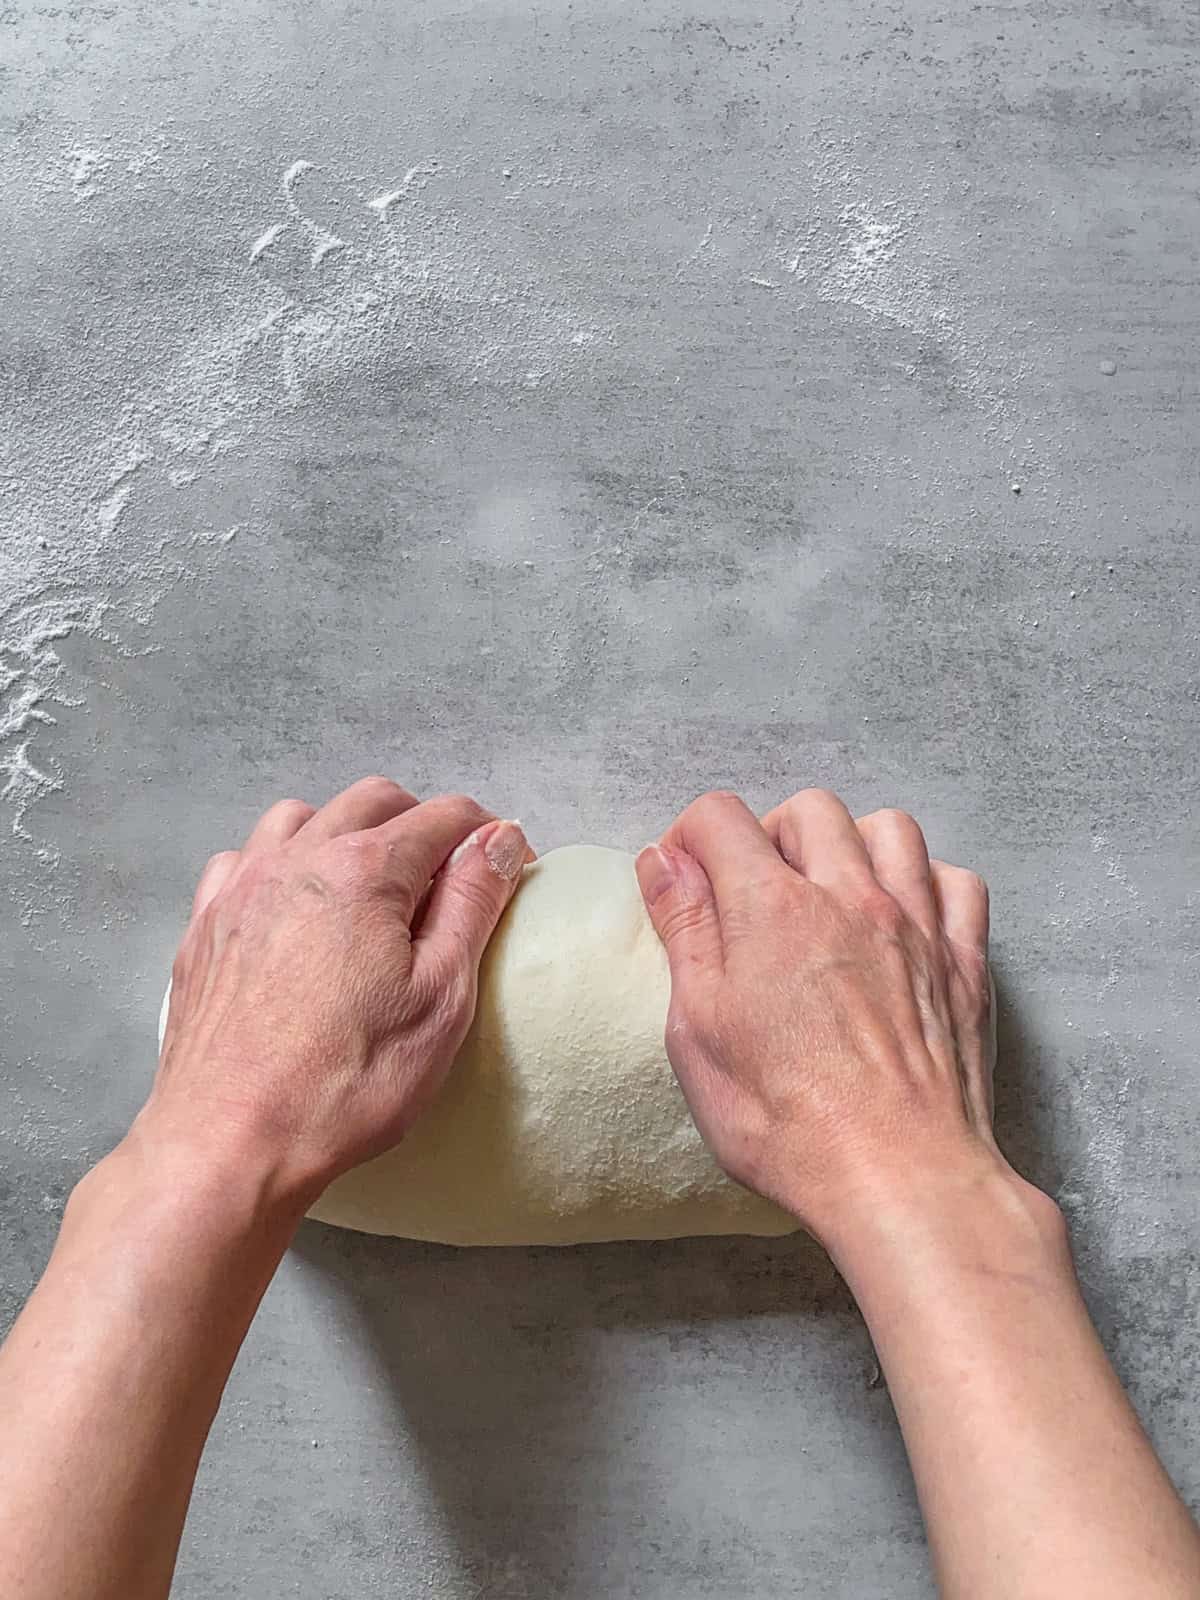
Step 9: Tighten the seam side using the bench scraper or your hands by pulling the long side of the bâtard along the working surface.
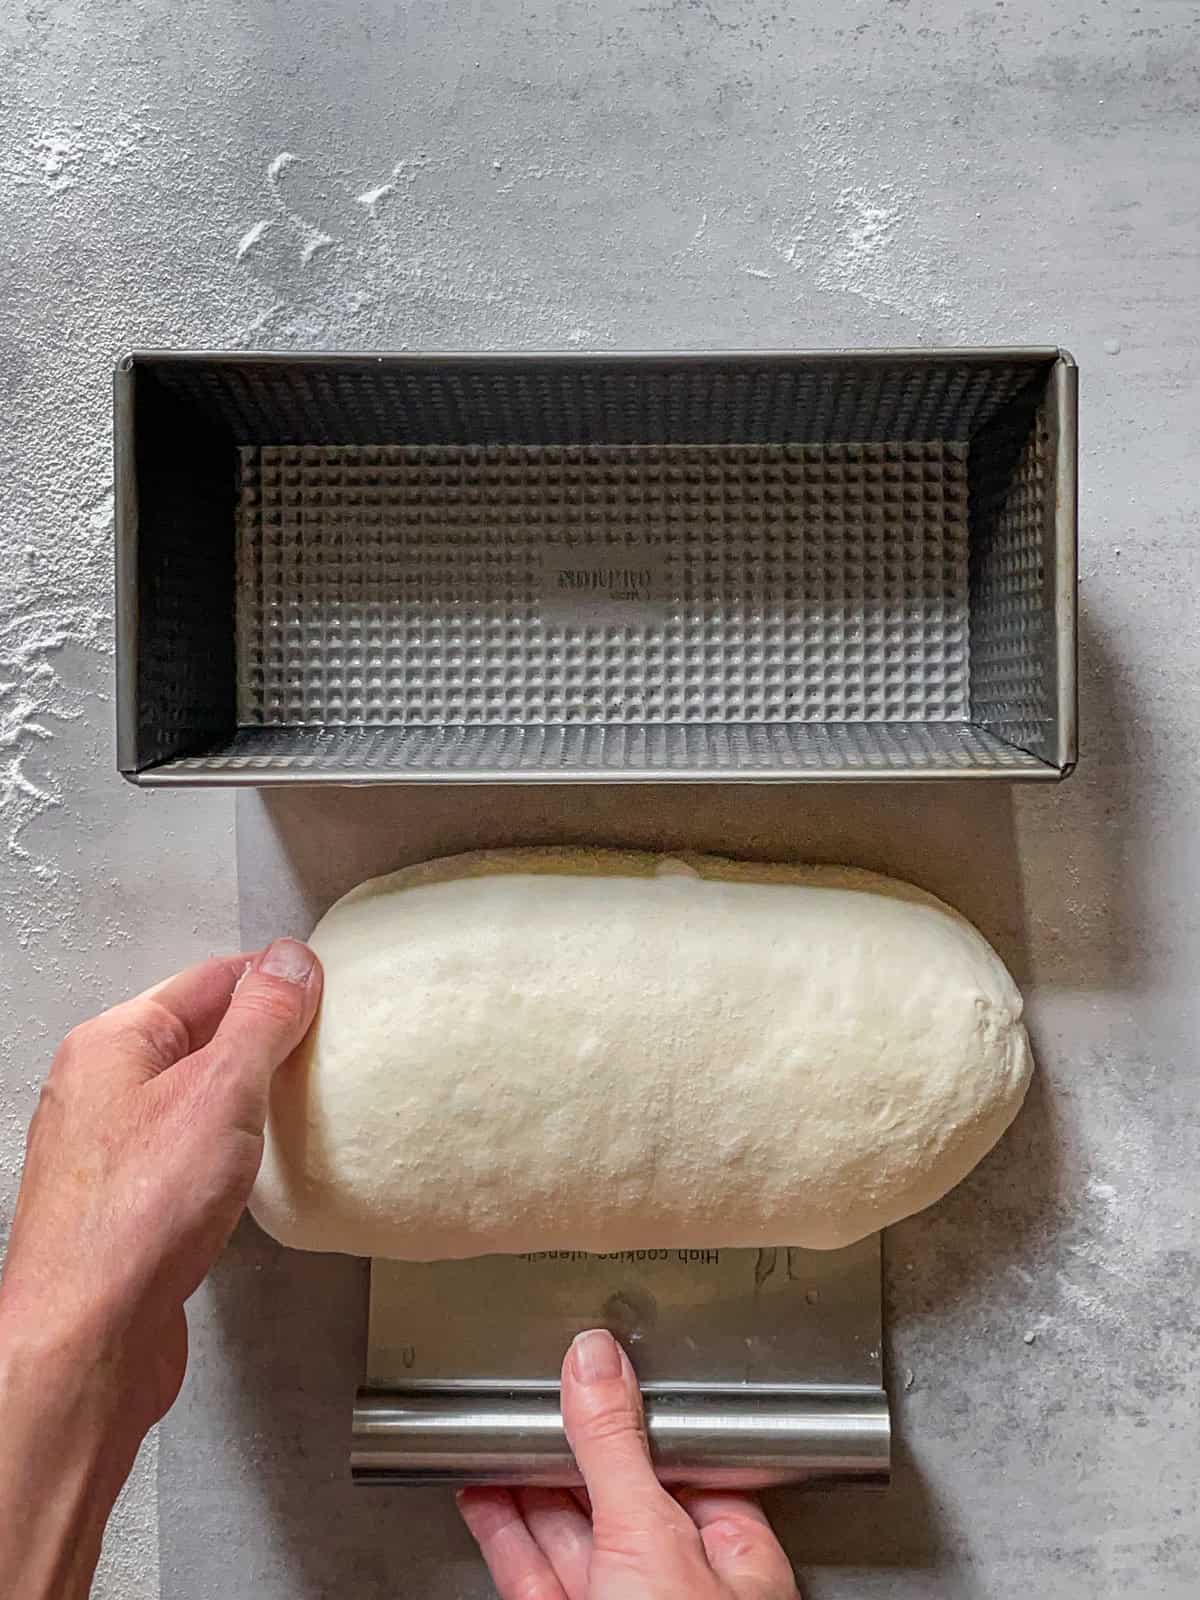
Step 10: Use a bench scraper to flip the batard into the prepared banneton or a greased loaf pan (use a cooking spray or parchment liners).

Step 11: Place the dough with the seam side facing down.
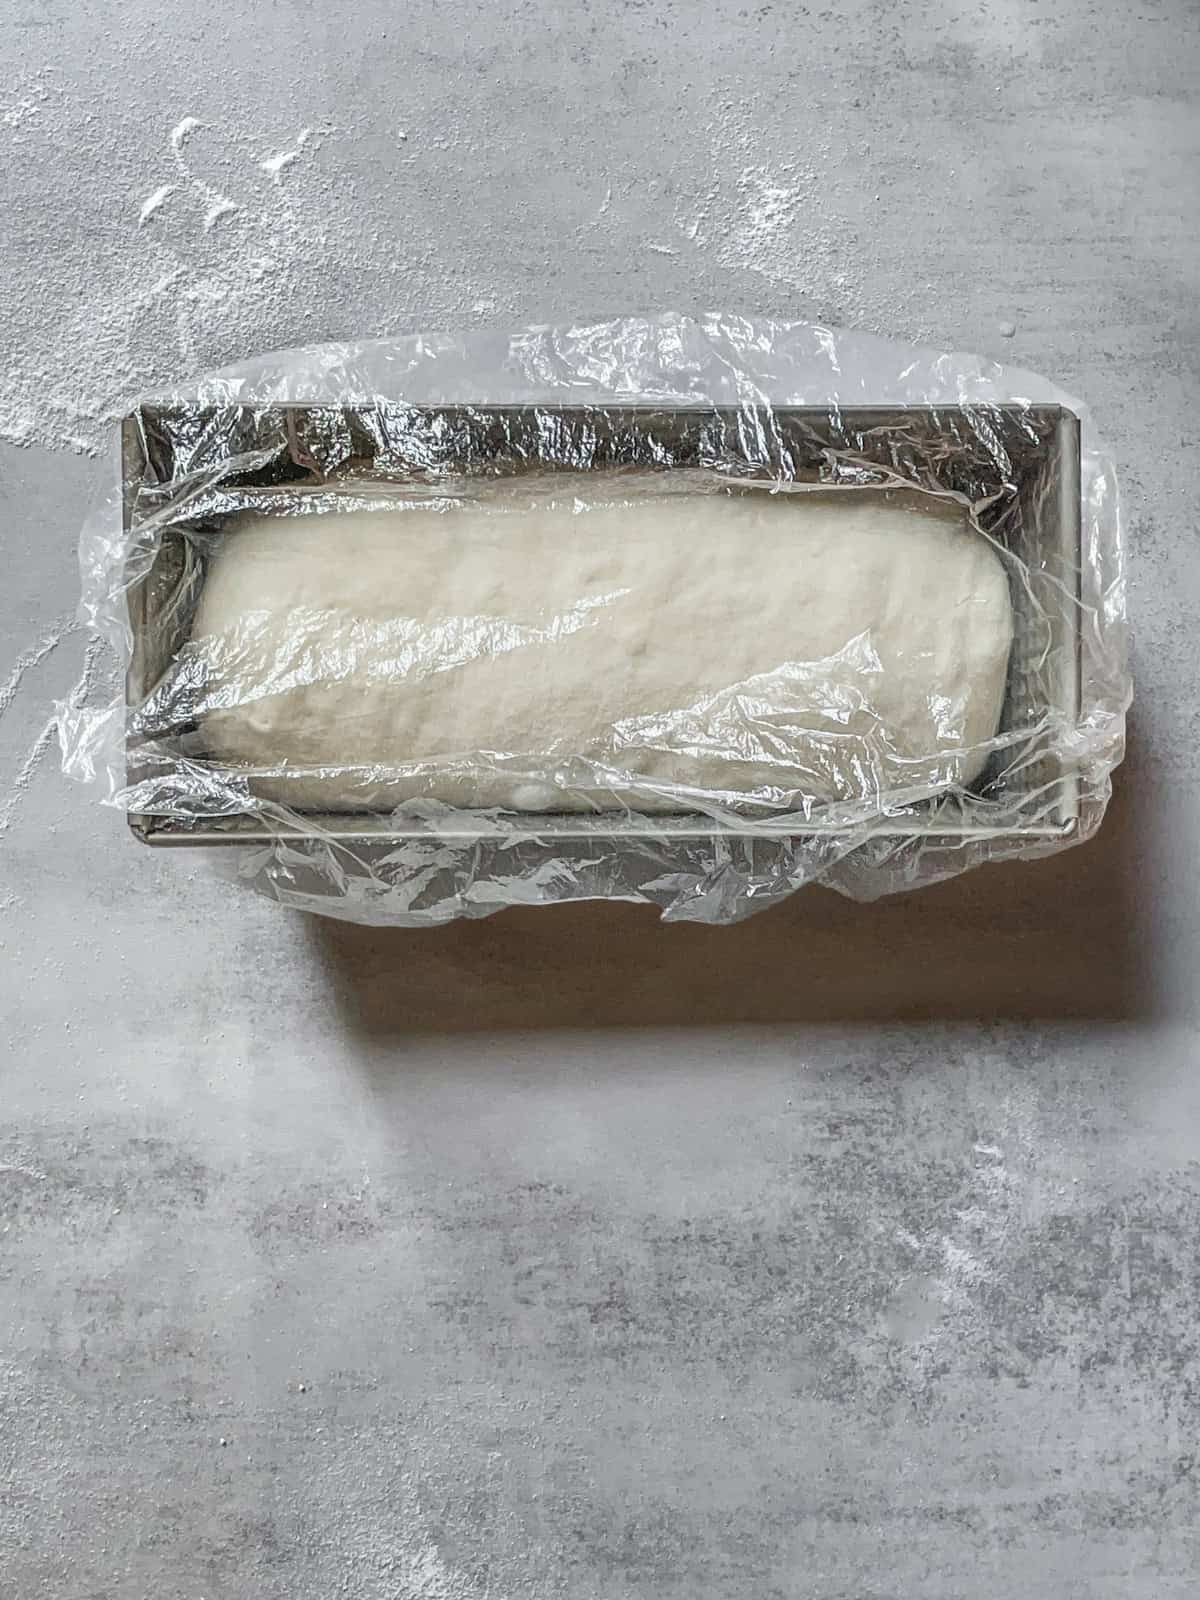
Step 11: Cover the loaf pan with a plastic cap, plastic wrap, or a clean plastic bag.
Top tips
- Handle with care: Be gentle when working with sourdough. Don't press too hard while shaping to preserve the air pockets.
- Lightly flour the work surface: Use just enough flour to prevent the dough from sticking, but avoid overflouring. Too much flour can make shaping harder and stop the dough from sealing properly.
- Create surface tension: Use your hands to gently pull the dough across the work surface, tucking the edges under as you go. This helps build tension without tearing.
- Flip the dough correctly: When placing the dough in a banneton, flip a boule or batard with the seam side facing up. For a pan loaf, flip with the seam side facing down.
- Keep it simple: For beginners, start with simple shapes, such as a boule (round). It is forgiving and easier to manage. Over time, you can experiment with other shaping techniques.
- Use the right proofing tools: A banneton or a banneton alternative helps maintain shape during final proofing and prevents sticking.
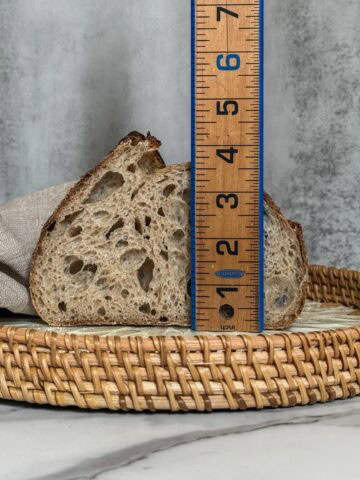
- Pop bubbles: Use a toothpick to gently pop any large bubbles while shaping or in the banneton. These big fermentation bubbles cause large holes, so releasing them helps achieve a denser, more even crumb (yes, to keep the butter!).
Handling dough: gentle vs. firm techniques
Should you handle the dough gently or more roughly when shaping it? It depends on its strength and the type of crumb you want.
- For high-protein flour, use a slightly rougher technique, like slapping the dough and popping large bubbles as you go. Check out a short video by @padocadoalex for an example.
- For an open crumb, use a gentle touch to preserve the dough's structure. Watch the shaping technique by @trevorjaywilson as a great example.
The general rule is that shaping goes well as long as the outer layer of the dough remains intact and doesn't tear.
Watch shaping techniques
Watch videos on Instagram and YouTube for sourdough shaping techniques. Here are a few to watch:
- "Gathering" technique for a boule from @eds_bred
- "Envelope" technique from @theinvybaker, "Stitching" technique from @trevorjaywilson, and again "Envelope" shaping from @padocadoalex
- "Cinching" technique and a variation of "cinching" from @trevorjaywilson
- "Degassing" technique for lower hydration bread from @trevorjaywilson
Let's talk sourdough
What's your go-to shaping style? Do you love the rustic round of a boule, the elegant bâtard, or the classic pan loaf for that perfect crust?
Ready to keep learning?
With your loaves shaped, the next step is letting them rise. Follow my sourdough proofing guide to understand timing, signs of readiness, and tips for perfect bread.
William Pettinger says
Hello Irina, thank you for all your lessons and videos. I've baked my first loaf Sunday. It wasn't perfect by no means but it looked nice. It did lack that tang and was a little dense. But still tasted better than store bought bread. Thanks again for all you do for us. I will go back and read and watch everything before my next loaf. Bill
Irina Totterman says
Hi Bill! Happy to hear the guides helped you bake your first sourdough loaf. Can’t wait to share more tips!!!