Quick Summary: Your sourdough starter is at its peak when it has risen to its highest point and is just about to deflate. Look for a starter that has doubled or tripled, with a flattened (not domed) top showing wrinkles, bubbles throughout, a light, airy texture, and a pleasant, tangy smell.
Most starters peak 4 to 12 hours after feeding, depending on temperature, hydration, flour, and feeding ratio. That is the ideal moment to bake or build levain.
I still remember the first time I tried to tell whether my starter had peaked. I had no idea what the word even meant or what to look for, and I didn't understand the factors that affect timing. But the more I baked, the more I realized how much this single moment shapes your loaf.
What is the peak of a sourdough starter?
The sourdough starter peak is reached when it has fully fermented and is at its highest activity level, just before it starts to deflate.
At this point, the yeast is working hard, producing carbon dioxide. This causes the starter to rise. When the starter reaches this peak, it is fully active and ready for baking.
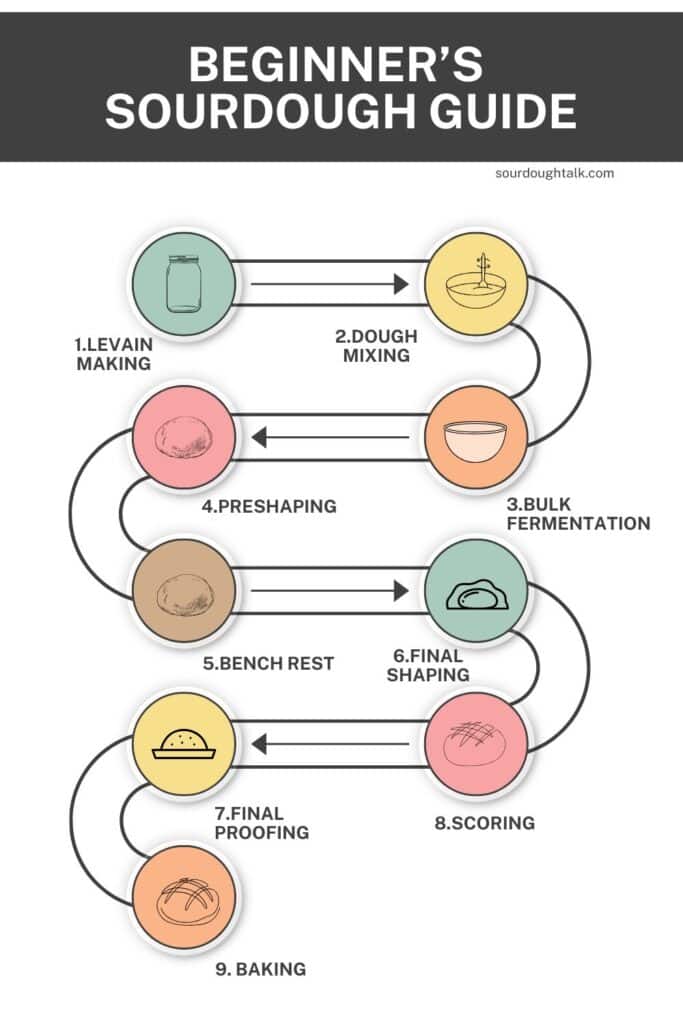
Your Beginner's Guide to Sourdough
This post is part of a series that walks you through every step, from feeding your starter to pulling the loaf from the oven.
The science behind the sourdough starter peak
The yeast in your starter is the key to the fermentation process. As the yeast cells reproduce, they release carbon dioxide gas, which causes the starter to swell and rise in the jar.
The peak occurs when yeast activity is highest, and the starter reaches its maximum height. At peak, the yeast colony is at its largest. The more yeast cells there are, the more gas they produce, and the higher the rise of your sourdough bread.
After this, once the yeast has consumed all the food, the starter will start to deflate.
How to know when your starter has reached its peak
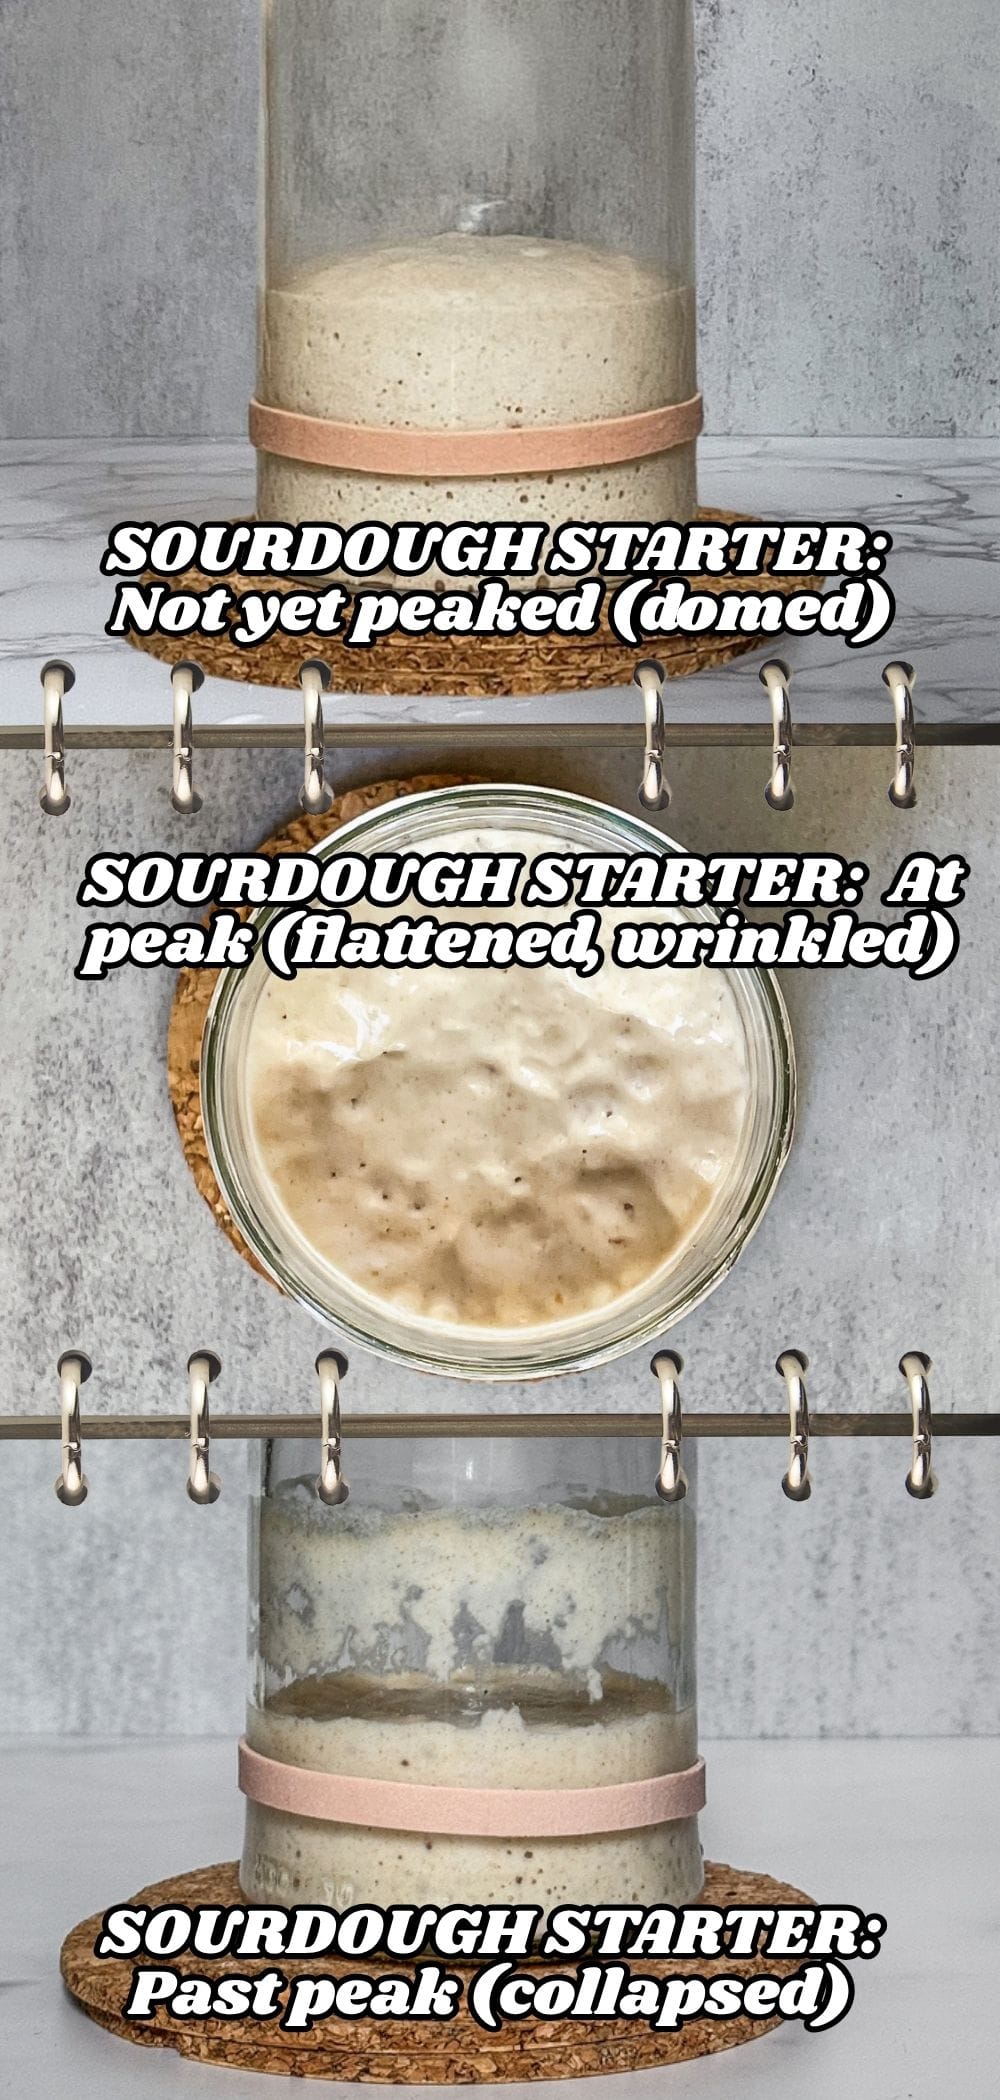
Your starter is at its peak when it stops rising and the top changes from domed to flattened, often with wrinkles and bubbles popping on the surface.
A domed, still-rising top means it hasn't peaked yet. While this is a sign of activity, it is not the actual peak. Once it flattens and just begins to sink, that is the peak.

The growing sourdough starter has a domed top (not yet peaked).
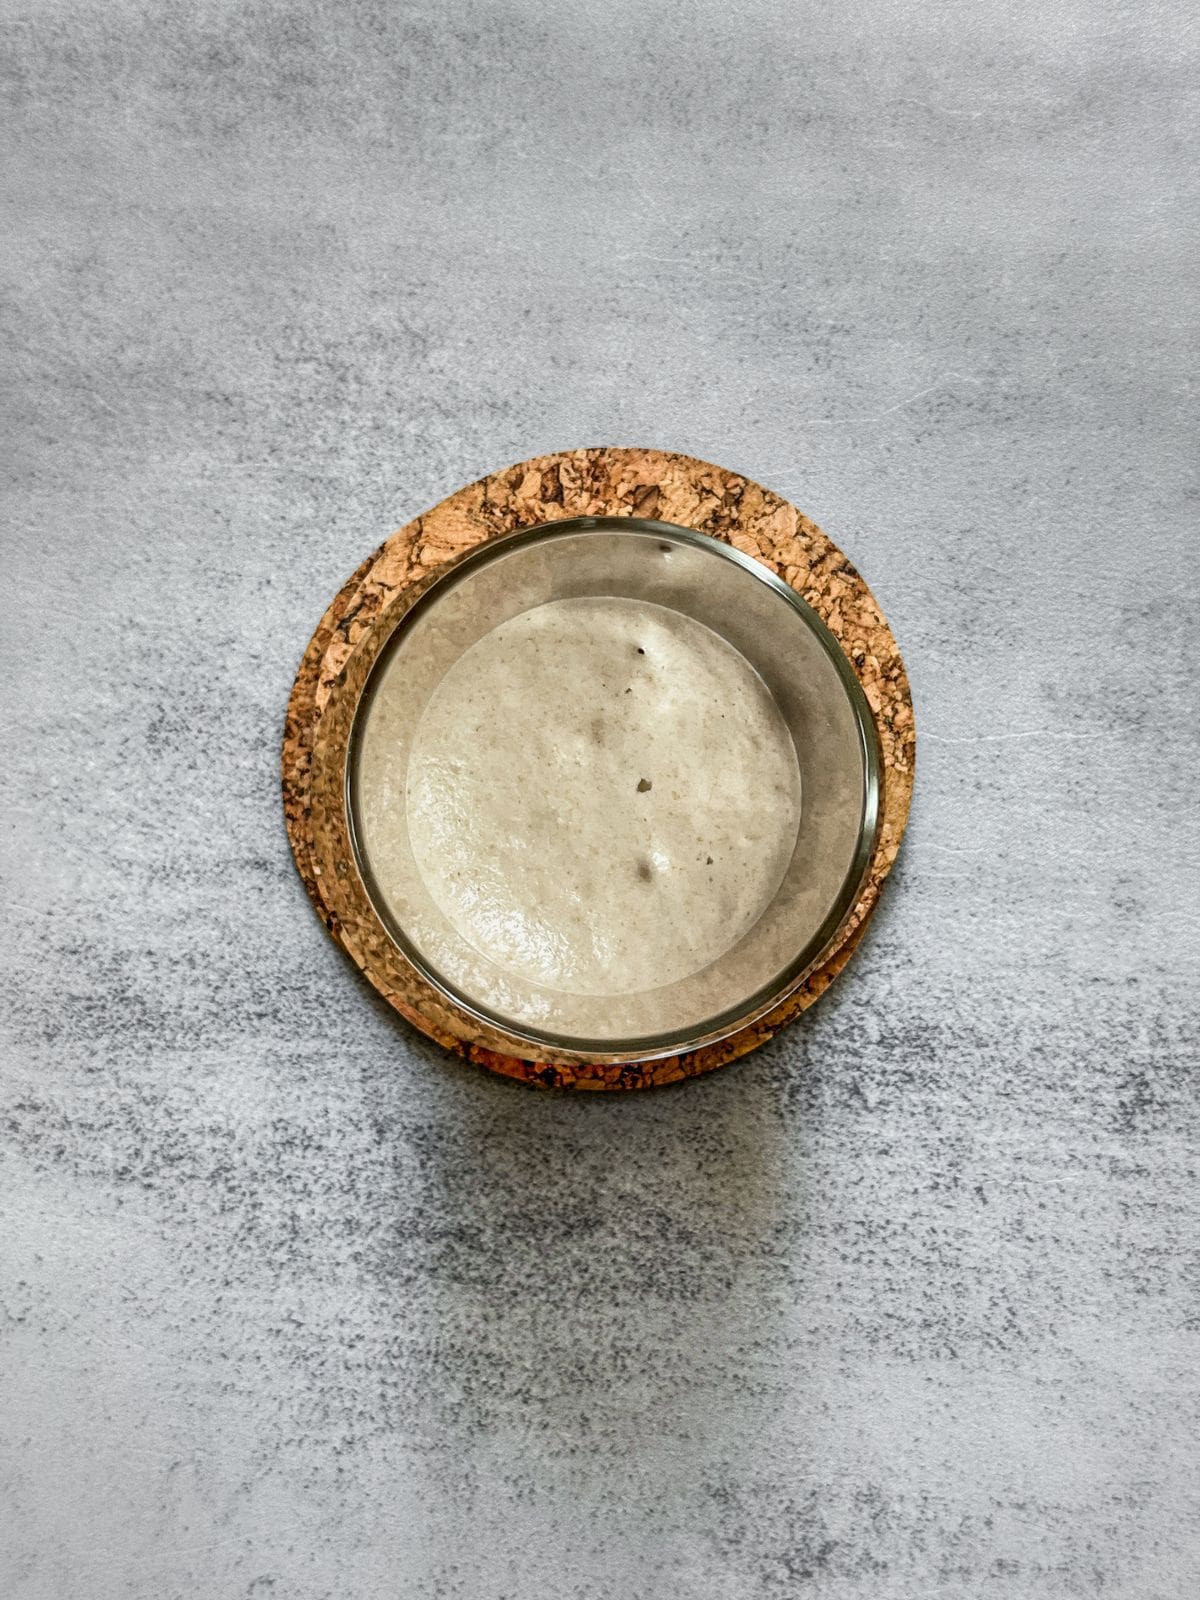
Here is an overhead view of the growing sourdough starter.
The true peak happens just before the starter begins to deflate. It is important to learn the signs that show your starter is at its peak. These signs will help you decide when to use the starter for baking and when to feed it.
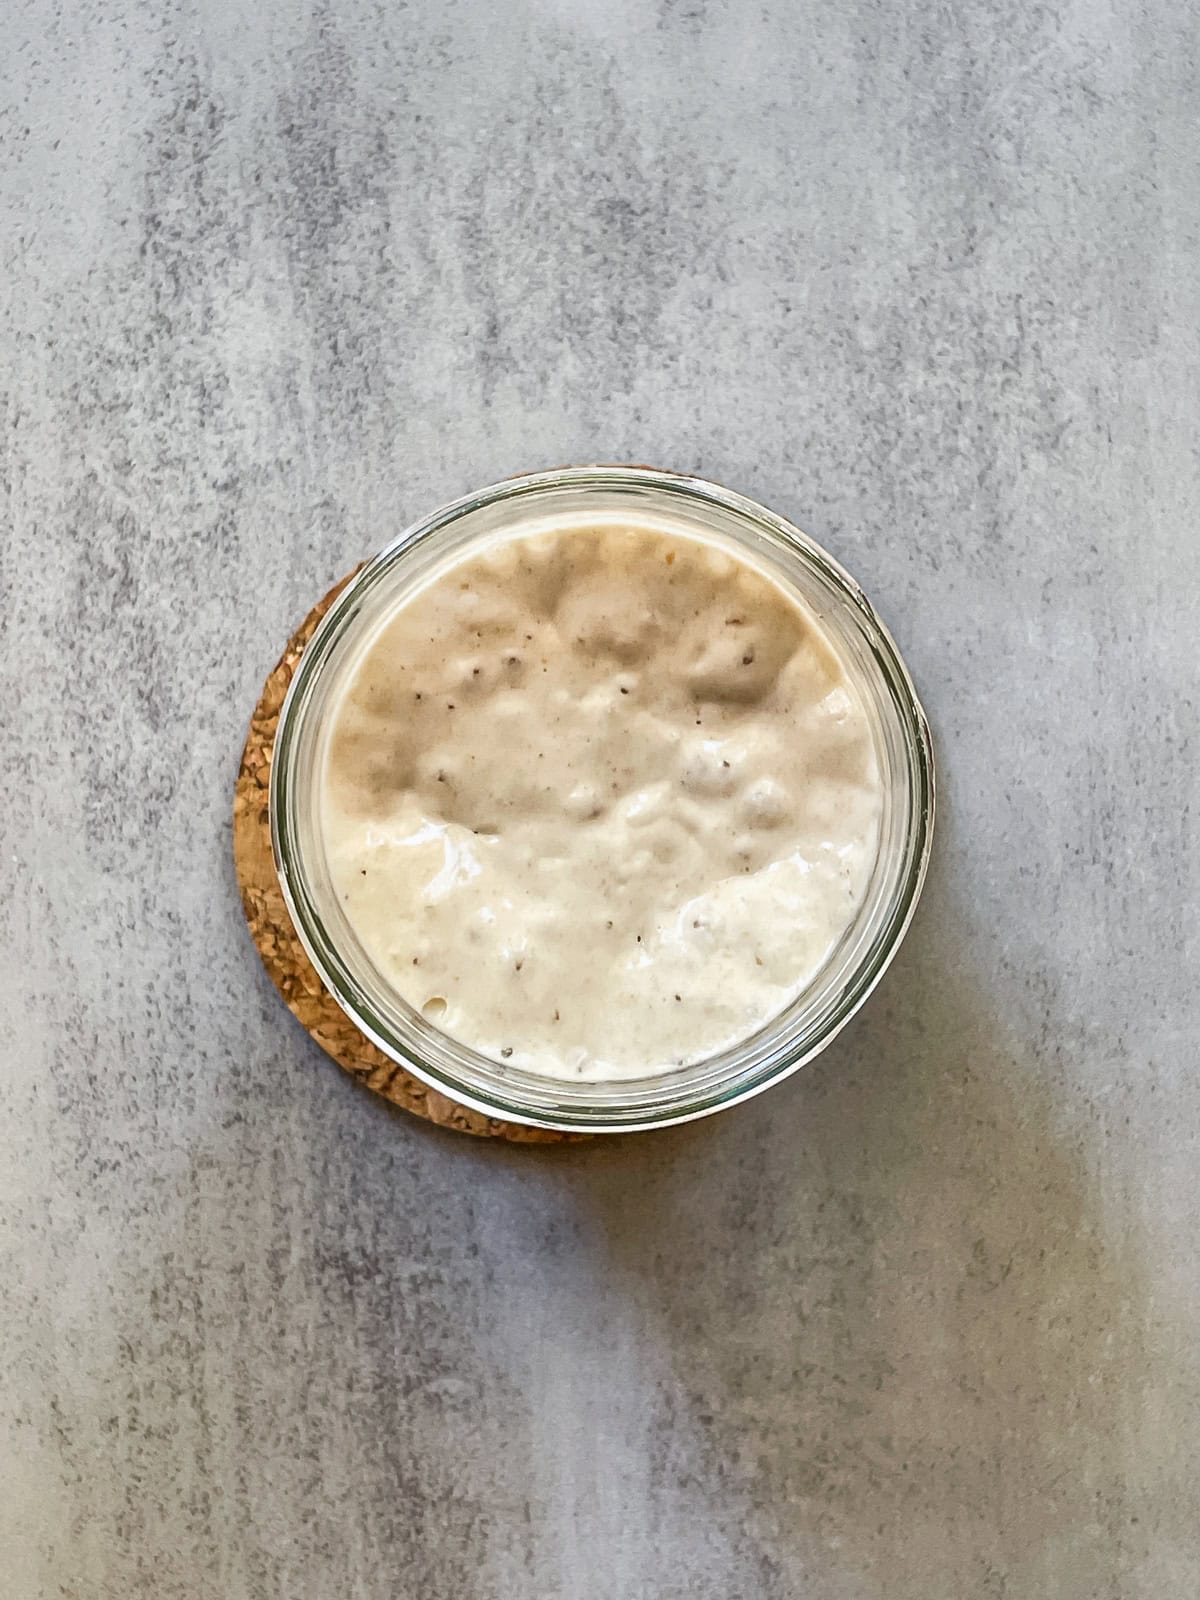
Sourdough starter is at the moment when it has stopped rising.
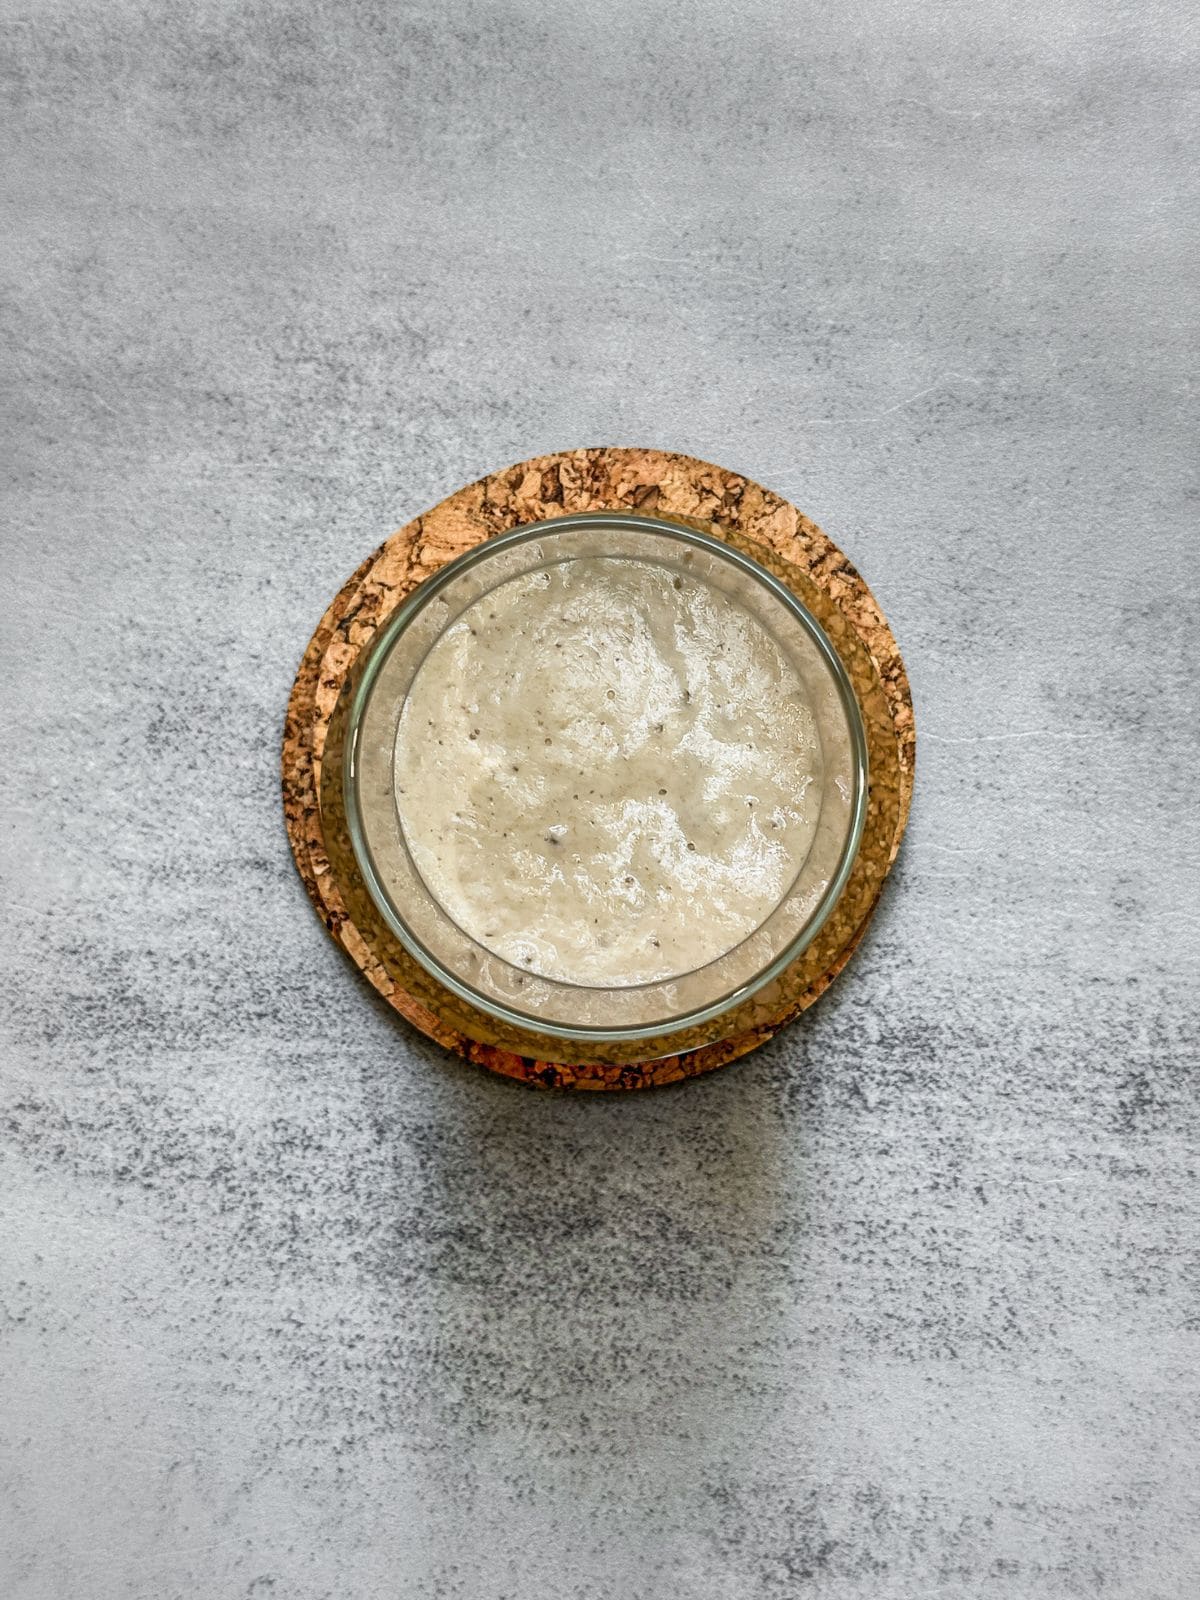
Here is an overhead view of a sourdough starter nearing its peak.
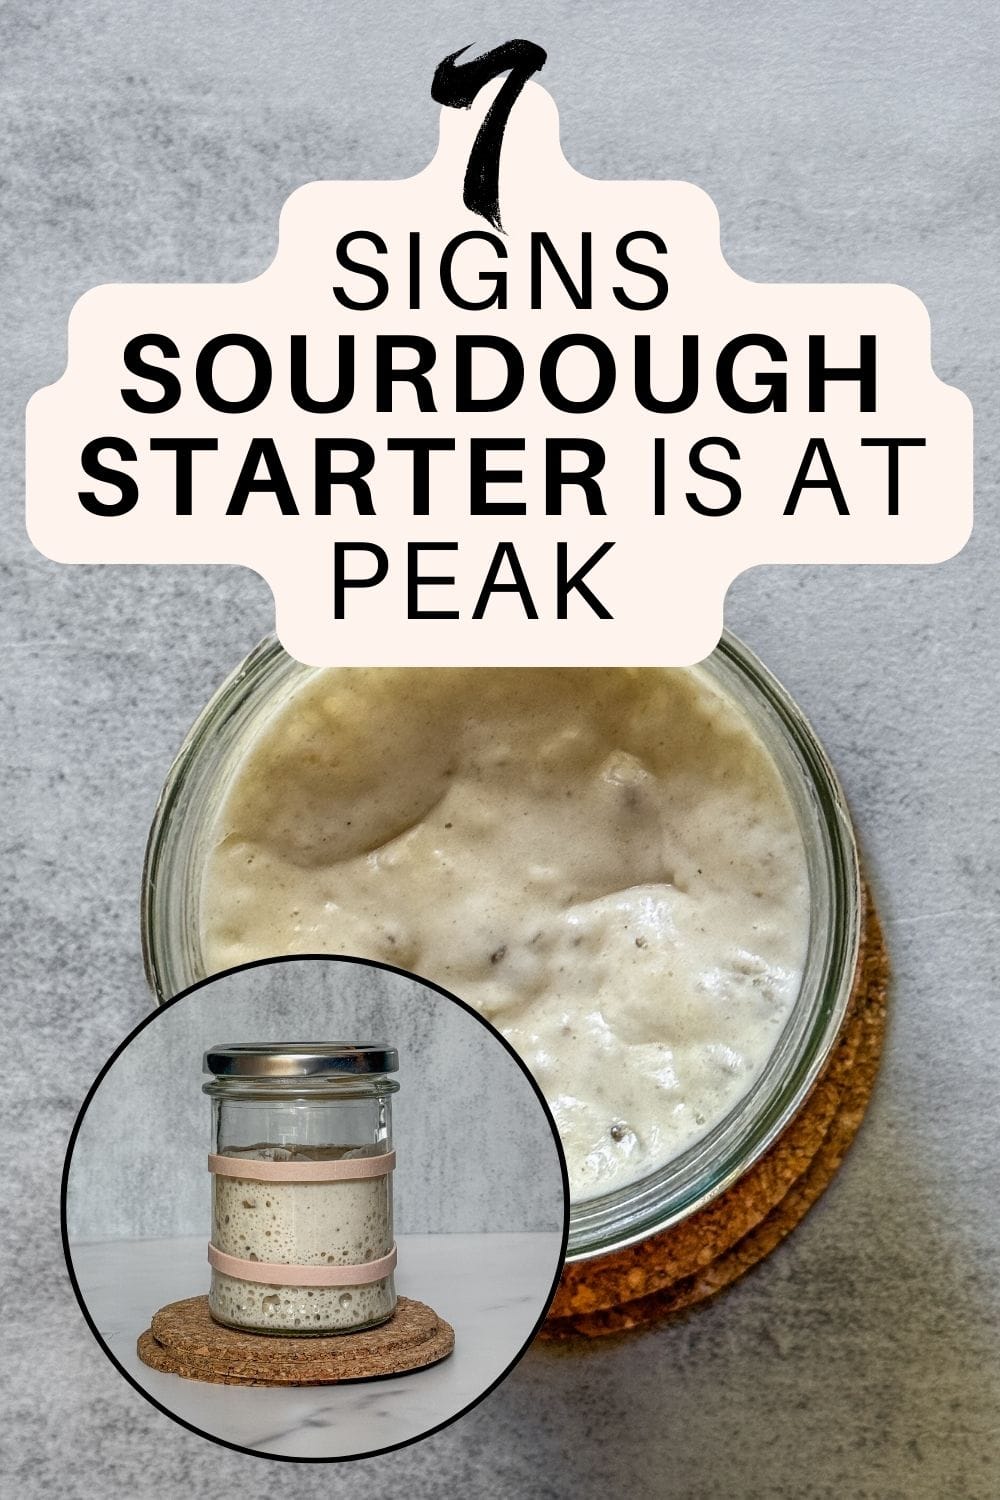
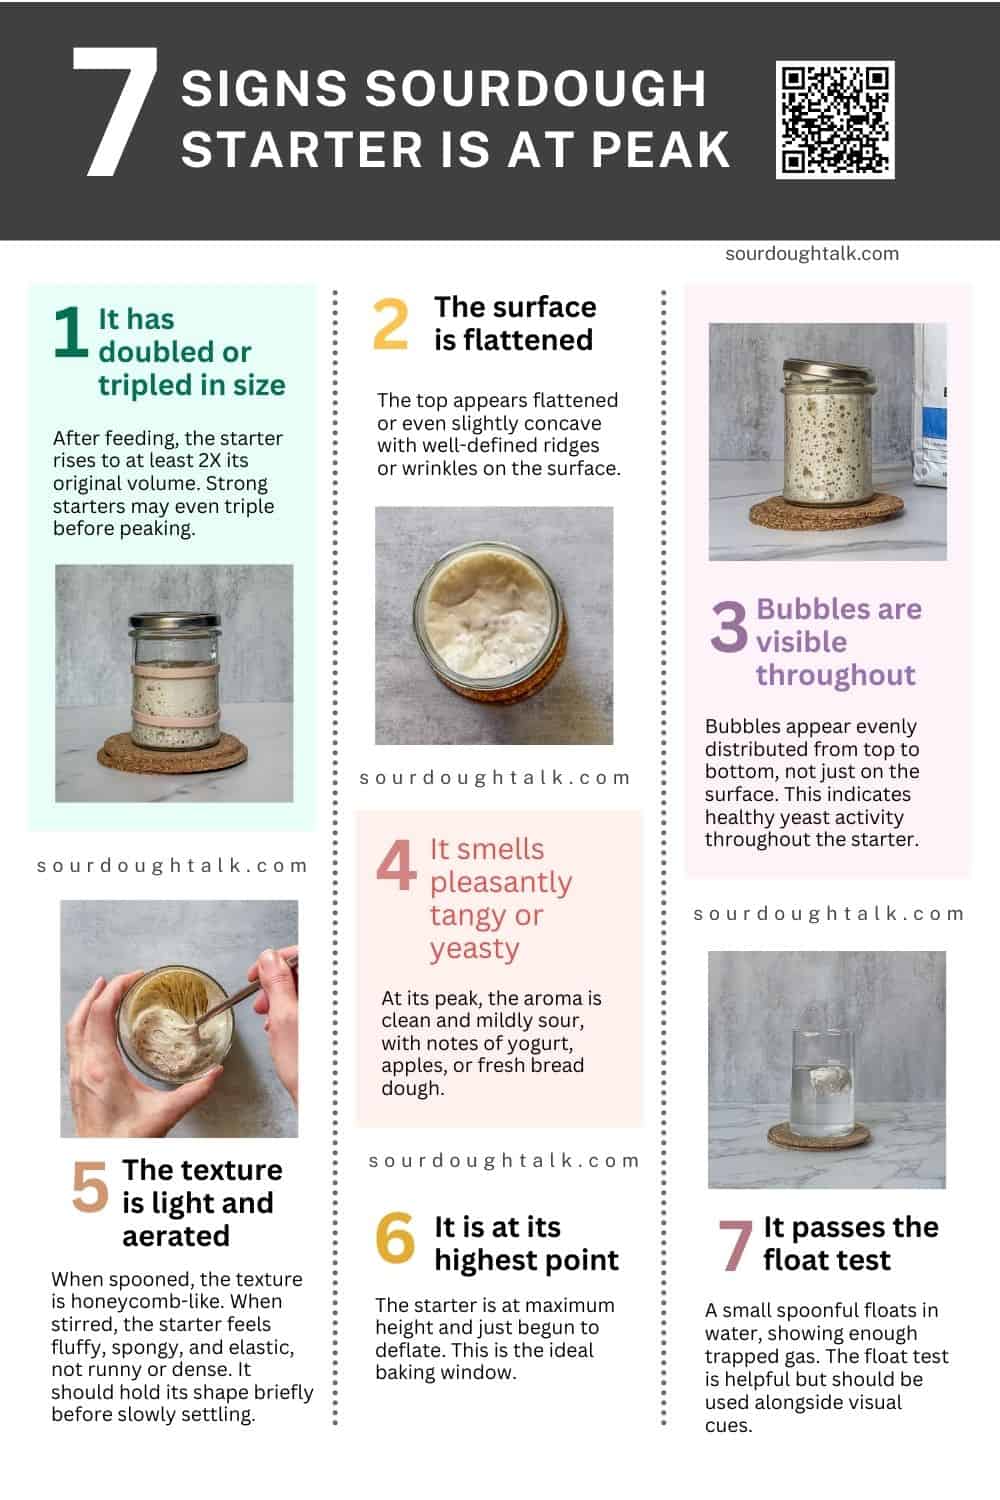
7 Signs your sourdough starter is at its peak
Look for several of these signs together, not just one.
1. It has doubled or tripled in size
After feeding, the starter rises to at least 2x its original volume. Strong starters may even triple before peaking.
2. The surface is flattened
The top appears flattened or even slightly concave with well-defined ridges or wrinkles on the surface.
3. Bubbles are visible throughout
Bubbles appear evenly distributed from top to bottom, not just on the surface. This indicates healthy yeast activity throughout the starter.
4. The texture is light and aerated
When spooned, the texture is honeycomb-like. When stirred, the starter feels fluffy, spongy, and elastic, not runny or dense. It should hold its shape briefly before slowly settling.
5. It smells pleasantly tangy or yeasty
At its peak, the aroma is clean and mildly sour, with notes of yogurt, apples, or fresh bread dough.
6. It is at its highest point
The starter is at maximum height and just begun to deflate. This is the ideal baking window.
7. It passes the float test (optional)
A small spoonful floats in water, showing enough trapped gas. The float test is helpful but should be used alongside visual cues.
Note: It is important to wait until the starter reaches its peak before using it for baking or feeding. If you feed your starter before it reaches its peak, it will weaken over time.
Using the starter before or after the peak is more advanced, and I do not recommend it unless you are already experienced with sourdough.
Rubber band test: Track when your sourdough starter peaks
You can tell when your sourdough starter peaks by using a rubber band to track its rise after feeding. Here's how it works:
- Place a rubber band around the jar at the level of the starter right after feeding. This marks the starting point.
- As the starter ferments, it will expand. Keep an eye on it.
- Once you think the starter has peaked (it looks fully risen with the domed top), place another rubber band at that level.
- Check if the starter continues rising. If it does, move the second band up again until it stops. If it just starts to deflate, you have found the peak: it was at the last highest point.
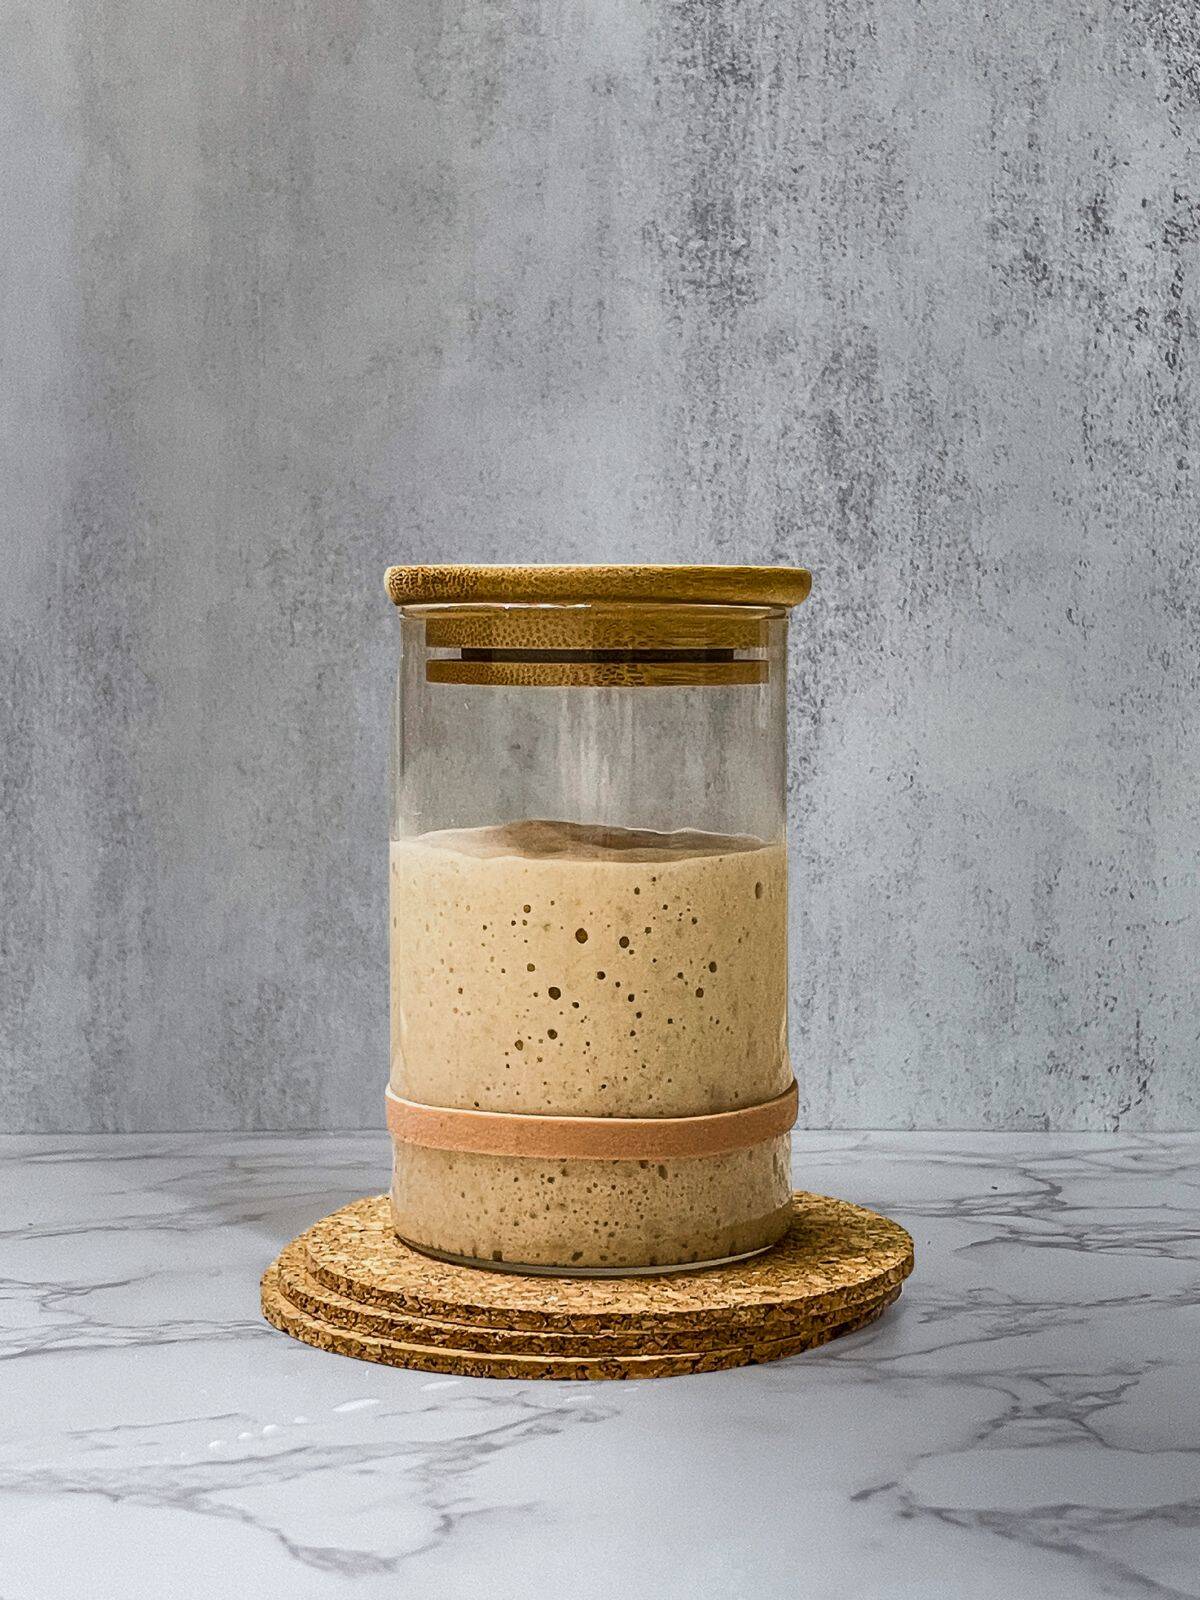
When the starter has a domed top, it is still rising but has not yet reached its peak.
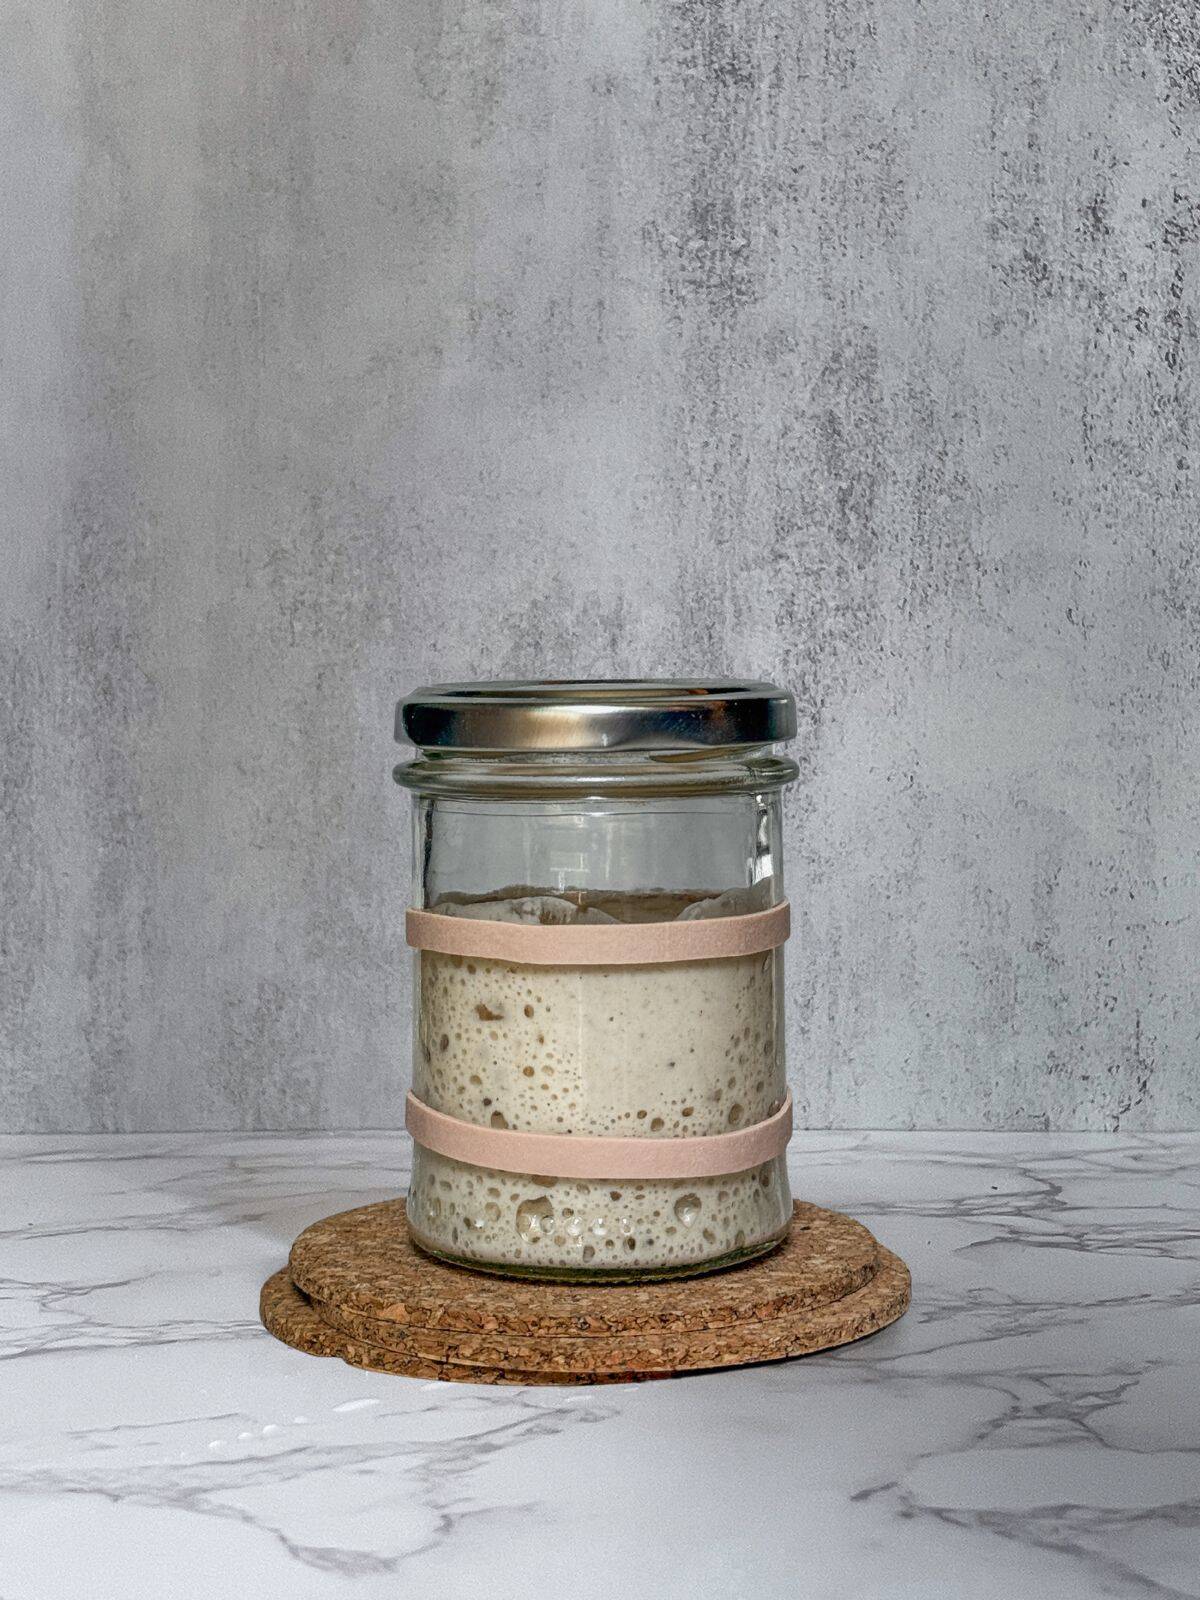
The true peak of the starter happens when the starter stops expanding, and you will notice that the surface becomes less bubbly, sometimes with bubbles popping or leaving voids. This is when your starter is at its peak.
The key is to watch for flattening and wrinkling. A 100% hydration starter, which consists of equal parts flour and water, clearly shows these signs.
Sourdough starter has not yet peaked.
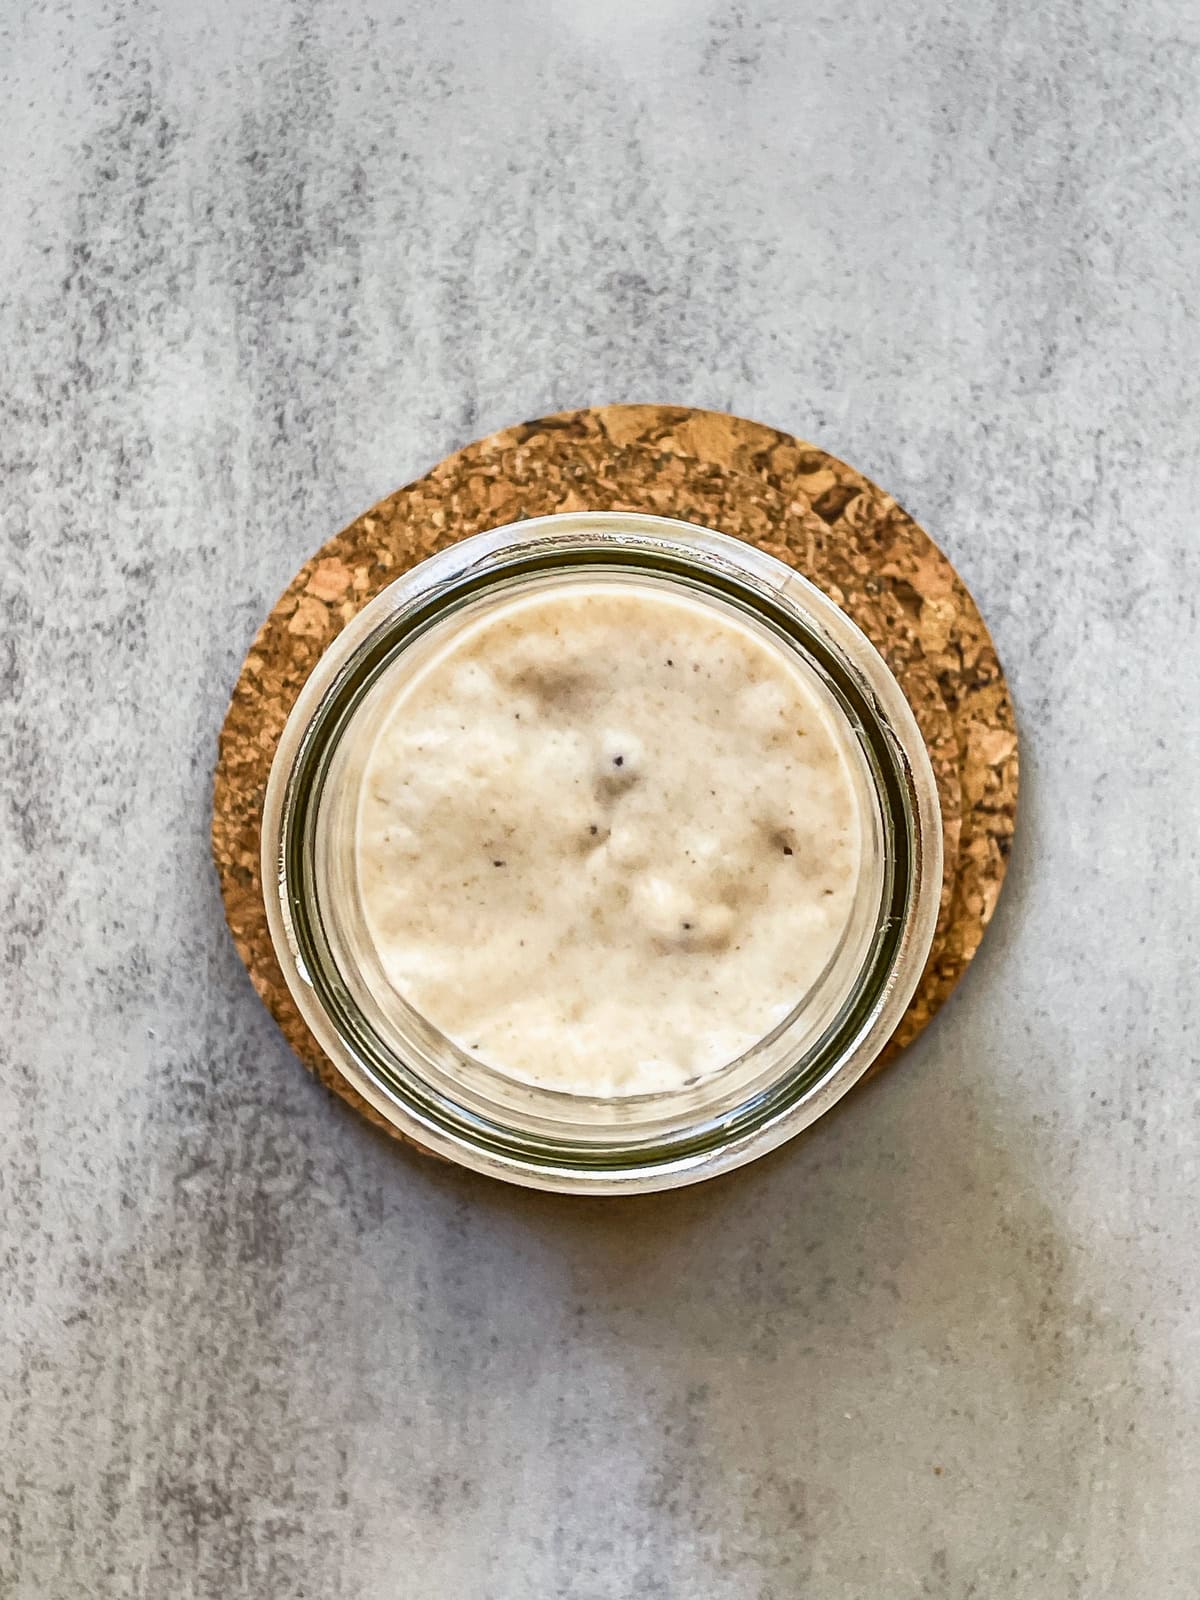
Here is the sourdough starter at its peak, showing visible wrinkling. You can even wait a few more minutes to see more wrinkles form on top.
How long does it take for the starter to peak?
A healthy sourdough starter made from scratch usually peaks between 4 and 12 hours after feeding, but that window shifts depending on how you feed and maintain it.
The time between feeding your starter and reaching its highest rise (aka peak) is called the time to peak, and learning this rhythm is one of the most useful skills in sourdough baking.
How to track your starter's time to peak (step by step)
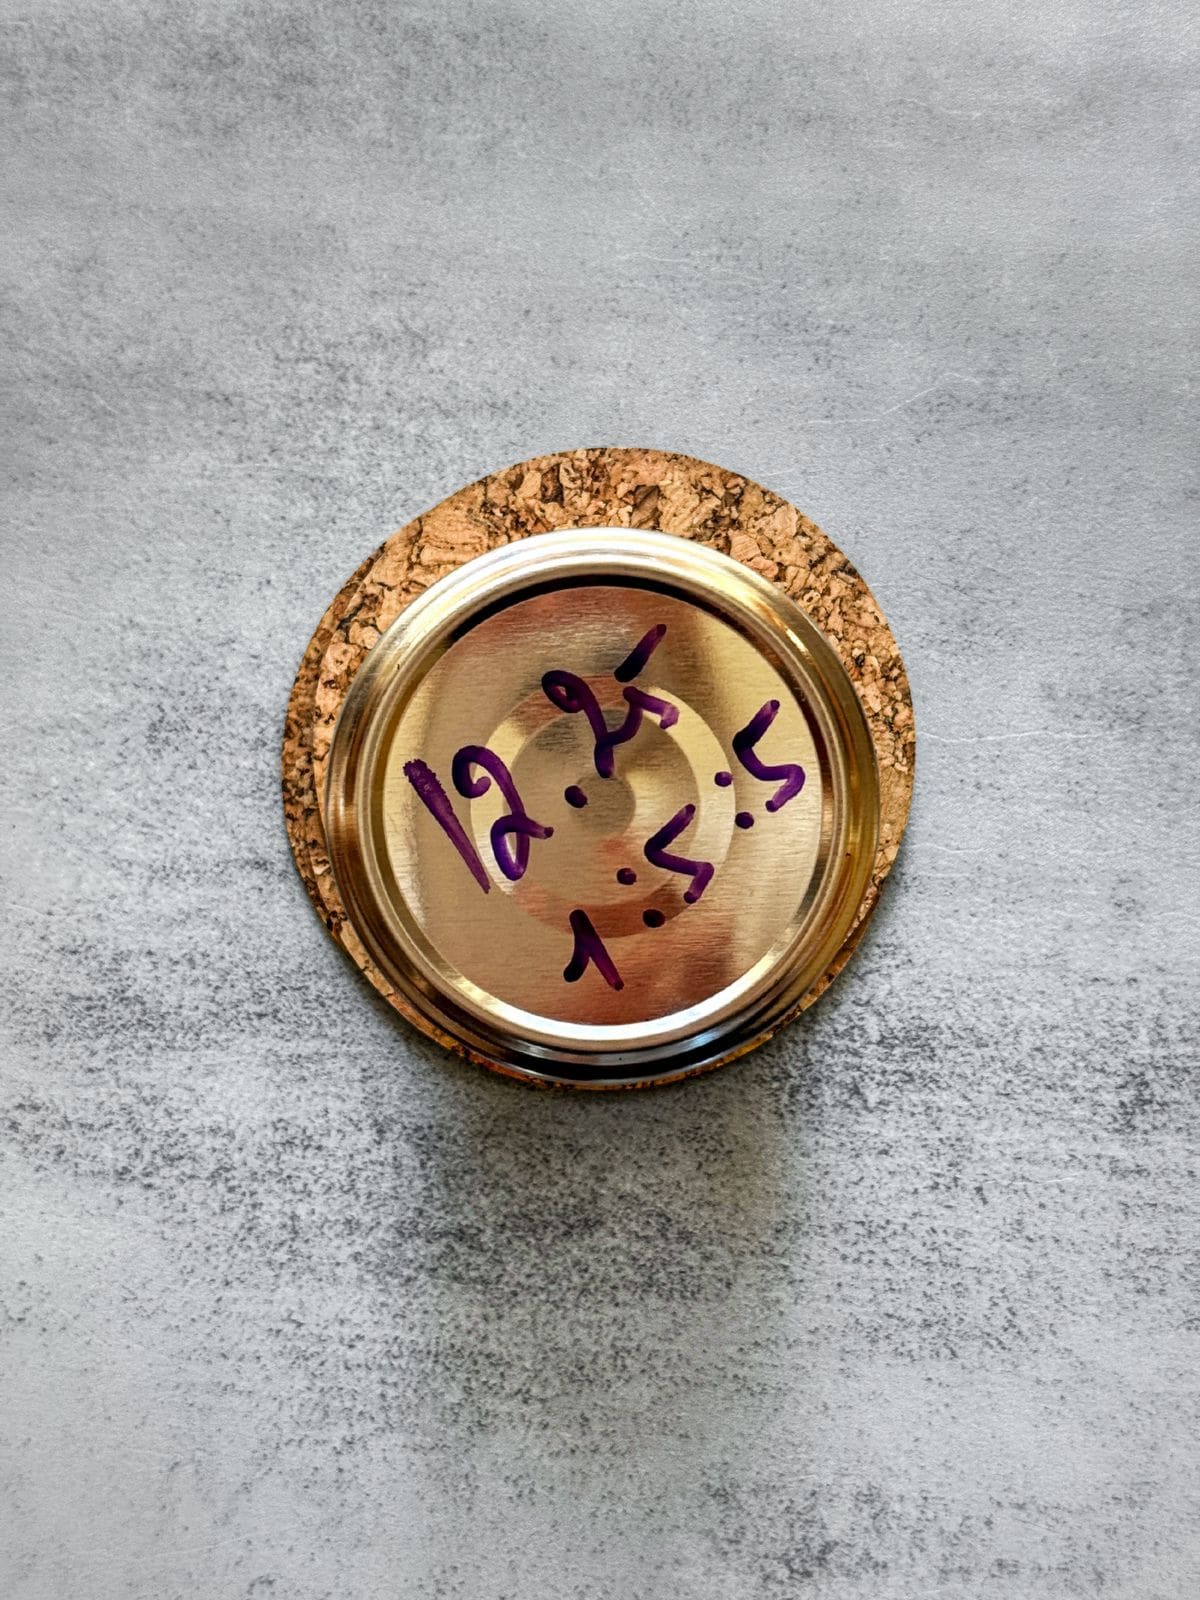
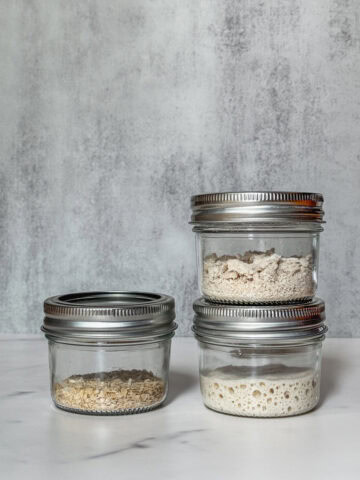
Start by feeding your starter at a known ratio, for example, 1:5:5, and note the exact feeding time on the lid with a marker.
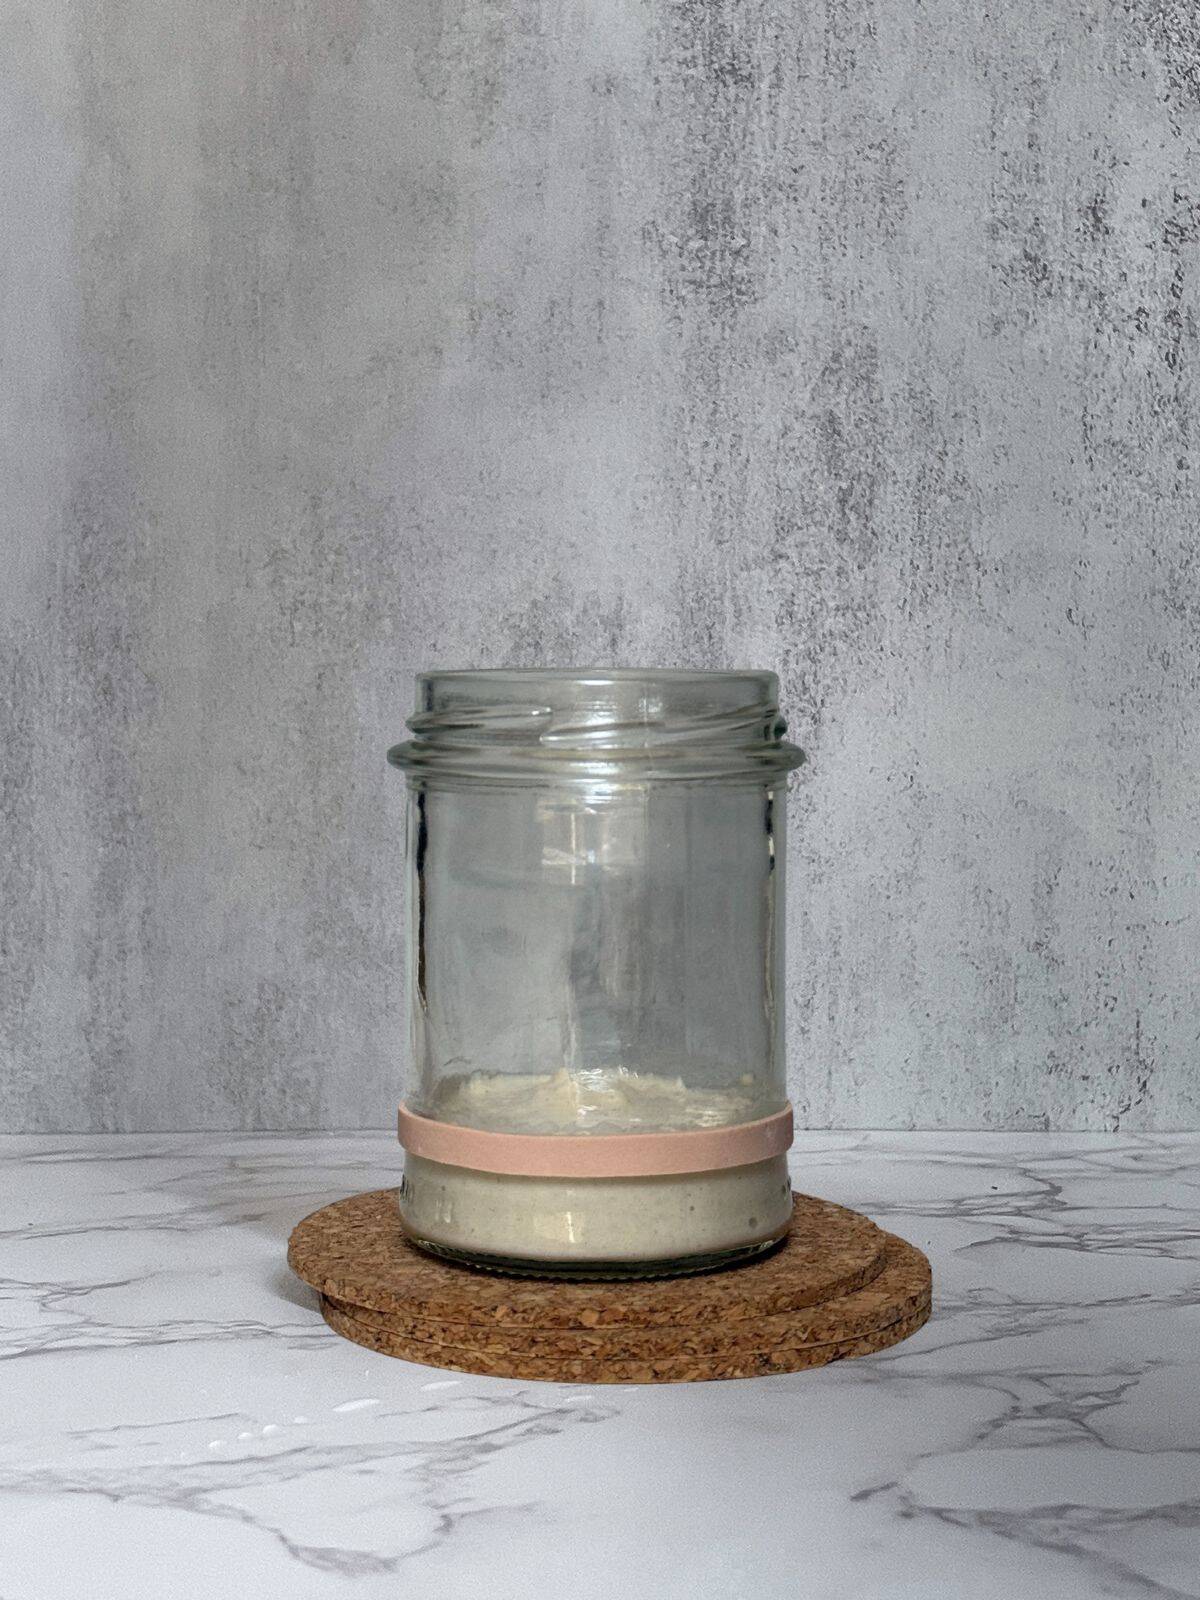
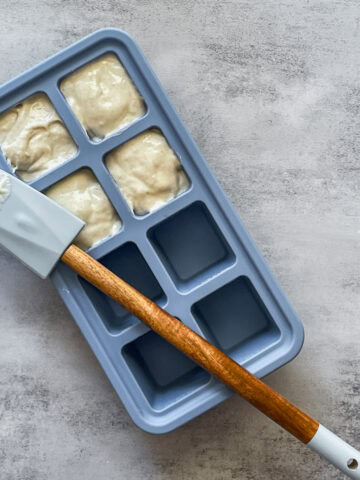
Mark the starter level on the jar with a rubber band or marker so you can clearly see how much it rises.
Keep the jar at a consistent room temperature, ideally in the same spot each time (Brod & Taylor Sourdough Home is a great example), and check the starter periodically, watching for its maximum rise.
The peak is reached when the starter has expanded to its highest point, and the surface begins to flatten. Write down the time this happens. Once the starter starts to sink or leaves streaks on the jar, the peak has already passed.
Repeat this process over several feedings using the same ratio. After a few days, you will notice a clear pattern. This is your starter's time to peak for that specific feeding ratio and temperature, and you can plan your mixing and baking around it.
Next, repeat the process with different feeding ratios, using the kitchen temperature you plan to use to build your levain. Record everything in a Sourdough Starter Feeding Log, then use that information to create your baking schedule.
Once you do this, you will know exactly how long it takes for your starter to peak overnight. This is one of the most useful indicators, especially for building levain while you sleep, so it is ready to use in the morning.
Factors that affect the sourdough starter peak
The peak depends on several factors, including temperature, hydration level, flour type, and the feeding ratio. These factors affect how quickly or slowly your starter reaches its peak.
1. Temperature and time
Temperature plays an important role in sourdough baking. If you want a deeper understanding of how warmth and cold affect fermentation speed, starter activity, and feeding schedules, read my full guide on how temperature affects sourdough.
Summer baking is very different from winter baking. Warmer temperatures accelerate fermentation, causing the starter to rise more quickly, while cooler temperatures slow it down. You can experiment with different temperatures to find what works best for your starter.
At the start of my sourdough journey, my starter thrived at room temperature, with daytime temperatures of around 73°F (23°C) and nighttime temperatures of 69°F (20.5°C).
Later, I started using a Brod & Taylor Sourdough Home, and I can say my starter has never been more active and healthy.
2. Starter hydration level
A true liquid starter, meaning it contains more water than flour, ferments the fastest. The higher water content allows microorganisms to move and feed more easily, which speeds up fermentation. Liquid starter often peaks very quickly, sometimes in as little as 3-5 hours at room temperature with moderate feeding ratios.
A 100% hydration starter ferments faster and usually peaks closer to 4-6 hours at room temperature with moderate feeding ratios. This starter shows a clear rise and fall, making the peak easier to spot.
A stiff starter ferments more slowly because reduced water limits microbial activity. It peaks later, sometimes 6-12 hours after feeding, depending on temperature and flour, and often shows a subtler rise rather than dramatic doubling.
3. Feeding schedule
How often you feed your starter affects its time to peak. A regularly fed starter tends to have a predictable, consistent peak because the microorganisms are active and healthy.
If you feed your starter on a set schedule, say every 12 hours, it will reach its peak in a relatively reliable window after each feeding.
On the other hand, a starter that is neglected or fed irregularly takes longer to reach its peak, and the rise will be less vigorous or uneven.
Keep a consistent feeding schedule to help you plan your baking more accurately and reduce surprises. (For more tips, see my guide to feeding sourdough starter.)
4. Flour type
The type of flour you use also affects the starter's time to peak. Flours with more nutrients and fiber, such as whole-grain flours or ancient grains, provide more food for yeast and bacteria, but their denser texture slows the rise. These starters often ferment more slowly at first but develop complex flavor over time.
In contrast, hard white wheat flour, which is lighter and easier for microbes to digest, usually results in a faster rise and a more obvious peak.
You may notice that whole-grain starters peak earlier than white-flour starters in some cases due to higher microbial activity, but their rise is less dramatic.
5. Feeding ratio
The starter feeding ratio refers to the amount of starter, flour, and water used. For example, a 1:1:1 ratio uses equal parts of starter, flour, and water, while a 1:2:2 ratio uses more flour and water than starter. These ratios directly affect how quickly your starter reaches its peak.
A lower feeding ratio, such as 1:1:1, causes the starter to rise and peak faster, whereas a higher ratio, such as 1:5:5, takes longer.
If you want your starter to peak quickly, use a lower feeding ratio. If you need a slower rise, you can use a higher ratio, such as 1:6:6, which is ideal if you want to make your levain overnight.
Peak duration: How long your starter stays at its peak
Peak duration refers to the length of time your sourdough starter remains at its maximum activity after feeding.
It is not just about when your starter reaches its highest point, but how long it stays there before it begins to collapse or slow down.
Once you know your starter's peak duration, you can plan the perfect time to use it to make levain or mix dough.
| Starter type | Time to peak (room temp) | How long it holds peak | How to spot the peak |
| Liquid (more water than flour) | 3–5 hours | Short | Bubbly surface, slight thickening; collapses soon after |
| 100% hydration | 4–6 hours | 1–2 hours | Clear rise and fall, wrinkled top, airy texture |
| Stiff (less water) | 6–12 hours | Longest | Subtle rise — judge by texture, bubbles, and aroma, not height |
A true liquid starter has a short-lived peak. Instead of dramatic height, the peak is often identified by a bubbly surface, a slight thickening. Because the mixture is very loose, it starts to collapse soon after reaching maximum activity.
A 100% hydration starter tends to stay at its peak a little longer, often providing a 1-2-hour window when it is most active. During this time, the rise is clear, the texture is airy, and it is easy to identify the perfect moment to use it for your levain.
A stiff starter has a more subtle peak but often lasts longer than the peak of higher-hydration starters. The rise is modest, so rely on changes in texture, surface bubbles, and aroma rather than height alone to determine when it is at its prime.
FAQ
Do you need to stir the sourdough starter before using it? According to many bakers, stirring your starter before using it isn't necessary. Stirring is usually done during feedings or a few hours later to aerate and strengthen the starter. Personally, I always stir mine before feeding or baking. When feeding, I stir first, then discard, and finally feed.
How long to wait for a new starter to bake with? A new starter usually takes 10-14 days to be ready for baking. Look for signs such as doubling in size, bubbles, and a pleasant, yeasty smell. Refer to my guide on how to tell when the sourdough starter is ready for baking.
How soon can you use the starter stored in the fridge? If your starter has been in the fridge for a while, plan to feed it 2 to 3 times before using it for baking. If it has only been in there for about a week, one or two feedings are usually enough, though many bakers go straight to building levain with it right away.
What does a sourdough starter look like at peak? At peak, the starter is at its highest point and just about to deflate. It has doubled or tripled, the top is flattened (not domed) with visible wrinkles, bubbles run throughout rather than just on top, and the texture is light, airy, and honeycomb-like. A domed, still-rising top means it hasn't peaked yet.
Why does my starter bubble again after I stir it past peak? That is normal. Stirring redistributes the remaining food and releases trapped gas, which can spark a little renewed fermentation. But the starter is past its peak strength by then, so while you will see bubbles, it won't leaven as powerfully as it would at the true peak.
What if my starter peaks but doesn't quite double? Peak is about the rise-and-fall pattern, not hitting exactly 2x. Some healthy starters peak a little below double, especially at higher feeding ratios (like 1:5:5), with whole-grain flour, or in cooler kitchens. If it rises, flattens, and then deflates on a consistent schedule, it is peaking even if it stops short of double.
Let's talk sourdough
How do you determine when your starter is at its best for baking? I'd love to hear about your experiences and help with any troubleshooting tips.
Ready to keep learning?
Another classic method to check readiness is the float test. This simple trick can show you when it is ready for baking. Read on to find out how reliable it really is.