

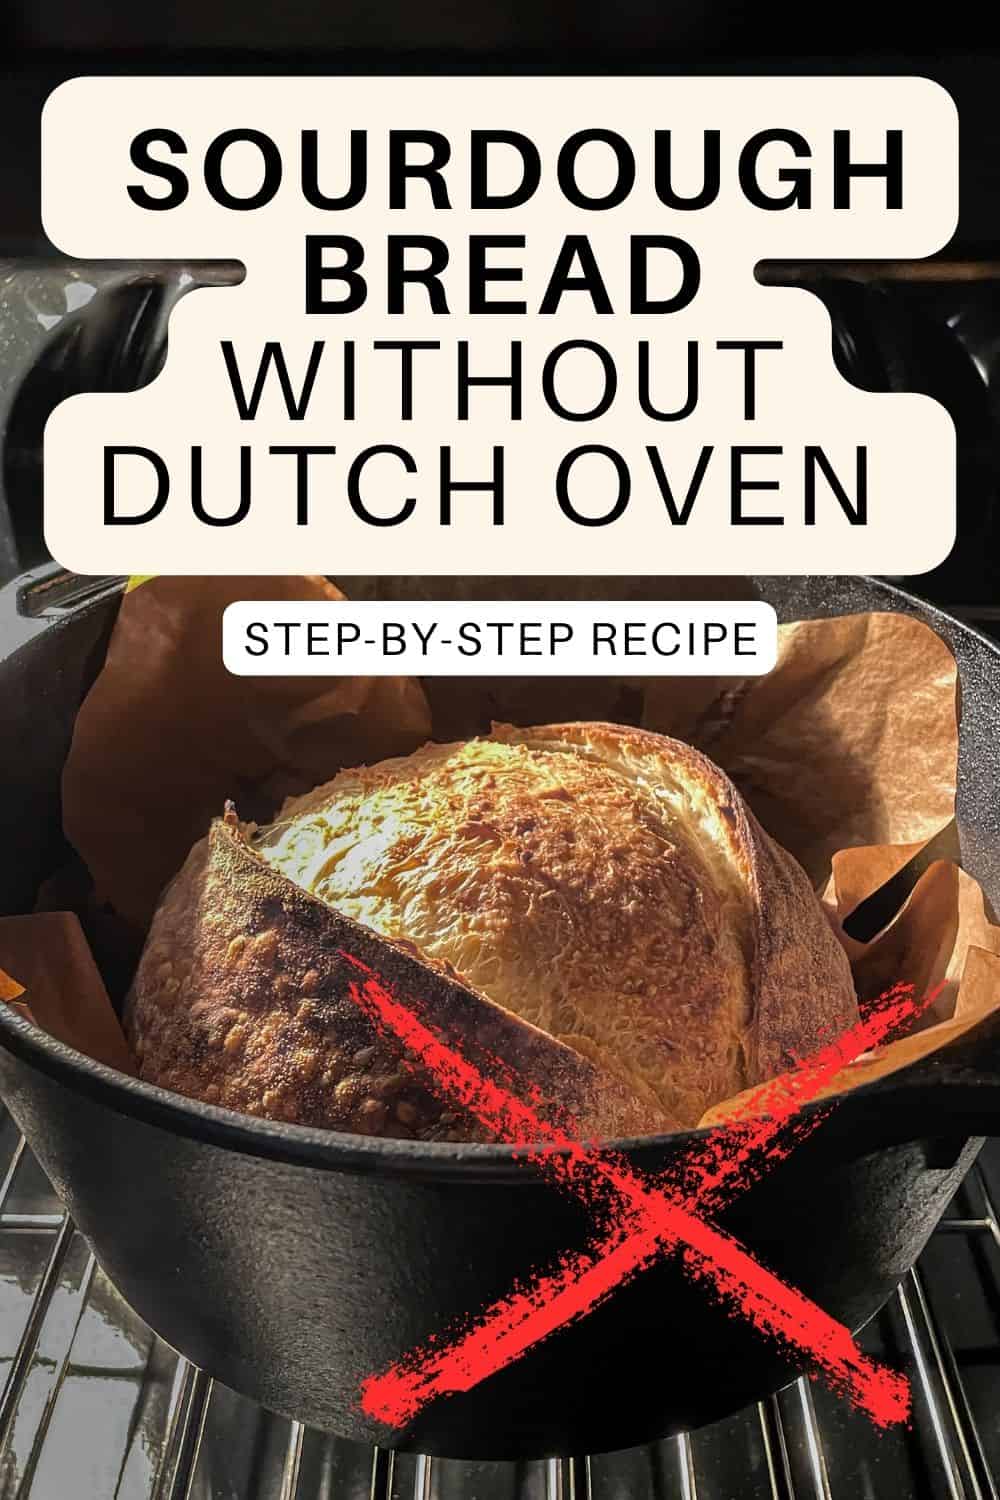
What if I told you you could bake sourdough bread without a Dutch oven? Many beginner bakers face challenges when they don't have one on hand, but there are 10 other ways to bake a sourdough loaf.
Take your time to explore each method, weigh its pros and cons, and choose the one that suits your budget, fits your oven, and feels right for you. At the end of the post, you will also find my sourdough bread recipe without a Dutch oven.
How to bake sourdough bread without a Dutch oven
While baking sourdough bread in a Dutch oven is considered superior for sourdough baking due to exceptional heat and steam retention, there are reasons you might want to try alternative methods.
If a Dutch oven feels too heavy to handle or you want to bake multiple loaves at once, consider alternative methods to achieve great baking results.
Steam, steam, steam! Steam plays a super important role during the first stage of baking sourdough bread.
While a Dutch oven naturally traps steam, other methods, such as placing hot water in the oven, misting the dough, or using a covered baking vessel like an enamel roaster or a glass casserole, help create the necessary steam.
Now, let's discover ten methods for baking sourdough without a Dutch oven.
1. Open bake method
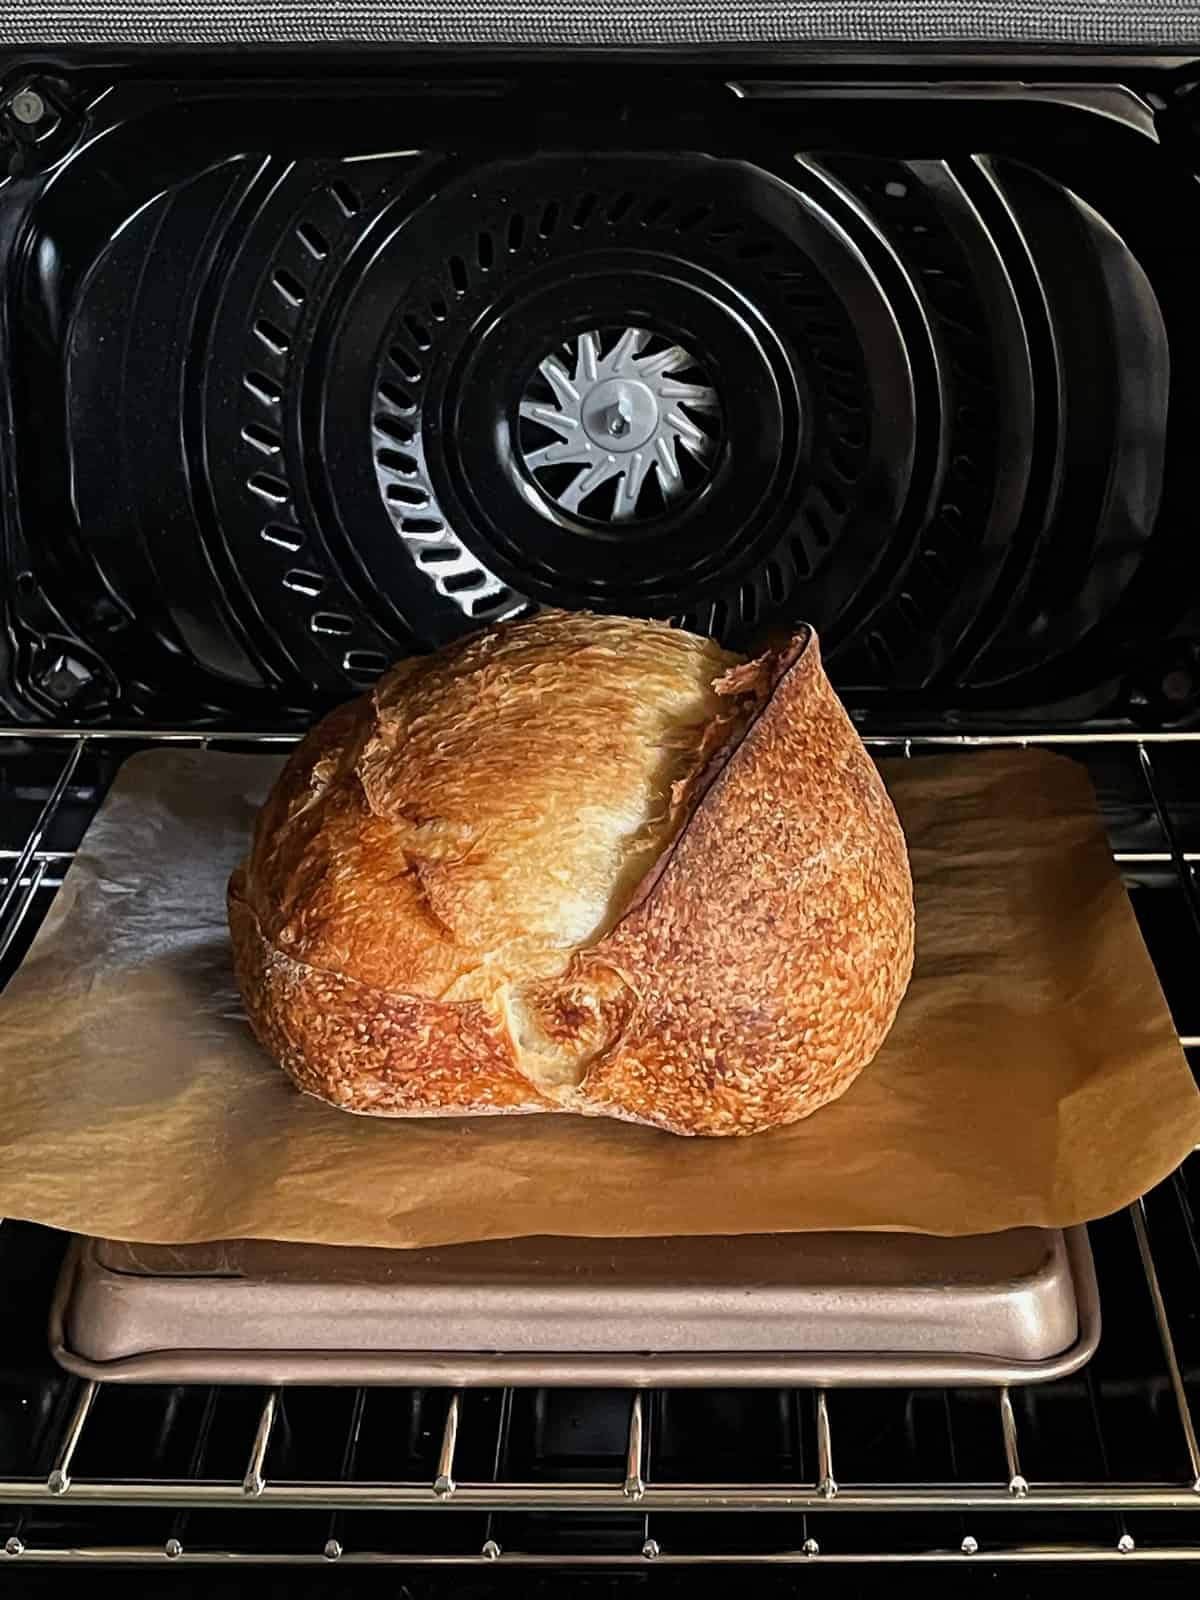
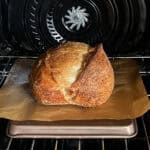
Open baking, or baking with a stone and a pan of water, is a method of baking sourdough bread without using a covered pot, such as a Dutch oven or its alternatives. Once you are comfortable with the basics of sourdough, it is a great method to try.
The goal is to create a crust texture slightly thinner and crispier than the thick, crunchy crust from a covered method. This method also allows you to bake two to four artisanal loaves in a home oven at once.
When baking sourdough bread without a covered pot, create steam by pouring boiling water into a cast-iron or another heatproof pot placed underneath the bread. Some bakers also add lava rocks to the pot to produce extra steam.
To bake sourdough bread with the "open bake" method:
- Place a baking stone, pizza stone, or baking steel in the center of the oven. On the lower rack, place a cast-iron or other stainless-steel heatproof pot (with or without lava rocks). Preheat the oven to 500°F (260°C). If using a baking stone, let it heat for 30-60 minutes.
- Boil water in a kettle until it reaches a rolling boil.
- Flip your dough onto a piece of parchment paper on a pizza peel. Score the top with a sharp blade or bread lame.
- Put on oven mitts (or my favorite silicone gloves) and safety goggles for protection. Open the oven and slide the dough onto the baking stone or pizza steel. Cover the oven glass door with a thick towel, and carefully pour approximately 350 ml (1 ½ to 2 cups) of boiling water into the heated pot. Be careful of the steam! Some bakers also mist the oven with water using an electric spray bottle before closing the oven door.
- Lower the oven temperature to 430°F (220°C) and bake for 20 minutes. Then, remove the pot (with lava rocks, if used) and bake the bread for an additional 17 to 20 minutes without steam.
- Once done, remove the bread from the oven, check its internal temperature, and let it cool on a wire rack for at least 2 hours before slicing.
If you don't have a baking stone or pizza steel, you can use a baking tray or sheet, but make sure it can withstand high temperatures of 500°F (260°C).
Pros:
- The hot baking stone or pizza steel transfers heat quickly, helping achieve a great oven spring.
- The high heat creates a nice, crisp golden-brown crust.
- You can bake larger loaves.
- You don't need to bring a heavy Dutch oven in and out of the oven.
Cons:
- The steam escapes quickly, especially when the oven door is opened.
- You need to add a pan of boiling water and remove it after 20 minutes of baking.
- You may need to rotate the bread for even baking.
- Water can splash when added to a hot oven, risking damaging the oven glass.
- Steam or water splashing while handling hot steel or pouring water into a hot pan can cause severe burns.
2. Baking sourdough with a stone and a stockpot
Baking sourdough bread on a baking stone, using an upside-down stockpot, a large mixing bowl, a deep roasting pan, or a Brod & Taylor baking shell is a great way to trap steam and bake a bakery-style loaf.
This method uses a heatproof, covered baker placed over the dough on a preheated baking stone. The vessel traps the steam like a Dutch oven.
Pros:
- This setup effectively creates steam and traps moisture.
- There is no need for an expensive Dutch oven.
- You can use various heatproof covers, such as a stockpot, bowl, or roasting pan.
- It is easier to lift than a heavy Dutch oven.
Cons:
- Handling the hot cover requires care.
- If the cover doesn't fit tightly, there is a risk of steam escaping.
- A covering vessel requires enough room in the oven and storage space.
3. Double loaf pan method
Baking sourdough bread in loaf pans is a great alternative if you don't have a Dutch oven or a covered baking dish. This method uses two loaf pans: the dough is placed in one, then covered with the other, creating a small oven-like chamber.
Since loaf pans are smaller and lighter, they are easier to handle than heavy baking pots. However, because they are thin, they don't retain heat as well as cast iron or ceramic, so the crust doesn't develop as deeply.
Pros:
- It creates steam and traps moisture.
- It is easier to handle than a Dutch oven.
- There is no need for expensive bakeware.
- The method works well for 9x5-inch standard loaf pans.
- It is perfect for baking multiple loaves at once (up to 12 loaves).
- It helps "save" the overproofed sourdough.
Cons:
- The thin metal of loaf pans doesn't hold heat as well as cast iron or ceramic.
- The crust is thinner and less crispy or caramelized.
- The pans sitting one above the other produce less steam than a sealed Dutch oven.
4. Baking sourdough in a glass casserole
The glass allows heat to spread evenly, so the bread bakes well. Additionally, since the glass is clear, you can see how the bread is baking without opening the oven. With the lid over a glass dish, the steam is trapped, similar to baking in a Dutch oven.
However, glass is prone to sudden temperature changes, so choose a borosilicate glass casserole and let it cool down gradually to prevent cracking.
Pros:
- Glass heats evenly.
- You can check the bread without opening the oven.
- The lid traps steam well.
- Glass is not reactive and doesn't affect the taste of bread.
Cons:
- Glass can break if exposed to sudden temperature changes.
- The crust is not as crispy as that baked in a Dutch oven.
- A cold dish affects the oven spring.
5. Baking in an enamel roasting pan
A Granite Ware roaster, a type of enamel roasting pan, is a lighter version of a Dutch oven, with the lid trapping heat and steam as the bread bakes.
Pros:
- An enamel roasting pan is lighter and easier to handle than a heavy Dutch oven.
- The lid traps moisture without the need for extra steaming techniques.
- The roasting pan doesn't need to be preheated; instead, it should be loaded into a preheated oven.
- The smooth enamel surface makes cleaning the pan easier than with cast iron or stoneware.
Cons:
- An enamel roasting pan is not non-stick, so it is essential to line it with parchment paper to prevent sticking.
- The enamel surface is sensitive to sudden temperature changes, which can cause cracks.
- Enamel surfaces can chip or scratch more easily than other materials.
6. Baking sourdough in a ceramic cloche
A ceramic bread cloche is a dome-shaped baking pot with a lid that sits over the dough while it bakes on its base. It works like a mini bread oven, keeping heat and moisture inside to help the bread rise properly.
The ceramic material retains heat well, resulting in an even bake and a crunchy crust for the bread. However, ceramic is fragile, and the cloche is heavy and tricky to handle when hot. Still, it is an excellent option for making bakery-quality sourdough at home.
Pros:
- The dome naturally retains moisture.
- Ceramic provides even heat distribution for an even bake.
- Many cloches have an elegant design.
Cons:
- Ceramics can crack or break if dropped.
- It is heavy and can be difficult to lift, especially when hot.
- A cloche needs a storage room when not in use.
- A high-quality cloche is pricey.
7. Baking sourdough in a clay pot
Clay pots hold heat well and create a natural steam chamber. Since clay heats up slowly and evenly, it prevents the bread from baking too quickly on the outside while staying raw inside.
Glazed clay pots must be preheated in the oven before baking, while unglazed clay pots (like a Romertopf clay roaster) should be soaked. Some bakers soak only the lid to add extra steam while keeping the bottom dry for better heat transfer.
Pros:
- Clay pots have excellent heat retention.
- The pot traps moisture inside without extra steps.
- Some bakers believe clay improves the taste of bread, giving it a mild, earthy flavor.
- Bread baked in a clay pot often has an old-fashioned, artisan appearance.
Cons:
- Clay pots can crack if dropped or exposed to sudden temperature changes.
- They take longer to heat up than metal pans.
- For unglazed clay pots, such as a Romertopf, soaking is usually recommended.
- Some clay pots are bulky and harder to handle.
- Some unglazed clay pots require special care to prevent sticking and cracking.
8. Baking sourdough in a slow cooker
The slow cooker can create a warm, steamy environment. However, the crust won't be as crispy because slow cookers don't get as hot as ovens. Some bakers prefer to finish the loaf in the oven for a few minutes to achieve a golden-brown crust.
This method is ideal for those who don't have a Dutch oven or prefer a hands-off approach to baking bread during hot weather.
Pros:
- This method doesn't require preheating.
- This is a great option for baking in warm weather.
- It works with a standard slow cooker and parchment paper.
Cons:
- The bread won't develop a crispy crust like in an oven.
- Baking fully can take 2-3 hours.
- Many bakers put the loaf in the oven at the end to brown the top.
9. Baking sourdough in a bread machine
While traditional sourdough requires careful planning, monitoring, shaping, and baking, a bread machine automates most of the process. Some models even have a sourdough setting to help with longer fermentation.
Using a bread machine is a great option for those who want fresh sourdough without the hands-on work of traditional baking.
Pros:
- The bread machine mixes, kneads, proofs, and bakes the dough.
- There is no need for knowledge of bulk fermentation and shaping skills.
- It is ideal for busy bakers who want fresh sourdough with minimal effort.
- The machine controls the temperature and timing for even baking.
- You have fewer dishes to clean than in traditional sourdough baking.
Cons:
- Most machines do not allow for long fermentation, which is essential for sourdough.
- The crust is softer than that of oven-baked sourdough.
- The loaf will have a standard bread machine shape, rather than a rustic round or oval.
- Many bread machines have limited sizes, so you cannot bake large loaves.
- You can't adjust baking conditions as easily as in an oven.
10. Baking sourdough in an oven bag
This sourdough baking method requires no special equipment, just a heat-safe oven bag. It traps moisture from the dough as it bakes, acting like a mini steam chamber. I first saw this technique demonstrated by Alex Duarte Ribeiro at @padocadoalex and Pablo Andre at @ProfessorPabloAndre.
Pros:
- The bag helps create steam.
- There is no need for expensive baking equipment.
- You do not need to lift heavy pots.
Cons:
- The crust is not as crispy as baked in a Dutch oven.
- The bag does not hold heat like a cast-iron or enamel pan.
- Oven bags are single-use, which creates waste.
- Most oven bags can't handle very high temperatures, so check the heat limit before baking.
Top tips for baking sourdough without a Dutch oven
- Maximize steam in the first 20 minutes: Since Dutch ovens naturally trap steam, replicate this effect by placing a tray of hot water at the bottom of your oven.
- Spritz with water before baking: A light mist on the dough surface improves steam production.
- Use a baking stone or steel: When baking directly on a baking sheet, stone, or steel, preheat it well for a better oven spring and a crispier crust.
- Cover your loaf creatively: If using a Dutch oven alternative, cover your bread with an inverted bowl or an upside-down roasting pan for the first half of the bake to trap steam.
- Adjust oven temperature for thin bakeware: Since loaf pans or baking dishes may transfer heat differently, reduce the temperature slightly (10-15°F) if the crust browns too fast.
- Select the correct rack position: The middle of the oven provides the best heat distribution.
- Check the bakeware's heat tolerance: Verify with the manufacturer whether your bakeware, including baking sheets or trays, is safe for temperatures of 450-500°F (230-260°C). Opt for borosilicate glass, which is more resistant to thermal shock than regular glass.
- Practice oven safety: When working with steam, always use oven mitts to protect your hands and safety goggles when removing the covered baker's lid or adding boiling water to a hot pan. Open the oven door carefully to avoid sudden bursts of hot air.
Recipe
Sourdough Bread Without a Dutch Oven
Here is a foolproof sourdough bread recipe without a Dutch oven. This open bake method uses a baking steel or stone with a steam pot filled with hot water placed beneath the loaf.
- Prep Time: 17 hours
- Cook Time: 40 minutes
- Total Time: 17 hours, 40 minutes
- Yield: 1 loaf 1x
- Method: Baking
- Cuisine: American
Ingredients
- 500 g bread flour
- 350 g water
- 100 g levain or active starter (at peak)
- 10 g sea salt
10 g white rice flour (optional, for dusting)
Instructions
- Autolyse: Combine the measured flour and water in a large mixing bowl. Mix with your hands or a dough whisk until the dough looks rough and shaggy. Cover the bowl with plastic wrap or a damp kitchen towel and let it rest for about 30 minutes.
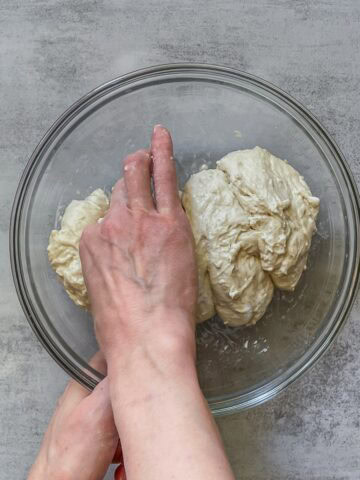
- Mix the dough: Add the levain at its peak and sea salt. Mix everything by hand for 3-10 minutes based on your schedule and the desired level of gluten development. A longer mix will strengthen the dough. After mixing, cover the bowl again and let it rest for 30 minutes. This marks the beginning of bulk fermentation.
- Fold the dough: Perform two sets of stretch and folds, spaced about 30 minutes apart, followed by two sets of coil folds, also separated by 30-minute intervals. During each fold, stretch the dough in four directions. After each set, take the dough temperature and record it in a baking log. Keep the bowl covered during rest periods between folds.
- Continue bulk fermentation: Let the dough ferment on the counter for a few more hours. Check the temperature every 30 minutes and monitor its rise. Bulk fermentation ends when the dough reaches the target percentage, which varies depending on the dough temperature. It's ready when bubbles appear on the surface and sides of the dough (especially if the bowl is transparent), the edges appear slightly domed, and the dough gives a gentle jiggle when the bowl is moved.
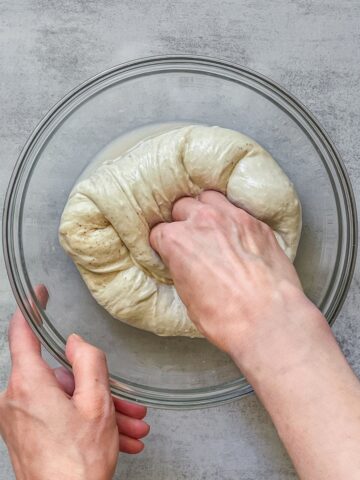
- Preshape the dough into a round form and let it rest uncovered on the counter for 15 to 20 minutes.
- Shape the dough: Dust your work surface lightly with rice flour. Flip the dough onto the floured surface and form it into a boule or batard. Prepare a banneton or a substitute, like a small bowl lined with a tea towel, and coat it generously with rice flour. Place your shaped dough seam side up into the prepared basket or bowl.
- Proof the dough: Cover the banneton or place it inside a plastic bag and refrigerate it. Let the dough proof in the fridge for 12 to 16 hours, although it can rest for up to 48 hours, depending on the flavor you want. The longer it proofs, the more tangy the result.
- Score the dough: Remove the dough from the fridge and gently invert it onto a sheet of parchment paper. Dust off any excess flour with a pastry brush. Score the dough with a bread lame. If you're starting, try a simple slash or an X. If you're feeling creative, go for a decorative pattern.
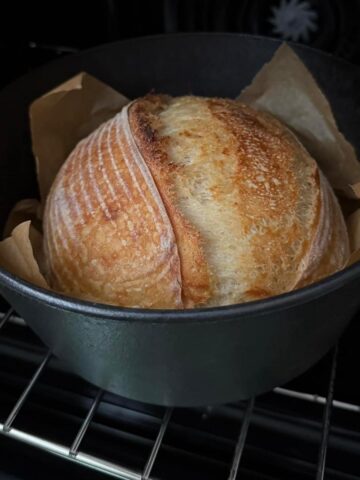
- Bake the bread: Preheat the oven to 500°F (260°C) with a baking stone or pizza steel in the center and a heatproof pot on a lower rack for 30-60 minutes. Boil water while the oven heats. Wearing oven mitts and safety goggles, slide the dough with a pizza peel onto the hot surface. Pour about 350 ml (1 ½ to 2 cups) of boiling water into the pot below to create steam (be careful!). Lower the temperature to 430°F (220°C) and bake for 20 minutes. Then, remove the steam pot and continue baking for an additional 17 to 20 minutes, or until the desired color is achieved.
- Cool the bread: Once baked, transfer the bread to a wire rack and let it cool for at least 2 hours before slicing.
Notes
- Storage and freezing: Store sourdough bread for 3-5 days. Freeze individual slices for up to 1-2 weeks, a whole loaf for 1-2 months.
- Safety tip: Always use oven mitts or silicone gloves when handling hot pans.
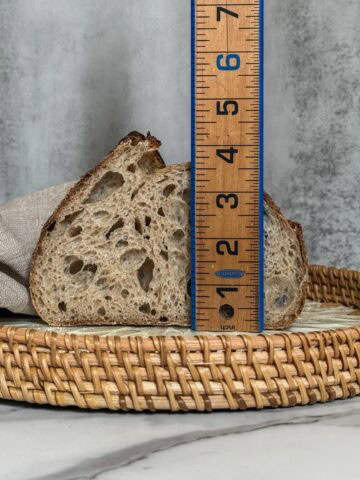
- Check for doneness: Your bread is fully baked when the internal temperature reaches 205-210°F (96-99°C). Use a digital probe thermometer to check.
- Need help getting started? Check out my beginner's sourdough bread guide to learn sourdough basics first.
- Note: Nutritional information does not include the white rice flour used for dusting.
Nutrition
- Calories: 2002
- Sugar: 1.5g
- Sodium: 3923mg
- Fat: 5.4g
- Saturated Fat: 0.9g
- Carbohydrates: 419.7g
- Fiber: 14.9g
- Protein: 56.8g
- Cholesterol: 0mg
Comments
No Comments