
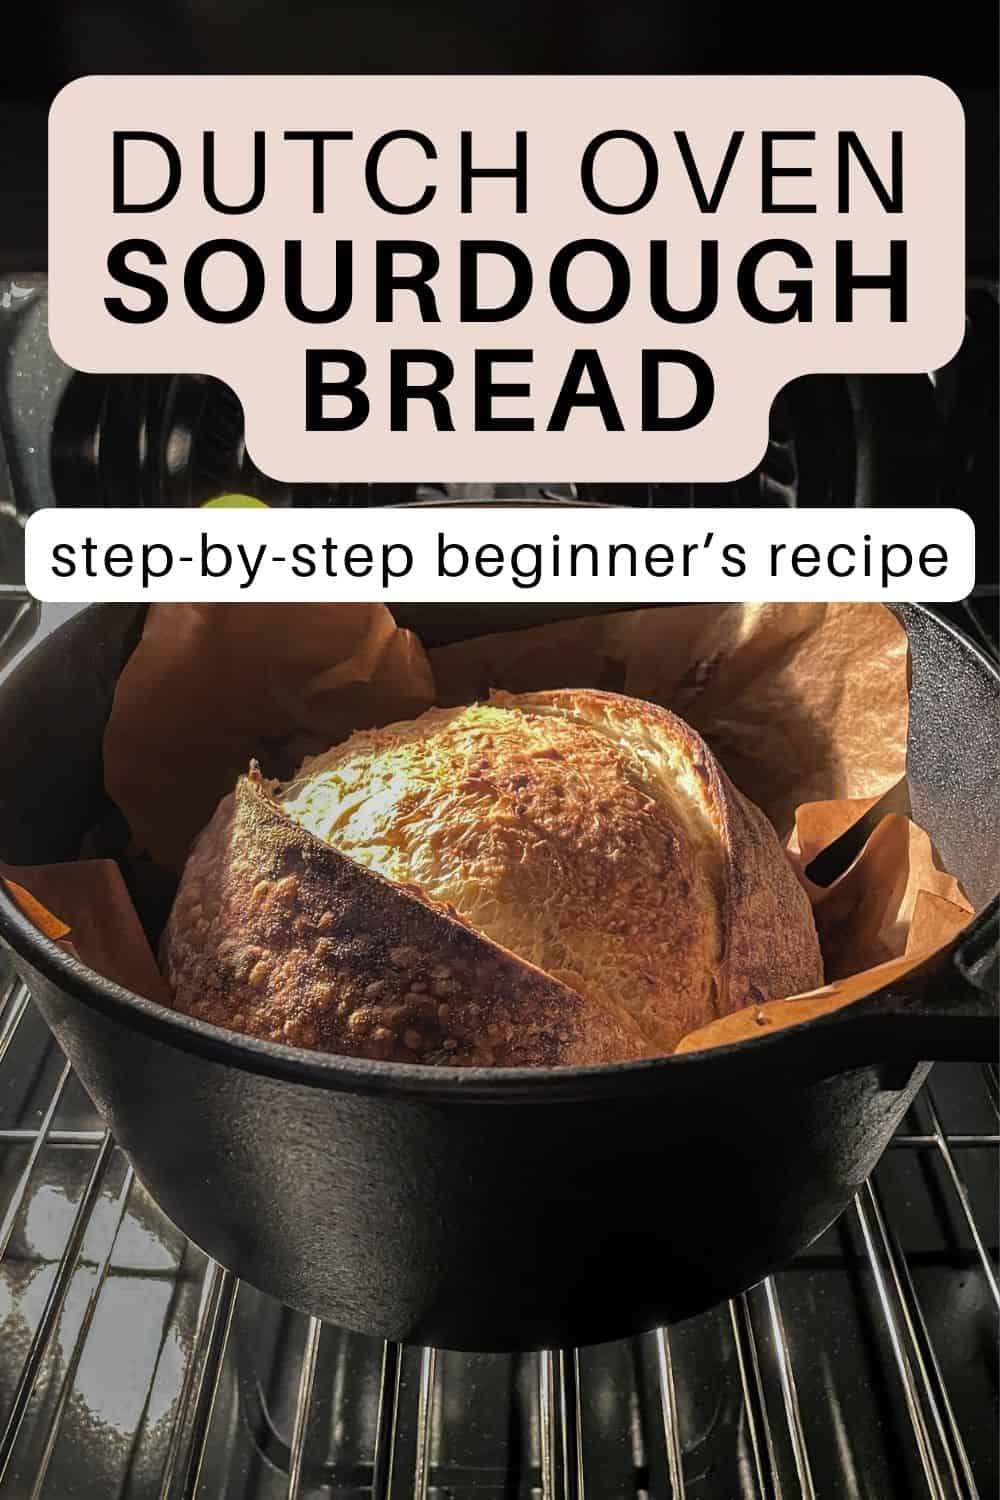

Dutch oven sourdough bread is a classic method for baking sourdough in a Dutch oven. It is a staple in sourdough baking because it creates the ideal steam environment for a strong oven rise and a crisp crust. Grab my sourdough bread baking log to track your progress and start baking.
If you are in the process of choosing the best Dutch oven for sourdough bread, I have written an article that outlines how to select one, what to look for, and how to use it effectively.
If you are just starting with sourdough, begin with my Beginner's Sourdough Guide to learn the basics. To make a new starter, refer to my Beginner's Sourdough Starter recipe.
Why use a Dutch oven for sourdough bread
Dutch oven baking is considered one of the best methods for baking sourdough bread for several reasons.
- Ideal steam creation: A Dutch oven traps moisture and creates a steamy environment. The steam allows the dough to expand fully before the crust sets, resulting in a better rise (oven spring) and a more open crumb.
- Even heat distribution: The thick walls of a Dutch oven ensure even heat distribution, which helps maintain a consistent baking temperature.
- Temperature control: A Dutch oven can reach high temperatures and retain heat effectively, creating a stable, high-heat environment.
Overall, Dutch oven baking provides a straightforward and reliable method for achieving professional-quality sourdough bread at home.
How to bake sourdough bread in a Dutch oven
- Place an empty Dutch oven, including its lid, into your oven. Preheat the oven to 500°F (260°C) for 30-60 minutes to make sure the Dutch oven is thoroughly heated.
- Take the fully proofed bread dough from the fridge (if cold-proofing) and flip it onto the parchment paper.
- Use a bread lame or a sharp knife to score the dough.
- Carefully remove the hot Dutch oven from the oven using oven mitts. Using the parchment paper as handles, gently lower the dough into the Dutch oven.
- Lower the oven temperature to 450°F (230°C). Cover the Dutch oven with its lid to trap steam and bake for 20 minutes.
- Remove the lid and bake for 17-20 minutes or until the crust reaches the desired color. Be careful of the steam released from the oven!
- Use a probe thermometer to check the internal temperature of bread. When fully baked, it should be 205-210°F (96-99°C).
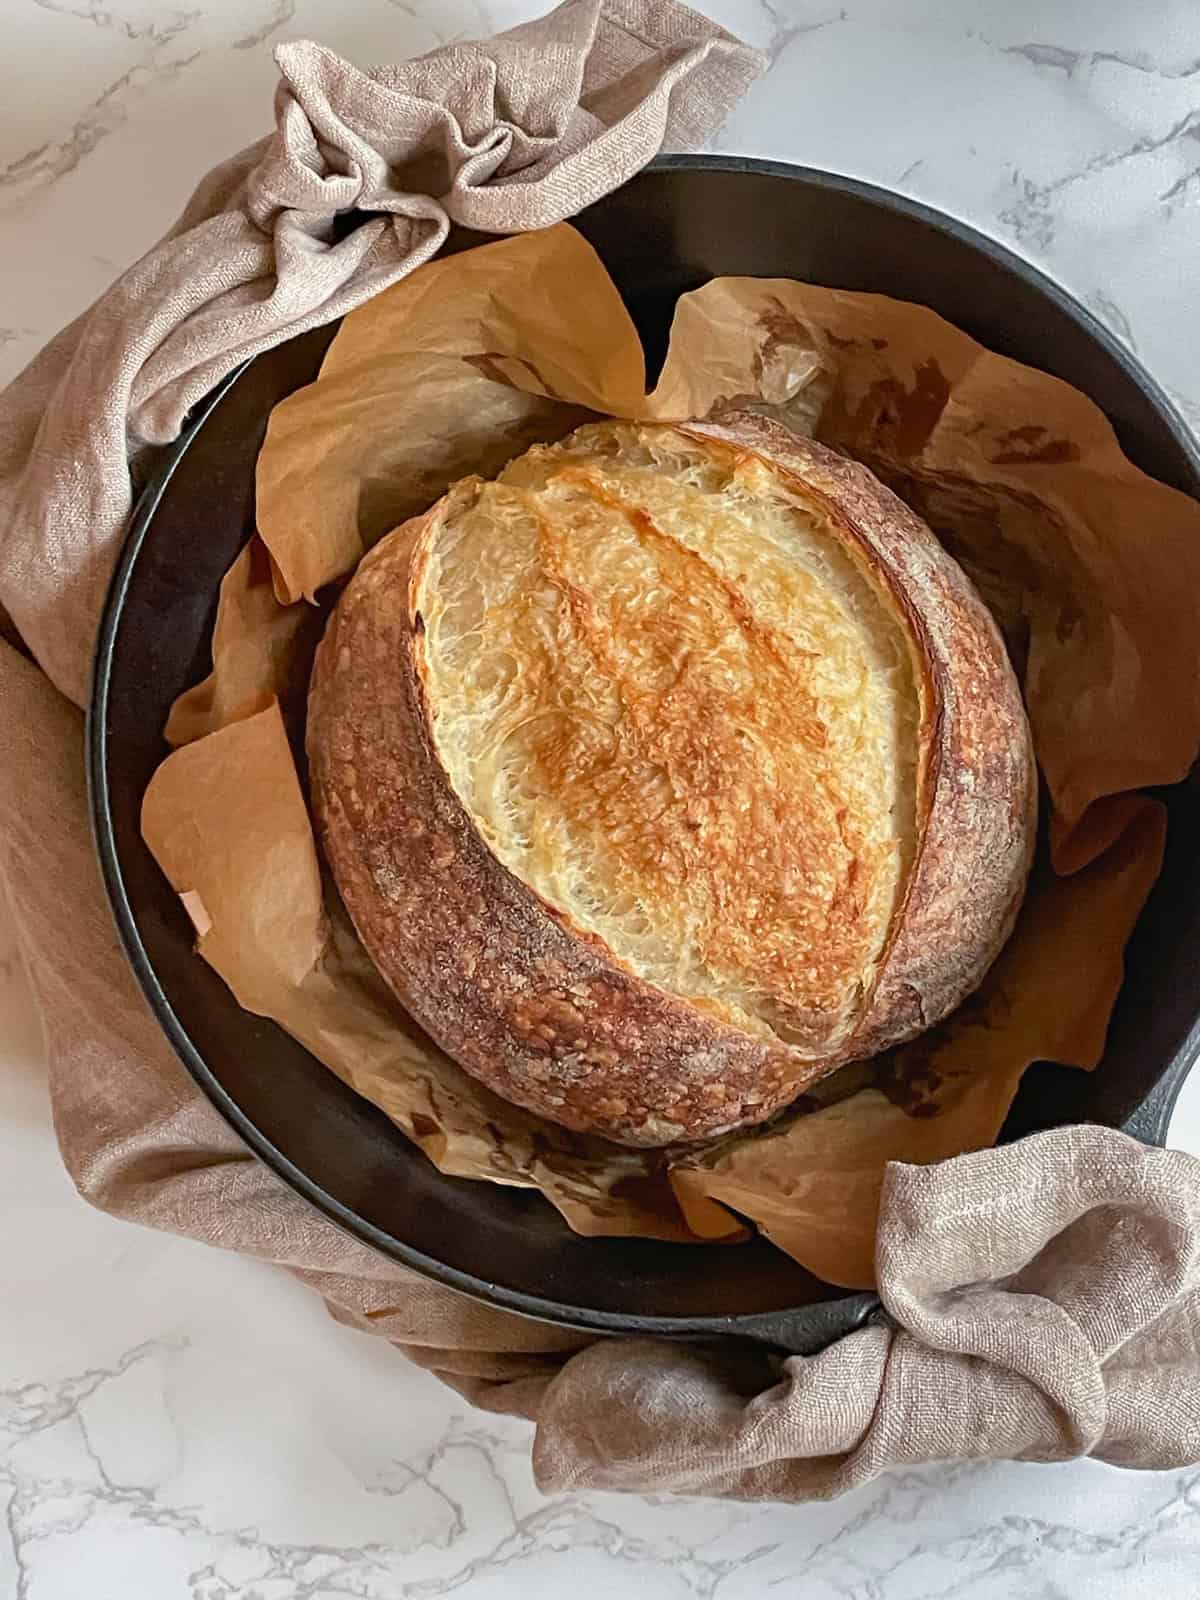
- Carefully remove the bread from the Dutch oven and place it on a cooling rack. Let it cool for at least 2 hours before slicing.
Tips for baking sourdough in a Dutch oven
- Preheat thoroughly: Preheat the Dutch oven with the lid to ensure even heat distribution.
- Handle with care: To avoid burns, use oven mitts or heatproof silicone gloves when handling the hot Dutch oven. The lid and pot retain high heat.
- Use top-quality parchment paper: Place the dough on parchment paper (here is how to choose the best parchment) to make transferring it into the Dutch oven easier. This also prevents sticking and ensures smooth removal after baking.
- Add extra steam (optional): Lightly mist the scored dough with water or spray the inside of the lid with water just before closing the pot.
- Retain steam: Keep the lid on for the first 20 minutes of baking to lock in steam. Avoid opening the oven during this critical phase.
- Uncover for browning: After the initial steam phase, remove the lid to let the crust brown and crisp. Monitor closely to achieve your desired crust color.
- Use a cold Dutch Oven (optional): If preheating isn't an option, try the cold Dutch oven method: place the dough in the Dutch oven without preheating and start baking. While results may vary, it is a safe and convenient alternative.
- Cool before cleaning: Allow the Dutch oven to cool completely before washing to prevent thermal shock, which can cause cracks in enamel-coated Dutch ovens.
- Batch baking: When baking multiple loaves, use the same type of covered baker and avoid mixing different types of bakeware, such as Dutch ovens, Granite Ware roasters, or ceramic cloches. This maintains a steady oven temperature, as other materials may heat up differently and require different handling, such as preheating or not.
Ingredients
- Flour: Use unbleached bread flour with a protein content of at least 12.5%. I prefer to use bread flour with a protein content of 12.7-13.5%. If you are comfortable working with whole wheat flour, substitute 5-10% of the flour with whole wheat.
- Water: Opt for unchlorinated tap water, filtered or spring water. To dechlorinate tap water, leave it in an open container on the counter overnight.
- Sourdough starter: Use 100% hydration wheat levain or active starter at peak.
- Salt: Use fine sea salt. Avoid iodized table salt.
- White rice flour is used to dust the work surface and the proofing basket.
Final bread formula
| Ingredient | Baker's Percentage | Weight |
|---|---|---|
| Bread flour | 100% | 500g |
| Water | 70% | 350g |
| Leavin/Active starter, 100% hydration | 20% | 100g |
| Fine sea salt | 2% | 10g |
- Total dough weight is 960g. To adjust the bread formula for your own loaf, use the baker's percentages or my sourdough calculator.
- Room temperature: 73°F (23°C) and 40% humidity
- Bulk fermentation: 6 hours 30 minutes to 7 hours 30 minutes with a 75-80% increase in dough size
- Cold proof: 14 hours in the fridge
- Baking: 450°F (232°C) in a conventional oven for 20 minutes with the lid on, then 17-20 minutes with the lid off.
Step-by-step Dutch oven sourdough bread
If this is your first loaf of bread, make sure to read my pilar Beginner's Sourdough Bread recipe.
1. Make a levain (an active starter):
Feed the starter in the morning at a 1:1:1 ratio (35g starter, 35g flour, and 35g water), and wait 4-6 hours for it to peak. Or feed it right before bed, based on your starter feeding ratio and peak time.
2. Autolyse
Weigh the water and flour into a large mixing bowl. Mix with your hand or a dough whisk until a shaggy dough forms. Cover the bowl with a plastic film or a damp kitchen towel and let it sit for 30 minutes (see my guide to sourdough autolyse).
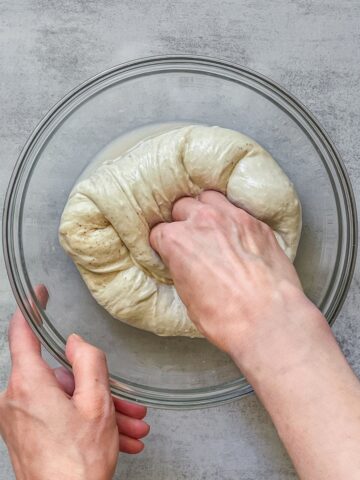
3. Mix the dough
Add the levain (an active starter) and sea salt to the bowl. Mix thoroughly by hand for 3-10 minutes, depending on your schedule and the desired level of gluten development. A more extended mix builds a stronger gluten network.
Cover the bowl with plastic wrap or a damp towel and let the dough rest for 30 minutes. Bulk fermentation begins once the starter is added.
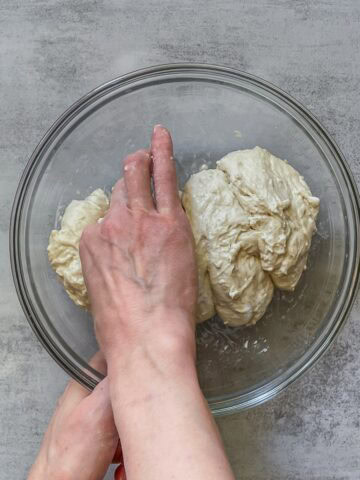
4. Bulk fermentation
Do two sets of stretch and folds, 30 minutes apart, followed by two sets of coil folds, also spaced 30 minutes apart. For each set, fold the dough in all four directions. Keep the bowl covered between folds and let the dough rest for 30 minutes after each set of folds.
After the last set of coil folds, allow the dough to continue bulk fermentation, checking its rise to track progress. Bulk fermentation speeds up in a warm kitchen and slows down in cooler conditions.
Note: I usually aim for about a 75-80% rise at 73°F (24°C), though with King Arthur bread flour and proper mixing, I can push it to 90%.
Finish bulk fermentation when the dough has visible bubbles on the surface and along the sides of the bowl (if it is glass), the edges have a slight dome, and the dough jiggles gently when you move the bowl.
6. Preshape the dough
Preshape the dough into a round, then let it rest uncovered for 15-20 minutes.
7. Shape the dough
Lightly flour your work surface with rice flour. Turn the dough out onto the table and shape it into a boule or batard (see my guide to shaping bread dough).
Prepare a banneton or an alternative proofing basket, such as a small bowl lined with a cotton tea towel. Dust it with rice flour. Place the shaped dough into the banneton or bowl, seam side up.
8. Proof the dough
Cover the banneton with a clean towel or place it inside a plastic bag, then refrigerate. Refrigerate for a cold proof lasting 12-16 hours, or up to 48 hours. The longer the proof, the more pronounced the sourdough flavor will be.
9. Score the dough
Remove the dough from the fridge. Flip it out of the banneton onto a piece of parchment paper. Use a pastry brush to remove any excess flour.
Score the dough using a bread lame. If you are a beginner, opt for a single slash for a batard or a cross "X" for a boule. Once you are more confident, try creative scoring patterns.
10. Bake the bread
Place your Dutch oven into the oven and preheat to 500°F (260°C) for 30 minutes.
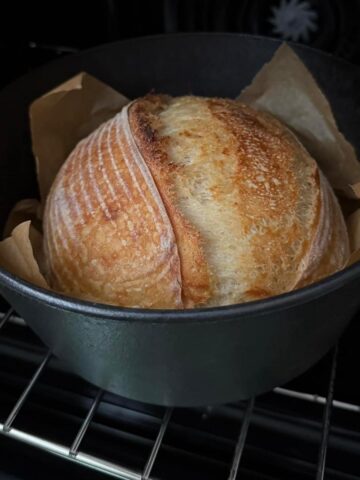
With the oven mitts on, transfer the dough to the Dutch oven, cover with the lid, and place it on the middle rack of the oven. For extra steam, spritz the dough with water or lightly spray the hot Dutch oven lid before covering. Lower the temperature to 450°F (232°C) and bake for 20 minutes.
After 20 minutes, use the oven mitts to remove the lid and continue baking for an additional 17-20 minutes, or until the crust reaches your desired color. Check the internal temperature of bread with a probe thermometer. It should reach 205-210°F (96-99°C).
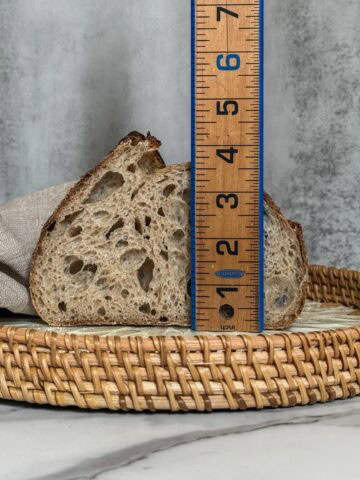
Let the bread cool on a wire rack for at least 2 hours before slicing. See my guides on how to cut sourdough bread and how to store sourdough bread.
Dutch oven baking variations
- Combine Dutch oven baking with finishing directly on the oven rack. After the initial steaming phase, carefully lift the loaf from the Dutch oven using the parchment paper ends, then transfer it to the oven rack (without parchment) to finish baking.
- Replace the Dutch oven with a Granite Ware roaster. Don't preheat the roasting pan before loading the loaf.
- When baking multiple loaves in a limited oven space, rotate bread between racks for different stages. Begin with loaves in Dutch ovens on the lower shelf. After 20 minutes of steaming, move them to the upper rack to finish baking and reload the Dutch ovens with scored dough. Adjust the temperature and timing to balance the steam and dry phases.
- Experiment with baking temperature and time for the best results.
Sample sourdough baking timeline
| Day 1 | |
| 8:00 AM | Build levain/active starter |
| 12:00 PM | Autolyse, rest for 30 minutes |
| 12:30 PM | Add levain (starter) and salt, rest for 30 minutes |
| 1:00 PM | Stretch and folds #1, rest for 30 minutes |
| 1:30 PM | Stretch and folds #2, rest for 30 minutes |
| 2:00 PM | Coil folds #1, rest for 30 minutes |
| 2:30 PM | Coil folds #2, rest for 30 minutes |
| 7:00 PM | Preshape and shape the dough. |
| 7:45 PM | Cold proof |
| Day 2 | |
| 8:00 AM | Score and bake |
FAQ
No, but it is highly recommended. A Dutch oven traps steam during the first part of baking, which helps the dough rise properly and develop a crispy crust. Without it, you may get less oven spring and a thinner crust.
Place a piece of parchment paper over your banneton, flip it upside down to release the dough, and score it. Then gently lower the parchment and dough into the preheated Dutch oven. The parchment makes it easy and safe to handle, even with a hot pot. Alternatively, you can use a high-quality silicone bread sling.
You can bake sourdough without a Dutch oven, for example, on a baking stone or sheet with a tray of hot water underneath to create steam. Alternatively, use the double loaf pan method by covering the dough with an inverted pan.
Ready to keep learning?
Learn what the internal temperature of bread should be for perfectly baked sourdough.
PrintRecipe
How to Bake Sourdough Bread in a Dutch Oven
Here is a foolproof Dutch oven sourdough bread recipe. Learn how to bake sourdough bread in a Dutch oven, which is one of the best ways to get a perfect crust, oven spring, and bakery-style loaf, perfect for beginners.
- Prep Time: 17 hours
- Cook Time: 40 minutes
- Total Time: 17 hours, 40 minutes
- Yield: 1 loaf 1x
- Method: Baking
- Cuisine: American
Ingredients
For the levain (an active starter):
- 35 g sourdough starter
- 35 g bread flour
- 35 g water
For the bread dough:
- 500 g bread flour (I use King Arthur organic bread flour)
- 350 g water (70% hydration)
- 100 g levain (active starter at peak)
- 10 g sea salt (I use Redmond ancient fine sea salt)
10 g white rice flour (for dusting)
Instructions
- Make a levain (an active starter): Feed the starter in the morning at a 1:1:1 ratio (35g starter, 35g flour, 35g water) and wait 4-6 hours for it to peak.
- Autolyse: Weigh water and flour into a large mixing bowl. Mix them with your hand or a dough whisk until a shaggy dough forms. Cover the bowl with a plastic film or a damp kitchen towel and let it sit for 30 minutes.
- Mix the dough: Add the levain (an active starter at peak) and sea salt to the bowl. Mix thoroughly by hand for 3-10 minutes. A longer mix builds a stronger gluten network. Cover the bowl with plastic wrap or a damp towel and let the dough rest for 30 minutes. Bulk fermentation begins once the starter is added.
- Fold the dough: Do two sets of stretch and folds, 30 minutes apart, followed by two sets of coil folds, spaced 30 minutes apart. For each set, stretch the dough in all four directions. Keep the bowl covered between folds and let the dough rest for 30 minutes after each set.
- Continue bulk fermentation: Let the dough continue to ferment. End bulk fermentation when the dough has visible bubbles on the surface and along the sides of the bowl (if it is glass), the edges have a slight dome, and the dough jiggles gently when you move the bowl.
- Preshape the dough into a round, then let it rest uncovered for 15-20 minutes.
- Shape the dough: Lightly flour your work surface with rice flour. Turn the dough out onto the table and shape it into a boule or batard. Prepare a banneton or an alternative proofing basket, such as a small bowl lined with a cotton tea towel. Generously dust it with rice flour. Place the shaped dough into the banneton or bowl, seam side up.
- Proof the dough: Cover the banneton with a clean towel or place it inside a plastic bag, then refrigerate. Refrigerate for a cold proof lasting 12-16 hours, or up to 48 hours. The longer the proof, the more pronounced the sourdough flavor will be.
- Score the dough: Remove the dough from the fridge. Flip it out of the banneton onto a piece of parchment paper. Use a pastry brush to remove any excess flour. Score the dough using a bread lame. If you are a beginner, opt for a single slash for a batard or a cross "X" for a boule. Once you are more confident, try creative scoring patterns.
- Bake the bread: Place your Dutch oven into the oven and preheat to 500°F (260°C) for 30 minutes. With the oven mitts on, transfer the dough to the Dutch oven, cover with the lid, and place it on the middle rack of the oven. Lower the temperature to 450°F (232°C) and bake for 20 minutes. After 20 minutes, use the oven mitts to remove the lid and continue baking for an additional 17-20 minutes, or until the crust reaches your desired color. For extra steam, spritz the dough with water or lightly spray the hot Dutch oven lid before covering. Let it cool on a wire rack for at least 2 hours before slicing.
Notes
- Refer to my Beginner's Sourdough Bread recipe for step-by-step instructions and photos.
- Storage and freezing: Store sourdough bread for 3-5 days. Freeze individual slices for up to 1-2 weeks, a whole loaf for 1-2 months.
- Safety tip: Always use oven mitts or silicone gloves when handling hot pans.
- Check for doneness: Your bread is fully baked when the internal temperature reaches 205-210°F (96-99°C). Use a digital probe thermometer to check.
- Flour: Use bread flour or a mix of all-purpose and bread flour. Substitute 5-10% of the flour with whole wheat flour, if desired.
- Want to create a custom formula for your loaf? Try my sourdough calculator.
- Need help getting started? Check out my beginner's sourdough bread guide to learn sourdough basics first.
- Note: Nutritional information does not include the white rice flour used for dusting.
Nutrition
- Calories: 2002
- Sugar: 1.5g
- Sodium: 3923mg
- Fat: 5.4g
- Saturated Fat: 0.9g
- Carbohydrates: 419.7g
- Fiber: 14.9g
- Protein: 56.8g
- Cholesterol: 0mg
Mable says
Very complicated!
Irina Totterman says
Hello Mable, I’m sorry to hear that sourdough feels complicated. It can seem that way at first, but once you learn the basics, everything starts to fall into place. Please start with my Beginner’s Sourdough Guide. Also, subscribe for free sourdough lessons. Good luck!