
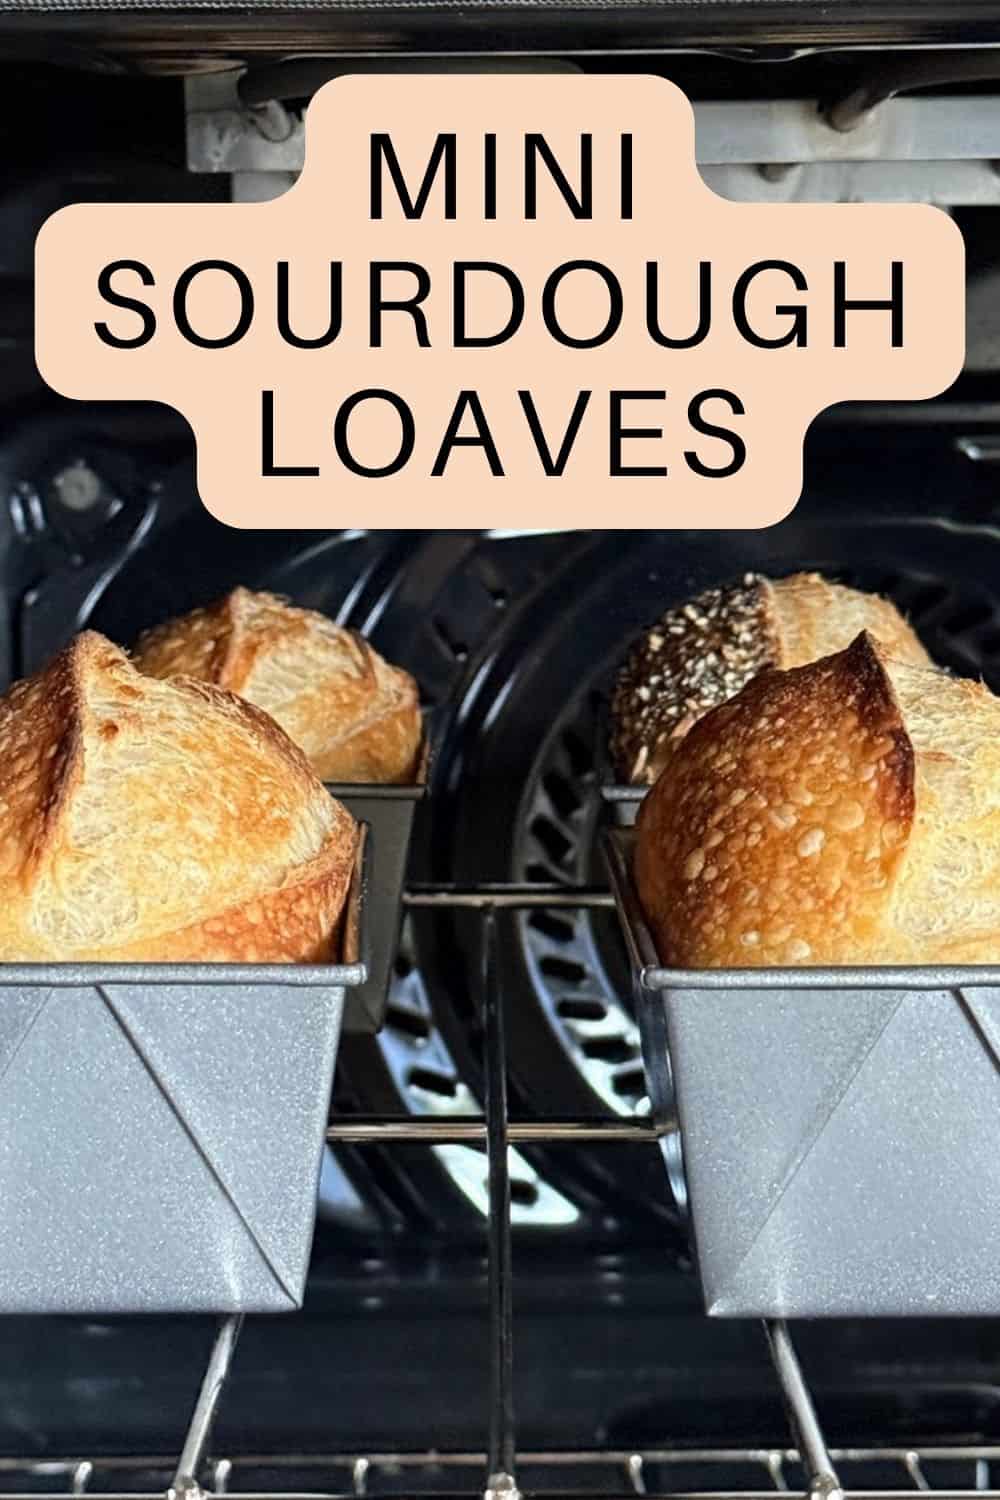
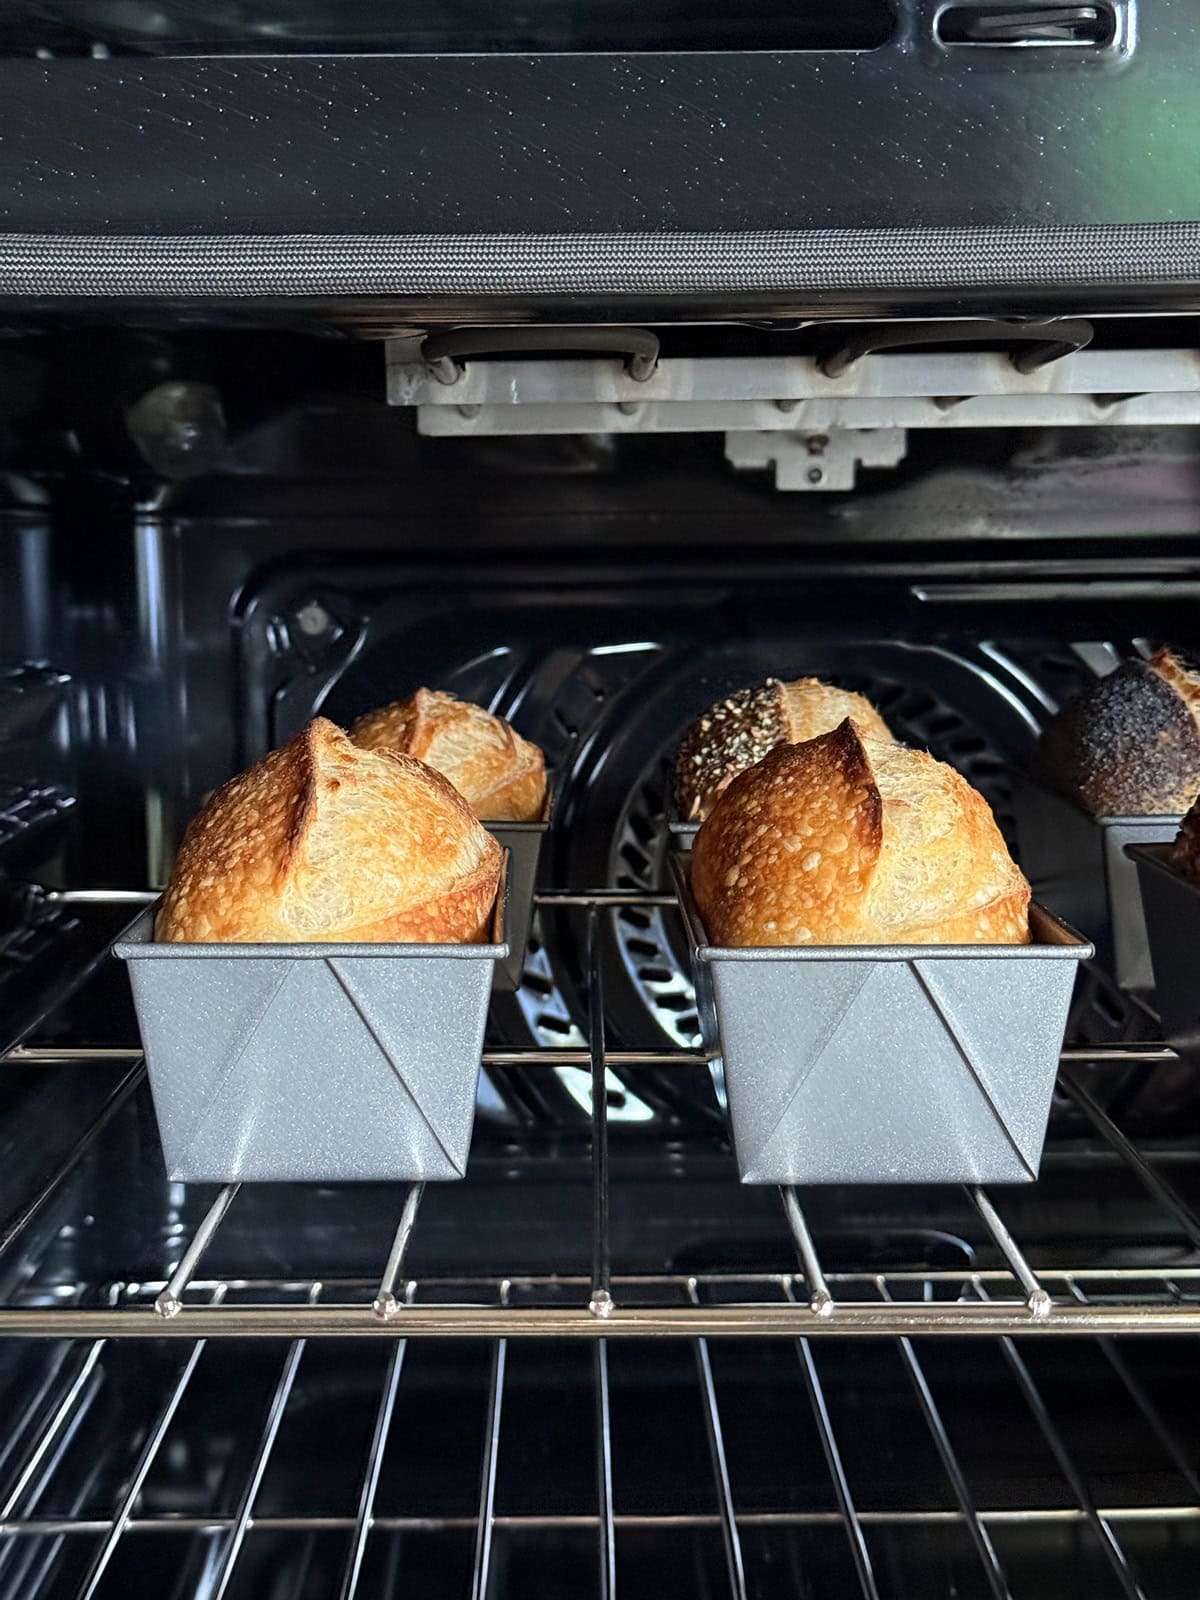
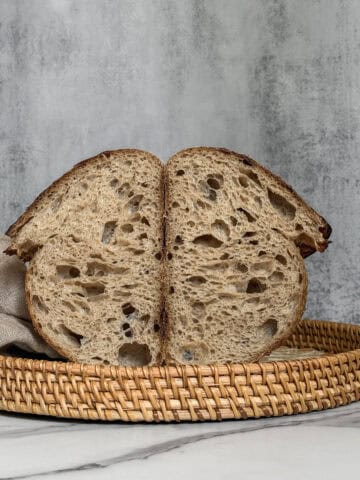
Quick Summary: These sourdough mini loaves are made from one batch of dough (500g flour) divided into three small batards, proofed directly in greased mini loaf pans, and baked with steam at 430°F (220°C).
Total time is about 17 hours, mostly hands-off cold proofing. They are perfect for gifting, sampling flavors, or making a sourdough flight, and you don't need a banneton or Dutch oven, just mini loaf pans.
The method is similar to my double loaf pan technique, scaled down to mini pans, and you will proof right in the pans. To track your bake, download my Sourdough Baking Log.
This recipe assumes you have an active sourdough starter that doubles within 4-6 hours, understand sourdough basics, and know when bulk fermentation is done. If you are new to sourdough, start with my Beginner's Sourdough Guide to learn the basics.
Why make sourdough mini bread loaves
- Sourdough mini loaves are perfect when you want all the flavor and texture of traditional sourdough bread, but in smaller, more manageable portions.
- They bake faster, cool quickly, and are ideal for gifting, freezing, or serving individual portions.
- While you can make a small batch sourdough bread for two, you can also have fun experimenting with flavors by baking a couple of mini loaves.
- Mini loaves also let you test different flours or mix-ins without committing to a full-sized loaf.
- They are perfect for sourdough mini loaf flights and often sell out fast, making them ideal for anyone selling sourdough bread.
- Plus, they look adorable on the table and are a great way to practice shaping and scoring on a smaller scale.
What is a sourdough flight?
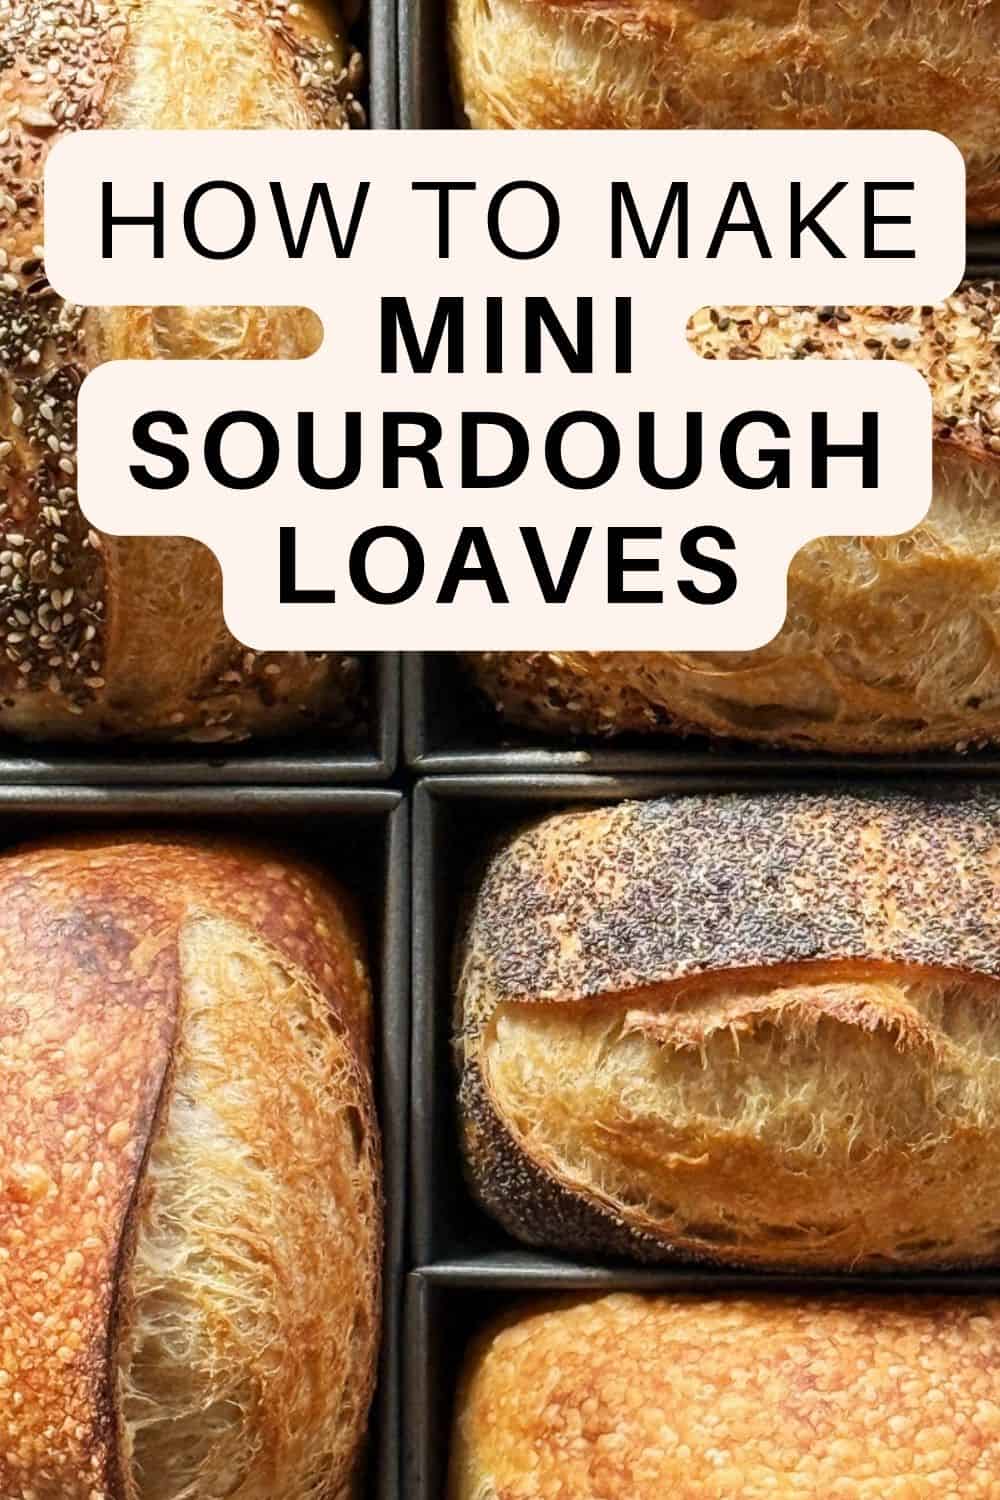
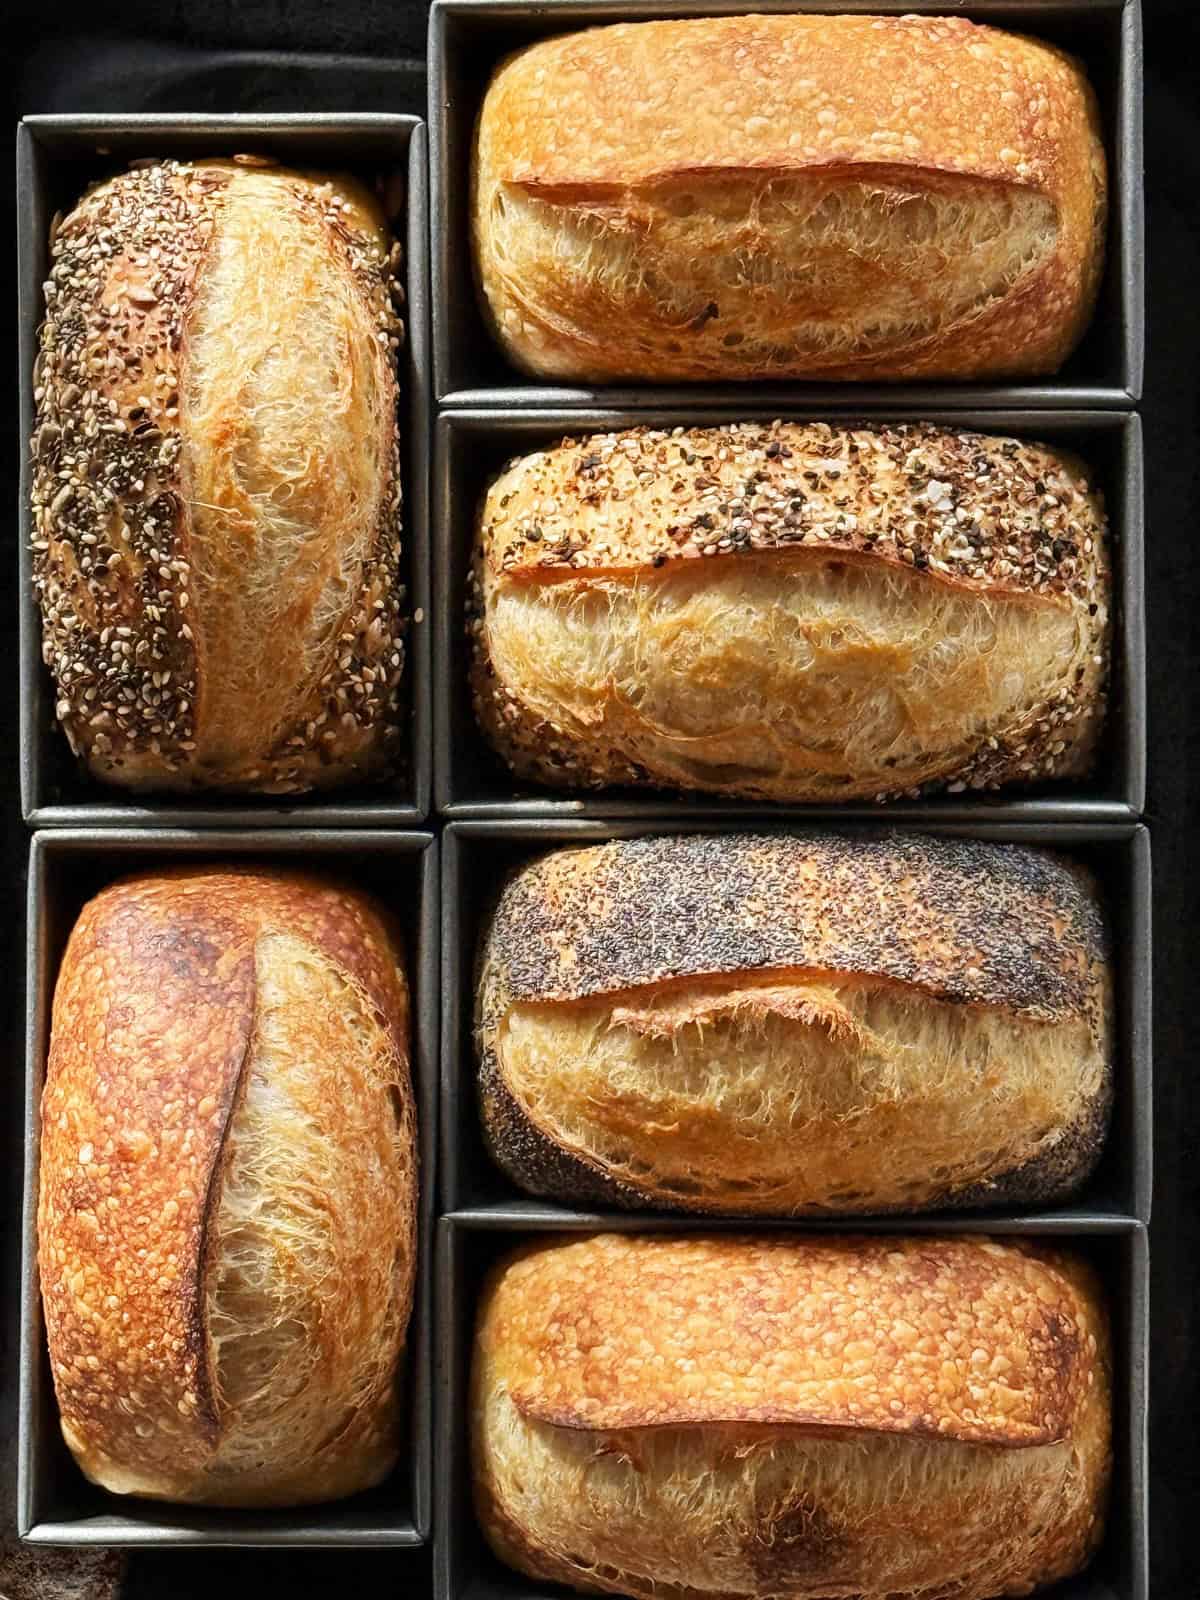
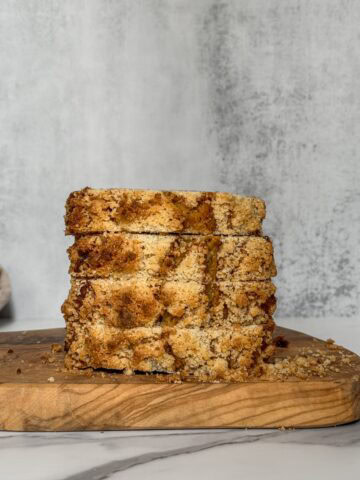
A sourdough flight is a set of mini loaves baked in different flavors, served together like a tasting flight of bread. Because this recipe makes three mini loaves from one batch of dough, it is perfect for a flight: divide the dough, then fold a different mix-in into each loaf so every one has its own flavor.
Popular sourdough flight flavors include rosemary and roasted garlic, cinnamon raisin, jalapeño cheddar, everything bagel, cranberry walnut sourdough, and chocolate chip.
The key to a good flight is adding your mix-ins evenly without overworking the dough. You can fold them in during the last set of stretch and folds, during shaping, or use lamination for a more even spread. See my guides on how to add sourdough inclusions and how to laminate sourdough for the techniques.
Ingredients
- Flour: Use unbleached bread flour with a protein content of at least 12.5%. For this recipe, I am using King Arthur bread flour with a protein content of 12.7%.
- Water: Use filtered, spring, or chlorine-free tap water. To dechlorinate the water, leave it in an open container on the counter overnight.
- Sourdough starter: Prepare a wheat levain or an active starter at 100% hydration, and use it when it is at its peak activity.
- Salt: Use fine sea salt. Avoid the iodized table salt.
- Avocado oil spray is used to grease mini loaf pans.
Before you start, make sure all ingredients are at room temperature and measure them accurately using a kitchen scale.
Final bread formula
It is created for baking three mini loaves.
| Ingredient | Baker's Percentage | Weight |
|---|---|---|
| Bread flour | 100% | 500g |
| Water | 75% | 375g |
| Leavin/Active starter, 100% hydration | 20% | 100g |
| Fine sea salt | 2% | 10g |
- The total dough weight is 985g, which is ideal for three mini loaf pans. For each Chicago mini loaf pan (5-¾ by 3-¼ by 2-¼ inches), I use 320g of dough. If you need to adjust the bread formula for your own loaf, see my guide to baker's percentages or use my sourdough calculator.
- My kitchen temperature is 73°F (23°C), with a humidity level of 40%
- Bulk fermentation: 6-7 hours with a 75-80% increase in dough size
- Proofing time: 14 hours cold-proof in the fridge
- Baking in a conventional oven: 430°F (230°C) with steam, 20 minutes; without steam, 15-17 minutes.
Tools & Equipment
- A kitchen scale for precise measurements.
- A large mixing bowl with enough space to mix and bulk ferment the dough.
- A probe thermometer for measuring dough temperature and the internal temperature of baked bread.
- A Danish dough whisk for mixing levain into water. Some bakers also use it to mix dough instead of using their hands.
- A bowl scraper for scraping dough from the sides of a bowl.
- An aliquot jar for tracking the rise of dough (if using the aliquot jar method). I use this 2.7-oz. plastic container.
- A damp linen or cotton towel to cover the dough and prevent drying. I love these flour sack towels.
- A bench scraper helps preshape the dough and clean your work surface.
- A dough scoring tool for slashing the dough. This bread lame is my favorite.
- Mini loaf pans: You will need three, each about 5.75 x 3 inches. If you plan to use the double-pan method, have three additional pans on hand to cover the loaves during baking. I use Chicago mini loaf pans and love how evenly they bake.
- Long oven mitts protect your hands from the high heat when handling the Dutch oven or roasting pan. These silicone gloves are my favorite.
- Bread knife: for slicing your sourdough bread into clean slices. Read more about how to choose the best bread knife.
How to make sourdough mini loaves
1. Make a levain (an active starter)
Feed your starter in the morning at a 1:1:1 ratio (35g each of starter, flour, and water) and let it peak. This 1:1:1 levain is used immediately at peak, not for daily maintenance.
2. Autolyse
In a large mixing bowl, combine the water and flour with your hands or a Danish dough whisk until a shaggy dough forms. Cover the bowl with plastic wrap or a damp towel and let it rest for 30 minutes (see my guide on how to autolyse sourdough).
3. Mix the dough
Add the levain (active starter) to the dough and mix until well combined, then sprinkle in the sea salt. Use your hand to mix for 3 to 10 minutes, depending on your schedule and the level of gluten strength you want to develop. A more extended mix builds a stronger gluten network.
Cover the bowl with plastic wrap or a damp tea towel and let it rest for 30 minutes. Once the levain is added, the bulk fermentation officially begins.
4. Bulk fermentation
Begin with two sets of stretch and folds, spaced 30 minutes apart. Next, do two sets of coil folds, also 30 minutes apart. For each set, stretch the dough in all four directions.
Between each fold, cover the bowl with plastic wrap or a damp kitchen towel and let the dough rest for 30 minutes.
After the last set of coil folds, allow the dough to continue bulk fermentation, checking its rise to track progress.
Note: I usually aim for about a 75-80% rise at 73°F (24°C), though with King Arthur bread flour and proper dough mixing, I can push it to 90%.
By the end of fermentation, you should notice bubbles on the surface and along the sides (if you are using a glass bowl). The edges will look softly domed, and when you gently shake the bowl, the dough should wobble slightly with a light, airy feel.
5. Divide, preshape, and bench rest
Turn the dough out onto a surface lightly dusted with white rice flour, then divide it into three equal portions, each about 320 grams. Preshape each piece into a round and let it rest uncovered for 15 minutes (see my guide to dividing and preshaping bread dough).
6. Shape the dough
Shape each round into a mini batard using a cinching bread shaping technique.
Lightly sprinkle a little white rice flour on the dough round and your work surface to prevent the dough from sticking. Gently flip the dough onto your work surface, sticky side up, and stretch it into a rough rectangle.
Lift the left side of the dough and fold it about 1-1.5 inches toward the center, pressing lightly so it sticks.
Then, lift the right side, folding 1-1.5 inches toward the center, and press lightly. The sides don't need to overlap completely.
Use both hands to roll the dough tightly from bottom to top, pressing lightly as you go, until you have a smooth, firm cylinder.
Pinch the ends of the dough, then let it rest for 2-3 minutes to tighten the seam, or gently pull the long side toward you with your hands or a bench scraper to create surface tension.
Meanwhile, lightly grease the mini loaf pans with avocado oil. I usually spritz 2-3 times, then spread the oil evenly with a silicone brush to coat all corners and prevent sticking.
Use a bench scraper or just your hands to place the shaped dough, seam-side down, into the pan.
7. Proof the dough
Place mini loaf pans with the dough in a plastic bag, or cover them with disposable shower caps. Let the dough proof in the fridge for 12 to 16 hours, or up to 48 hours. The longer it proofs, the deeper and more complex the sourdough flavor will become.
8. Baking
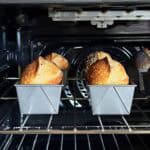
You can bake sourdough in mini loaf pans using two methods: the single-loaf pan method, which adds steam manually, or the double-loaf pan method, which traps steam naturally.
Single-loaf pan method (my preferred method)
- Place a heatproof pan (roasting pan, cast-iron skillet, or medium stainless steel pan) on the lower rack and preheat the oven to 500°F (260°C) for 30 minutes. Meanwhile, boil water.
- Open the oven door and place the mini loaf pans on the middle rack, leaving space between them for air circulation.
- Wear safety goggles and carefully pour 350-400 g of boiling water into the hot pan below, then quickly close the oven door. Optionally, spritz the dough and oven walls for extra steam.
- Reduce the oven temperature to 430°F (220°C) and bake for 20 minutes. Using oven mitts, remove the steam pan, close the oven, and continue baking for 15-17 minutes until the loaves are golden brown.
- Then, use oven mitts to remove the mini loaf pans, carefully release the loaves, and let them cool on a wire rack for at least 2 hours before slicing.
Double-loaf pan method (great for electric and gas ovens)
- Preheat your oven to 500°F (260°C) for 30 minutes.
- Remove the mini loaf pans from the fridge, take off the covers, and score the tops with a single slash using a bread lame.
- Place a second identical pan on top of each loaf to trap steam.
- Using oven mitts, place the pan stacks in the oven. Lower the temperature to 450°F (230°C) and bake for 20 minutes.
- After 20 minutes, carefully remove the top pans using oven mitts and continue baking for another 15-17 minutes, until the crust is golden brown.
- Then, use oven mitts to remove the mini loaf pans, carefully release the loaves, and let them cool on a wire rack for at least 2 hours before slicing.
Expert Tips
- Always use oven mitts or silicone gloves when handling hot pans.
- If you are using a steam pan, be cautious when adding boiling water, and consider wearing safety goggles for extra protection.
- Remove the top pan and cover the mini loaves with aluminum foil to prevent over-browning or burning when baking with two loaf pans.
- Check the internal temperature of bread: it should reach 205-210°F (96-99°C) when baking multiple batches.
- Allow the oven to return to 500°F (260°C) before loading the next batch.
- Leave some space between mini loaf pans in the oven for even baking.
- Adjust baking time and temperature as needed.
- Advanced notes: Use the aliquot jar method to track bulk fermentation. Measure the dough temperature after each set of folds and every 30-40 minutes throughout fermentation. Stop the bulk fermentation once the dough reaches the target rise. Refer to my Homemade Sourdough Bread recipe for guidance if needed.
FAQ
How long do you bake mini sourdough loaves? About 35 to 37 minutes total at 430°F (220°C): 20 minutes with steam, then 15 to 17 minutes after removing the steam pan, until golden and the internal temperature reaches 205 to 210°F (96 to 99°C).
How much dough goes in each mini loaf pan? About 320g per pan for a standard 5.75 x 3-inch mini loaf pan, which gives three loaves from this recipe.
How do you keep the top pan from sliding in the double loaf pan method? Use mini loaf pans with rims, or secure the top pan with 100% metal binder clips on the grip handles or wide rims at both ends to hold it in place and trap steam.
Can you make a sourdough flight with this recipe? Yes. Divide the dough into three (or more) and fold a different mix-in into each, like rosemary garlic, cinnamon raisin, or jalapeño cheddar, for a flavor flight. See the flight section above.
PrintRecipe
Sourdough Mini Loaves Recipe
Bake golden sourdough mini loaves with this easy, beginner-friendly recipe. Perfect for gifting, small batches, or sampling your favorite sourdough flavor.
- Prep Time: 17 hours
- Cook Time: 40 minutes
- Total Time: 17 hours, 40 minutes
- Yield: 1 mini loaf 1x
- Method: Baking
- Cuisine: American
Ingredients
For the levain (an active starter):
- 35 g sourdough starter
- 35 g bread flour
- 35 g water
For the bread dough:
- 500 g bread flour (I use King Arthur organic bread flour)
- 375 g water
- 100 g levain (active starter at peak)
- 10 g sea salt (I use Redmond ancient fine sea salt)
10 g white rice flour (for dusting)
Instructions
- Make a levain (an active starter): Feed your starter in the morning at a 1:1:1 ratio (35g starter, 35g flour, and 35g water), and wait 4-6 hours for it to peak.
- Autolyse: Mix water and flour with your hand or a dough whisk into a large mixing bowl until you have a shaggy dough. Cover the bowl with a plastic film or a damp tea towel and let it sit for 30 minutes.
- Mix the dough: Add the levain (your active starter) and mix it in. Then, sprinkle in the sea salt. Use your hand to mix thoroughly for 3 to 10 minutes. A longer mix builds a stronger gluten network. Cover the bowl with plastic wrap or a damp kitchen towel and let it rest for 30 minutes. Once the levain is added, bulk fermentation begins.
- Fold the dough: Start with two sets of stretch and folds, spaced 30 minutes apart. Then perform two sets of coil folds, also 30 minutes apart. For each set, stretch the dough in all four directions. Between folds, cover the bowl with plastic wrap or a damp kitchen towel and let the dough rest for 30 minutes.
- Continue bulk fermentation: Allow the dough to keep fermenting. Bulk fermentation is complete once you see visible bubbles across the surface and along the sides, if you are using a glass bowl. The edges of the dough will appear slightly domed, and if you gently shake the bowl, the dough should have a soft, wobbly jiggle.
- Divide and preshape: Divide the dough into three equal parts, then preshape each into a round. Let rest uncovered for 15 minutes.
- Shape the dough: Lightly dust your work surface with white rice flour. Gently flip each dough round and shape it into a mini batard. Place the dough seam side down in a lightly greased mini loaf pan.
- Cold proof: Cover the loaf tins with a towel or place each in a plastic bag. Refrigerate the dough for at least 12 hours, or up to 48 hours. The longer it chills, the tangier the flavor.
- Bake mini loaves: Place an empty steam pan (such as a roasting pan or cast-iron skillet) on the lower rack and preheat your oven to 500°F (260°C). Once preheated, bring water to a boil. Take the loaf pans out of the fridge and score the dough. Bring the tins to the middle rack of the oven. Carefully pour about 350-400g (or 1½ to 2 cups) of boiling water into the steam pan, then quickly close the oven door. Lower the temperature to 430°F (220°C) and bake for 20 minutes. After that, remove the steam pan and bake for an additional 15-17 minutes, until the crust is nicely browned.
- Cool the bread: Use oven mitts to remove the mini loaf pans, carefully release the loaves, and let them cool on a wire rack for at least 2 hours before slicing.
Notes
- Storage and freezing: Keep your sourdough bread at room temperature for 3 to 5 days. For longer storage, freeze individual slices for 1-2 weeks or whole mini loaves for 1-2 months.
- Multiple batches: If baking several loaves, allow the oven to return to 500°F (260°C) before loading the next batch. Adjust the baking temperature and time as needed by testing.
- Safety tip: Always use oven mitts or silicone gloves when handling hot pans. When pouring boiling water into the steam pan, wear safety goggles.
- Check for doneness: Your mini loaves are fully baked when the internal temperature reaches 205-210°F (96-99°C). Use a digital thermometer to check.
- Want to create a custom formula for your loaf? Try my sourdough calculator.
- Need help getting started? Check out my beginner's sourdough bread guide to learn sourdough basics first.
- Note: Nutritional information does not include the white rice flour used for dusting.
Nutrition
- Calories: 222
- Sugar: 0.2g
- Sodium: 433mg
- Fat: 0.6g
- Saturated Fat: 0.1g
- Carbohydrates: 46.6g
- Fiber: 1.7g
- Protein: 6.3g
- Cholesterol: 0mg


Dave says
Thank you so much. These pans you suggested are wonderful. I find these easier to batch prep and bake vs my mini boules because I can only fit two boules in my Dutch oven at once. I do have a question for the double loaf pan with these pans specifically. They slide off so frequently and I wanted to know if you had any tips or tricks for the double loaf pan method for these mini loaf pans? Thanks for your time.
Irina Totterman says
Hello Dave, It seems that the Chicago metallic loaf pans slide when using the double loaf pan method, but they work perfectly when using just one in an electric oven. If you have a gas oven, you might try mini loaf pans with rims (affiliate link). I've read that some bakers secure the top pan with 100% metal binder clips, attaching them to the "grip handles" or "wide rim" at both ends to help trap steam inside.
Tami Taylor says
I made this recipe yesterday! The mini loaves turned out PERFECTLY! And they are really cute!
Irina Totterman says
Thank you for making the recipe, Tami!