
This unloaf sourdough bread breaks away from traditional sourdough rules. You mix the ingredients, let the dough rise, and bake it in a cold Dutch oven. That is really all there is to it.
While I am a big believer in classic sourdough techniques (making levain, proper bread dough mixing, folding, preshaping, shaping, and baking with steam), this unloaf method seems one of the most approachable ways to bake sourdough. And I am giving it a fair try to see how well it can work.
I don't expect it to become a regular in my own kitchen, but I can absolutely see its place for busy parents, or anyone who just wants homemade bread without the extra steps.
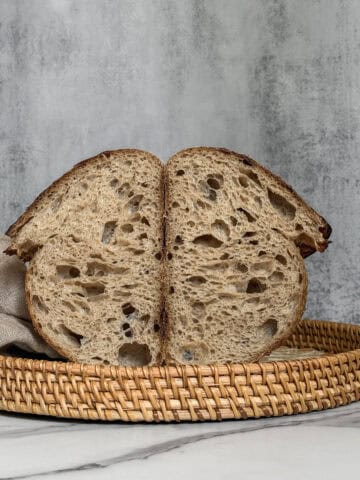
I am personally all about great oven spring and chasing that beautiful open crumb (yes, I love big holes!), but let's dive in and see what this Unloaf can do.
Note: If you are new to sourdough, I wouldn't recommend starting with unloaf sourdough bread. I recommend beginning with my Beginner's Sourdough Guide and Beginner's Sourdough Bread recipe.
What is unloaf sourdough bread?
Unloaf sourdough bread is a very simple, relaxed style of sourdough that breaks almost all the traditional rules. Unlike a classic sourdough bread recipe, it:
- Uses unfed starter (aka sourdough discard), so you don't need to make levain first. The term "unfed" is a bit misleading. It doesn't mean the starter was never fed. It only means it was fed at some point in the past. The key difference is whether the starter was allowed to reach its peak before being placed in the fridge. Read more about using the starter straight from the fridge.
- Doesn't involve stretching, folding, or elaborate shaping. The dough is just mixed and placed in a pan.
- It is often baked in a cold Dutch oven, without preheating.
The idea is to make sourdough baking approachable, quick, and stress-free. It is less about perfect oven spring and large holes, and more about easy, flavorful, everyday sourdough bread.
Using unfed sourdough starter (aka discard)
Unfed sourdough starter is the same as a discard. It hasn't been fed for a while, and its age has a big impact on how it behaves in your dough.
- Unfed starter 1-3 days old: The yeast is still fairly active, though the starter may be slightly more acidic than a fresh, fed starter. Lactic acid bacteria (LAB) are already producing acids, mainly lactic acid, which adds a mild tang. Bulk fermentation will be a little slower than with a fully active starter.
- Unfed starter around 1 week old: Yeast activity slows further, while LAB populations take over, producing both lactic and acetic acids. The dough will ferment more slowly, and the flavor becomes tangier.
- Unfed starter older than 1 week: Yeast activity is very low, and the starter becomes more acidic, which inhibits both yeast and LAB in your dough. Bulk fermentation will be slower, and you may need a longer rise or slightly warmer conditions to get good results.
Ingredients
- Flour: Use white bread flour with high protein content. I am using King Arthur bread flour with 12.7% protein.
- Water: Use filtered or spring bottled water.
- Unfed sourdough starter: Flat starter with an age of less than a week. I am using the 100% hydration starter I fed 3 days ago, which reached its peak and was then placed in the fridge.
- Salt: Use fine sea salt. Avoid iodized table salt.
Final bread formula
| Ingredient | Baker's Percentage | Weight |
|---|---|---|
| Bread flour | 100% | 500g |
| Water | 75% | 375g |
| Unfed Sourdough Starter, 100% hydration | 20% | 100g |
| Salt | 2% | 10g |
- Total dough weight is 985g. If you need to adjust the bread formula for your own loaf, try my sourdough calculator.
- My kitchen temperature is 73°F (23°C) and the humidity is 40%.
- Bulk fermentation: 8-9 hours with a 75-80% increase in dough size (learn how to adjust bulk fermentation).
- Proofing time: 14 hours cold-proof in the fridge
- Bake in a cold oven at 450°F (232°C) with the lid on for 45-50 minutes.
How to make unloaf sourdough bread
1. Mix ingredients
In a large mixing bowl, mix unfed sourdough starter and water. Add bread flour and salt, and mix by hand for 3-5 minutes. Cover the bowl with a damp kitchen towel or a plastic cap and let it ferment.
2. Bulk fermentation
To track bulk fermentation, transfer the dough to a straight-sided container or a 2-L measuring cup. Alternatively, use the aliquot jar method if you are familiar with it.
The target dough rise depends on the dough temperature, which is influenced by your room temperature.
Look for visual signs when bulk fermentation is done, such as bubbles on the surface, and a light, airy feel. The dough edges should look slightly domed, and the dough should gently wobble when you shake the bowl from side to side.
Note: I usually aim for a 75-80% rise at 73°F (24°C), but with King Arthur bread flour and proper upfront mixing, I can sometimes push it to 90%.
Preshape (optional) and shape
Lightly flour your work surface with white rice flour, preshape the dough into a round, and let it rest for 10-15 minutes. This step is optional: you can skip it when making a single loaf.
Shape the dough into a batard (or a boule), then place it seam-side up in a prepared 12-inch oval banneton (see my guide to shaping bread dough).
Proof
Cover the banneton with a clean towel, disposable plastic cap, or place it inside a reusable plastic bag. Transfer the dough to the refrigerator and let it proof overnight.
Score
Take the chilled dough from the fridge and place it on a piece of parchment paper. Using a bread lame, make a single slash or score a square pattern for a boule.
Bake
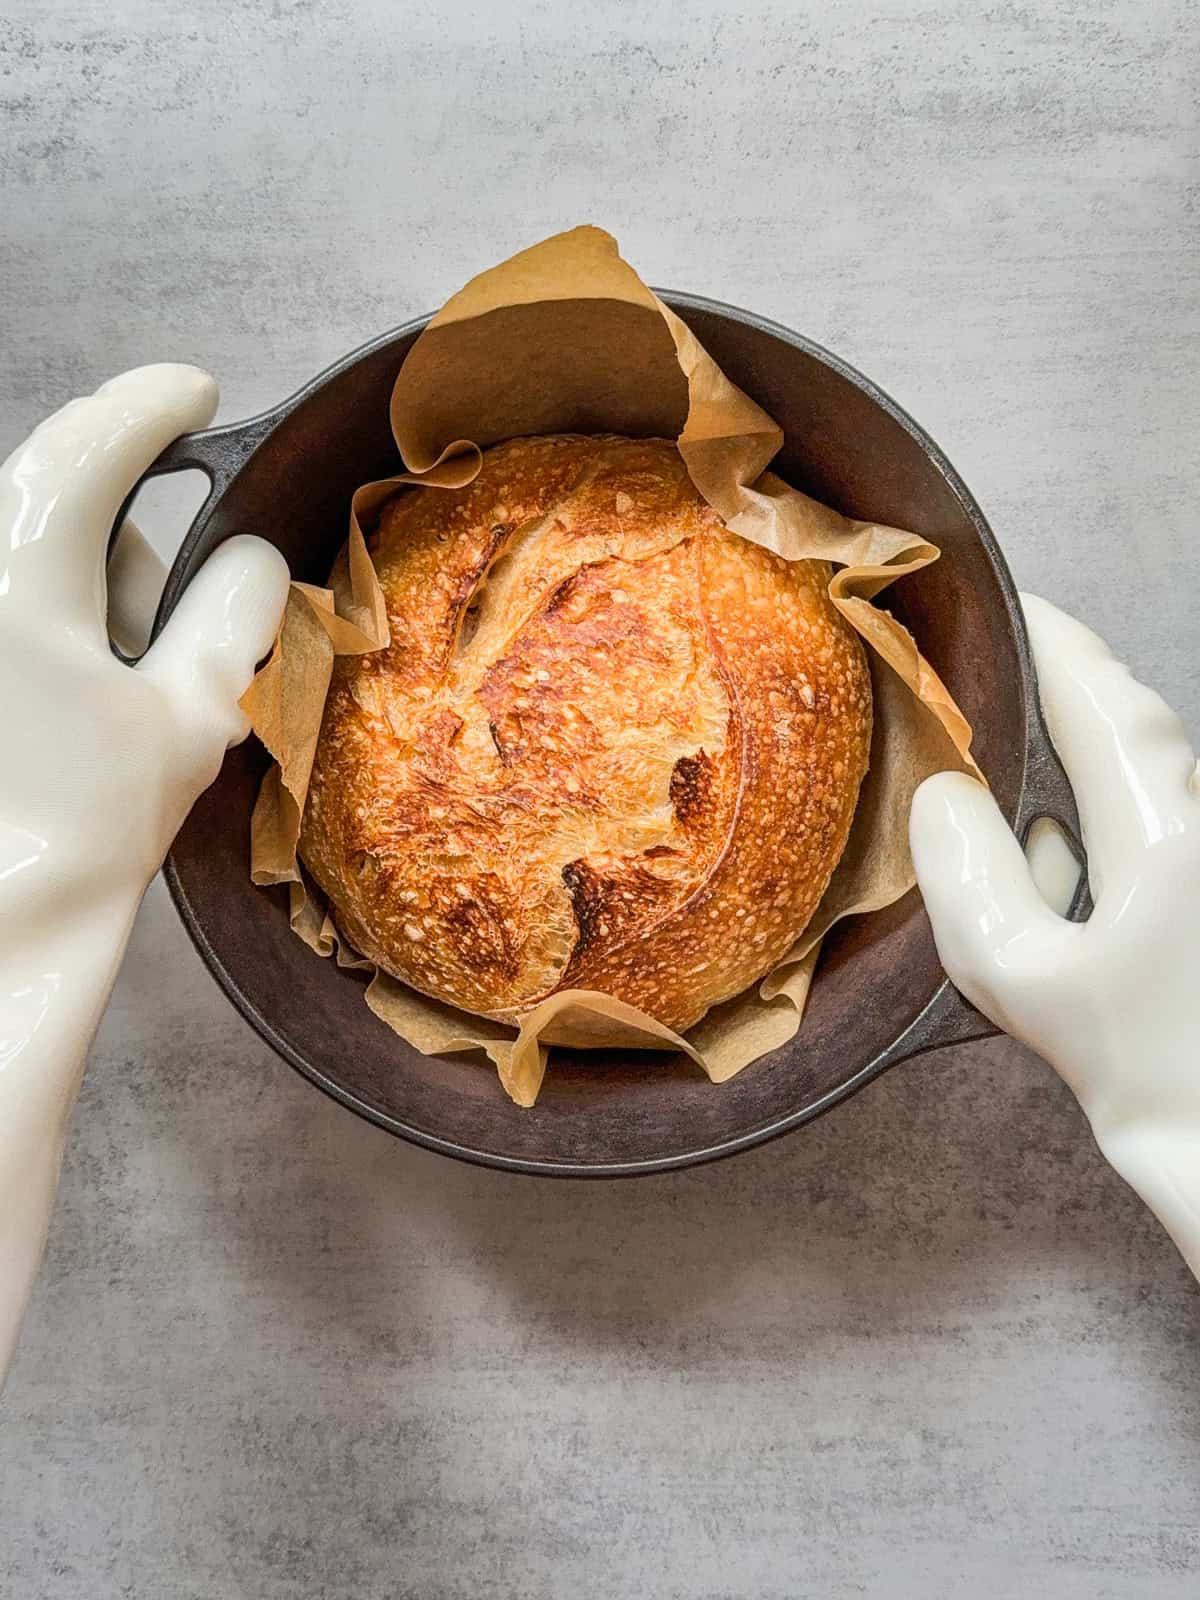
Bake the bread in a cold conventional oven. Lift the parchment paper, place the dough in a Dutch oven, cover it with the lid, and put the pot in the cold oven. Set the oven to 450°F (230°C) and bake for about 45-50 minutes with the lid on.
Check the doneness, using a probe thermometer. The bread internal temperature should reach 205-210°F (96-99°C). I usually aim for 207°F (97°C) or higher.
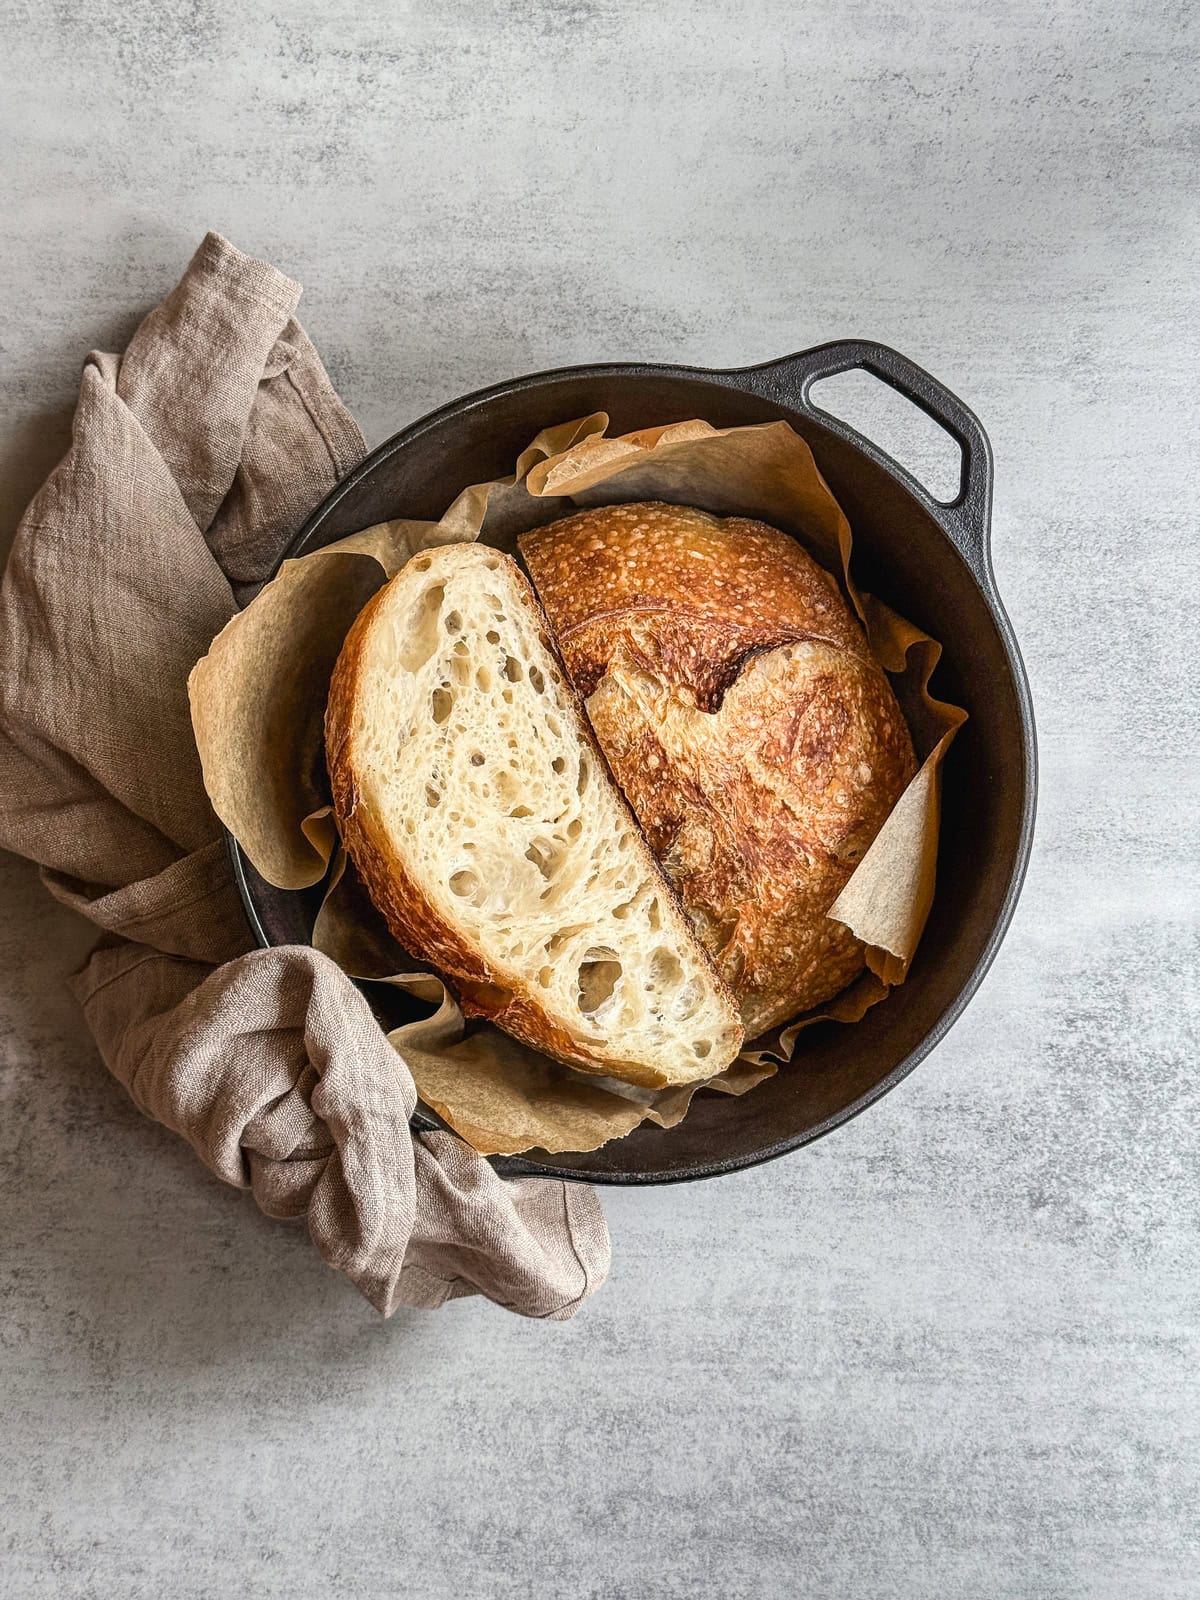
Carefully remove the bread from the Dutch oven and let it cool on a wire rack for at least 2 hours before slicing.
Expert tips
- Unfed starter: While you can use unfed sourdough starter straight from the fridge, I recommend using a starter that was fed within the past week and allowed to peak before being refrigerated. I am all about better-quality bread than just mediocre.
- Warm up your starter: If time allows, let your unfed sourdough starter warm up at room temperature before mixing the dough. Using a cold starter lowers the final dough temperature (FDT), slowing fermentation and extending bulk fermentation.
- Baking vessel: You can bake sourdough in a cold oven using a Dutch oven, but a roasting pan is preferable because it heats up faster.
- Safety tip: Always use oven mitts or silicone gloves to handle hot pans.
- Storage and freezing: Store sourdough bread for 3-5 days. Freeze individual slices for up to 1-2 weeks, a whole loaf for 1-2 months.
Bulk fermentation expectations
Using sourdough discard slows bulk fermentation compared to a fully active levain / sourdough starter at peak. Depending on the starter's age, expect:
- 1-3 day-old discard: about 5-10% longer bulk fermentation
- About one week-old discard: about 10-20% longer
- Older discard: up to 25-30% longer, and it will benefit from fermenting the dough in a warm place.
Note: These are only estimates. Always watch the dough, not the clock. Look for signs such as increased volume, bubbles, and a light, jiggly texture to determine when bulk fermentation is finished.
PrintRecipe
Unloaf Sourdough Bread Recipe
Unloaf sourdough bread recipe is a relaxed, beginner-friendly sourdough made with unfed starter. No stretching, no fancy shaping, and no preheating: mix the dough, place it in a pan, and bake for simple, homemade, unloaf bread.
- Prep Time: 21 hours, 40 minutes
- Cook Time: 50 minutes
- Total Time: 22 hours, 30 minutes
- Yield: 1 loaf 1x
- Method: Baking
- Cuisine: American
Ingredients
For the bread dough:
- 500 g bread flour (I use King Arthur organic bread flour)
- 375 g water (75% hydration)
- 100 g unfed starter (flat and warmed up)
- 10 g fine sea salt (I use Redmond ancient fine sea salt)
10 g white rice flour (for dusting)
Instructions
- Mix ingredients: In a large mixing bowl, mix unfed sourdough starter and water. Add bread flour and salt, and mix by hand for 3-5 minutes. Cover the bowl with a damp kitchen towel or a plastic cap and let it ferment.
- Bulk fermentation: To track bulk fermentation, transfer the dough to a straight-sided container or a 2-L measuring cup. Alternatively, use the aliquot jar method. The target dough rise depends on the dough temperature, which is influenced by your room temperature. Look for visual signs when bulk fermentation is done, such as bubbles on the surface, and a light, airy feel. The dough edges should look slightly domed, and the dough should gently wobble when you shake the bowl from side to side.
- Preshape (optional) and shape: Lightly flour your work surface with white rice flour, preshape the dough into a round, and let it rest for 10-15 minutes. This step is optional: you can skip it when making a single loaf. Shape the dough into a batard (or a boule), then place it seam-side up in a prepared 12-inch oval banneton.
- Proof: Cover the banneton with a clean towel, disposable plastic cap, or place it inside a reusable plastic bag. Transfer the dough to the refrigerator and let it proof overnight.
- Score: Take the chilled dough from the fridge and place it on a piece of parchment paper. Using a bread lame, make a single slash for a batard or score a square pattern for a boule.
- Bake the bread in a cold conventional oven. Place the dough in a cold Dutch oven or Granite Ware roasting pan, cover with the lid, and place the pot in the cold oven. Set the oven to 450°F (230°C) and bake for about 45-50 minutes with the lid on. Check the doneness, using a probe thermometer. The bread internal temperature should reach 205-210°F (96-99°C).
- Cool bread: Carefully remove the bread from the Dutch oven and let it cool on a wire rack for at least 2 hours before slicing.
Notes
- Unfed starter: While you can use unfed sourdough starter straight from the fridge, I recommend using a starter that was fed within the past week and allowed to peak before being refrigerated. I am all about better-quality bread than just mediocre.
- Warm up your starter: If time allows, let your unfed sourdough starter warm up at room temperature before mixing the dough. Using a cold starter lowers the final dough temperature (FDT), slowing fermentation and extending bulk fermentation.
- Baking vessel: You can bake sourdough in a cold oven using a Dutch oven, but a roasting pan is preferable because it heats up faster.
- Storage and freezing: Store sourdough bread for 3-5 days. Freeze individual slices for up to 1-2 weeks, a whole loaf for 1-2 months.
- Safety tip: Always use oven mitts or silicone gloves when handling hot pans.
- Check for doneness: Your bread is fully baked when the internal temperature reaches 205-210°F (96-99°C). I usually aim for 207°F (97°C) or higher. Use a digital probe thermometer to check.
- Want to create a custom formula for your loaf? Try my sourdough calculator.
- Need help getting started? Check out my beginner's sourdough bread guide to learn sourdough basics first.
- Note: Nutritional information does not include the white rice flour used for dusting.
Nutrition
- Calories: 2002
- Sugar: 1.5g
- Sodium: 3900mg
- Fat: 5.4g
- Saturated Fat: 0.9g
- Carbohydrates: 419.7g
- Fiber: 14.9g
- Protein: 56.8g
- Cholesterol: 0mg
Comments
No Comments